Welcome, fellow pie lovers! There’s something truly magical about a classic apple pie, isn’t there? The aroma alone is enough to transport you to a cozy kitchen, filled with warmth and the promise of a delicious treat. It’s more than just a dessert; it’s a hug in a slice, a timeless tradition, and a symbol of comfort. If you’ve ever dreamt of baking that perfect, golden-brown pie with a crust that shatters at the touch and a filling that’s perfectly sweet and tart, you’re in the right place. This recipe is designed to guide even the most novice baker through every step, ensuring a show-stopping apple pie that will earn you rave reviews.
History and Background of Apple Pie
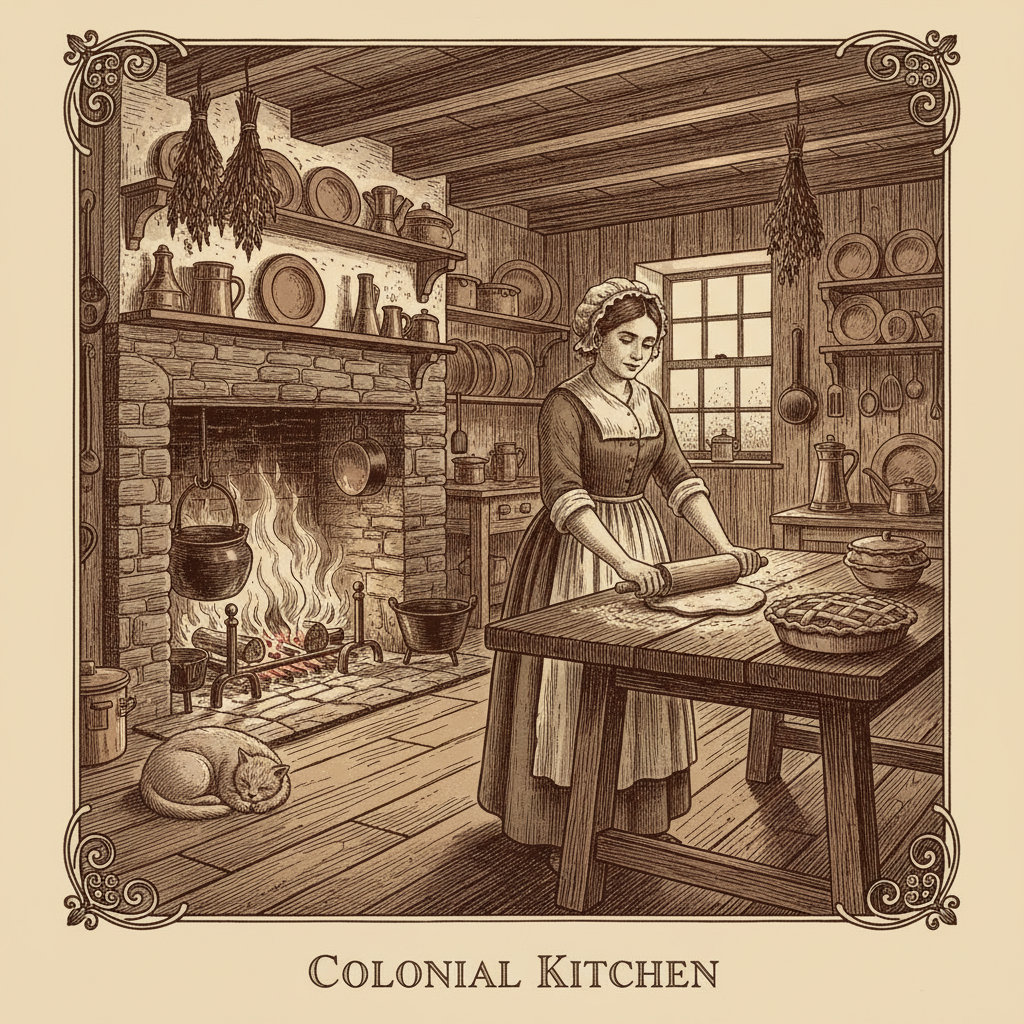
Apple pie, as we know it today, has a surprisingly rich and varied history that stretches back centuries. While often considered quintessentially American, its roots actually lie in Europe. Early recipes, dating as far back as the 14th century, used apples, but these pies were often savory, encased in tough, inedible pastry shells used primarily to preserve the filling. Sugar was a luxury, so spices were used to enhance flavor.
When apples made their way to America with European settlers, they thrived in the new climate. Over time, as sugar became more accessible, the pie evolved into the sweet dessert we cherish. The flaky, buttery crust developed to become an integral part of the experience, rather than just a container. Each family, each generation, added their own touch, creating the diverse world of apple pies we enjoy today. Our recipe honors this tradition, focusing on a truly classic approach that celebrates simple, quality ingredients.
Why You’ll Love This Recipe
- Beginner-Friendly We break down every step, making it easy for first-time pie makers.
- Perfectly Flaky Crust Our crust recipe is foolproof and delivers that coveted golden, buttery flakiness.
- Balanced Flavor The apple filling is a harmonious blend of sweet, tart, and warm spices.
- Detailed Instructions We provide clear, concise steps and helpful tips for success.
- Crowd-Pleaser This pie is a guaranteed hit for any occasion, from family dinners to festive gatherings.
Ingredient Notes
Choosing the right ingredients is key to a spectacular apple pie. Here’s what you’ll need and why:
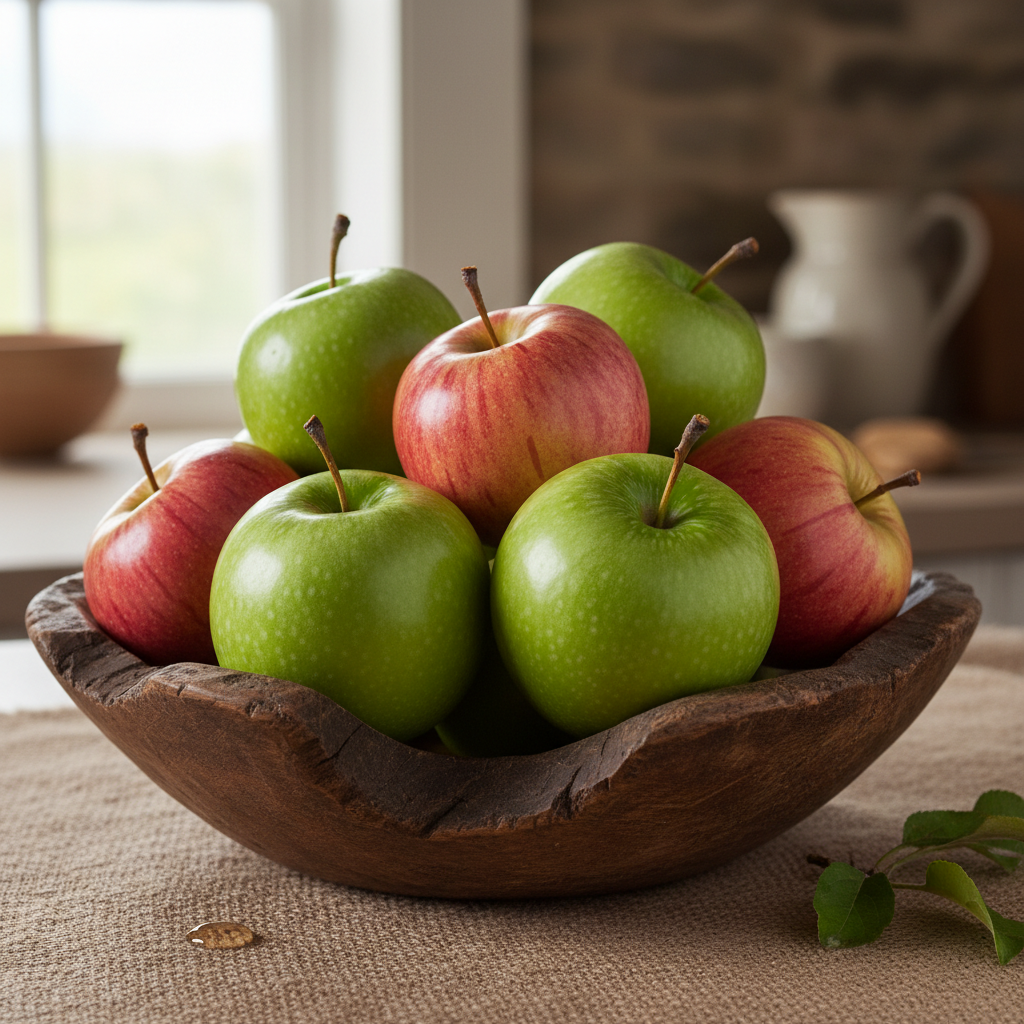
- Apples A mix of sweet and tart apples is best. Granny Smith provides tartness and holds its shape, while Honeycrisp or Fuji add sweetness and a lovely texture. Aim for about 6-8 medium apples.
- All-Purpose Flour The foundation for our flaky crust. Make sure it’s fresh!
- Unsalted Butter Cold, unsalted butter is crucial for a tender, flaky crust. Cut it into small pieces and keep it chilled.
- Granulated Sugar Sweetens the filling. Adjust to your apple’s sweetness.
- Brown Sugar Adds a deeper, molasses-rich sweetness to the filling.
- Cinnamon and Nutmeg Essential warm spices that complement apples beautifully. A pinch of allspice or cloves can also be lovely.
- Lemon Juice Brightens the apple flavor and prevents browning.
- Salt A pinch of salt enhances all the flavors, both in the crust and filling.
- Ice Water Very cold water is vital for a flaky pie crust.
- Egg Wash (optional) An egg yolk mixed with a little milk or water creates a beautiful golden sheen on the crust.
Equipment Needed
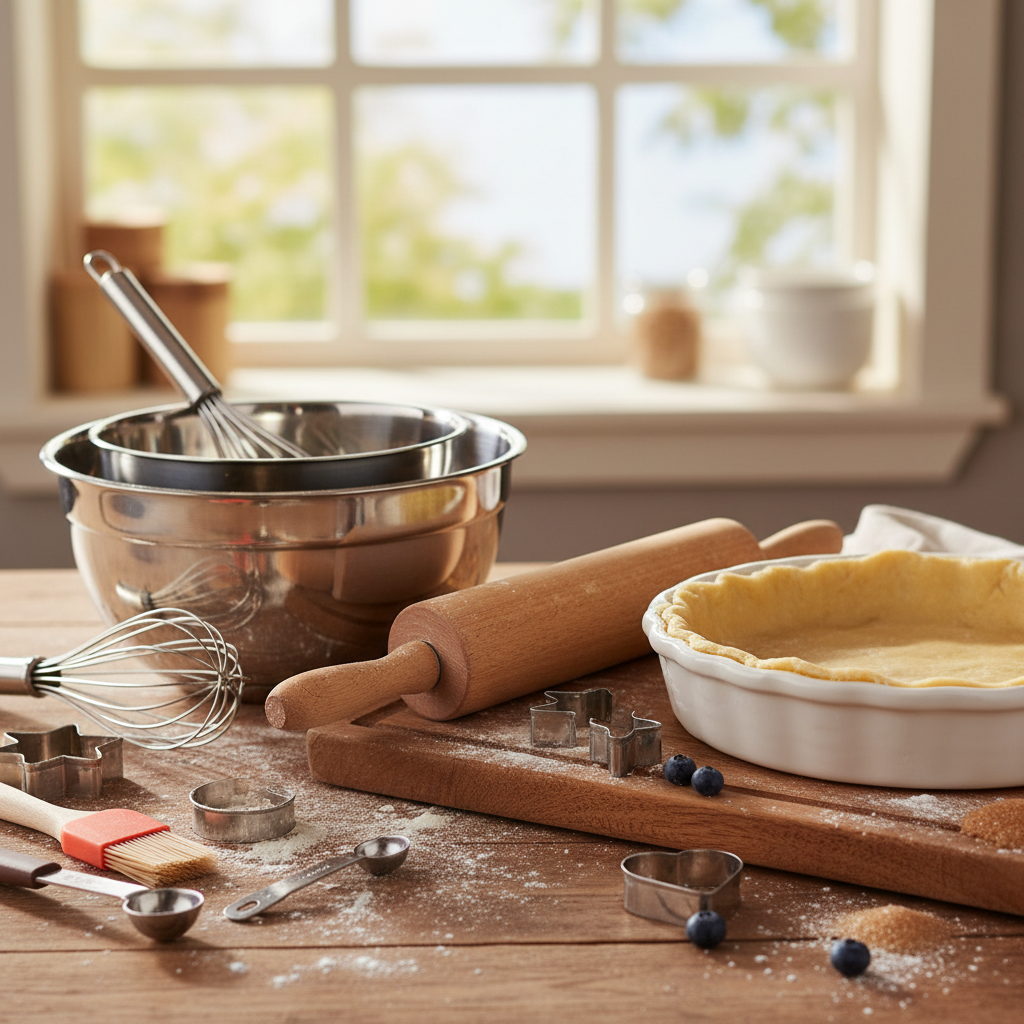
Having the right tools makes the baking process much smoother:
- 9-inch Pie Dish A ceramic or glass pie dish works best for even baking.
- Large Mixing Bowls You’ll need one for the crust ingredients and another for the apple filling.
- Pastry Blender or Food Processor For cutting butter into flour for the crust.
- Rolling Pin Essential for rolling out that perfect pie crust.
- Measuring Cups and Spoons For accurate ingredient measurements.
- Sharp Knife and Apple Peeler/Corer To prepare your apples efficiently.
- Wire Rack For cooling the pie completely after baking.
Full Recipe Card
Yields 8 servings
Prep time 45 minutes
Cook time 50-60 minutes
Ingredients
For the Flaky Pie Crust (Double Crust)
- 2 ½ cups all-purpose flour, plus more for dusting
- 1 teaspoon salt
- 1 cup (2 sticks) unsalted butter, very cold and cut into ½-inch cubes
- ½ cup ice water, plus more if needed
For the Apple Filling
- 6-8 medium apples (Granny Smith, Honeycrisp, Fuji mix), peeled, cored, and sliced ¼-inch thick (about 6 cups)
- ½ cup granulated sugar (adjust based on apple sweetness)
- ¼ cup packed light brown sugar
- 2 tablespoons all-purpose flour or cornstarch
- 1 teaspoon ground cinnamon
- ¼ teaspoon ground nutmeg
- 1 tablespoon fresh lemon juice
- Pinch of salt
- 1 tablespoon unsalted butter, cut into small pieces
For the Egg Wash (optional)
- 1 egg yolk
- 1 tablespoon milk or water
Instructions
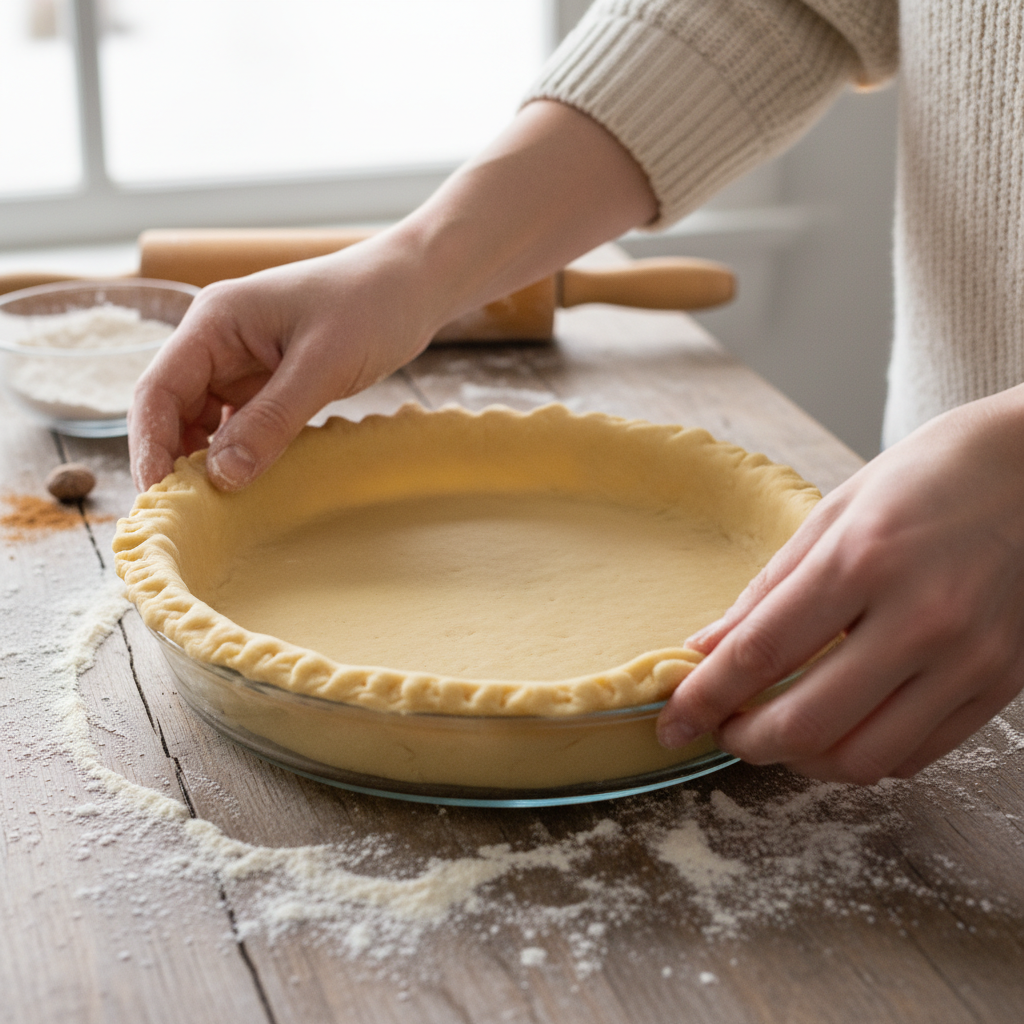
- Make the Pie Crust In a large bowl, whisk together the flour and salt. Add the cold butter cubes and cut them into the flour using a pastry blender, your fingertips, or a food processor until the mixture resembles coarse crumbs with some pea-sized butter pieces remaining. Gradually add the ice water, 1 tablespoon at a time, mixing until just combined and the dough comes together. Be careful not to overmix.
- Divide and Chill Dough Divide the dough in half, flatten each half into a disk, wrap tightly in plastic wrap, and refrigerate for at least 30 minutes, or up to 2 days.
- Prepare the Filling In a large bowl, combine the sliced apples, granulated sugar, brown sugar, flour (or cornstarch), cinnamon, nutmeg, lemon juice, and a pinch of salt. Toss gently until the apples are evenly coated.
- Preheat Oven and Roll Dough Preheat your oven to 425°F (220°C). On a lightly floured surface, roll out one disk of dough into a 12-inch circle. Carefully transfer it to a 9-inch pie dish. Trim the edges, leaving about a ½-inch overhang.
- Add Filling Pour the apple mixture into the pie crust. Dot the top of the apples with the small pieces of butter.
- Top Crust Roll out the second disk of dough into an 11-inch circle. Place it over the apple filling. Trim the top crust, leaving about a ½-inch overhang. Crimp the edges of both crusts together to seal, creating a decorative edge. Cut several slits in the top crust to allow steam to escape during baking.
- Egg Wash (optional) In a small bowl, whisk the egg yolk with milk or water. Brush lightly over the top crust for a golden finish.
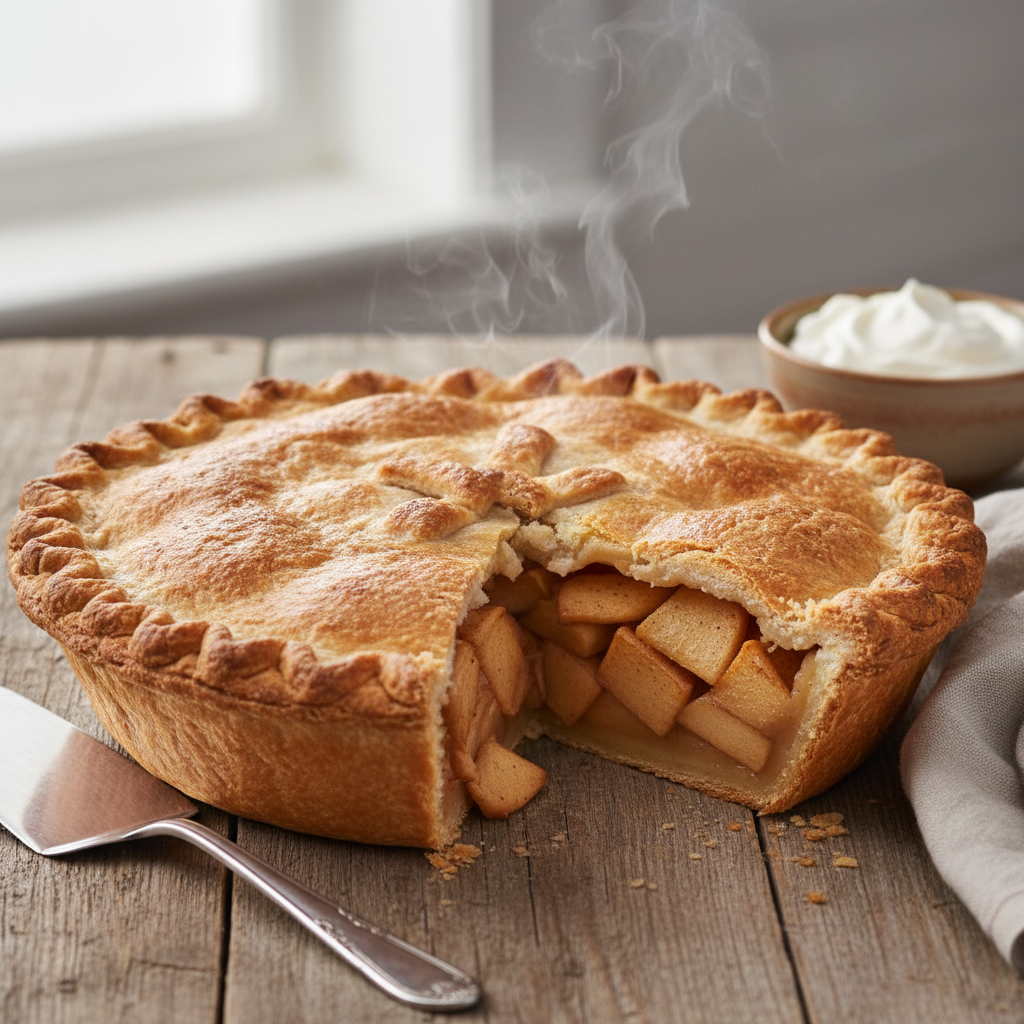
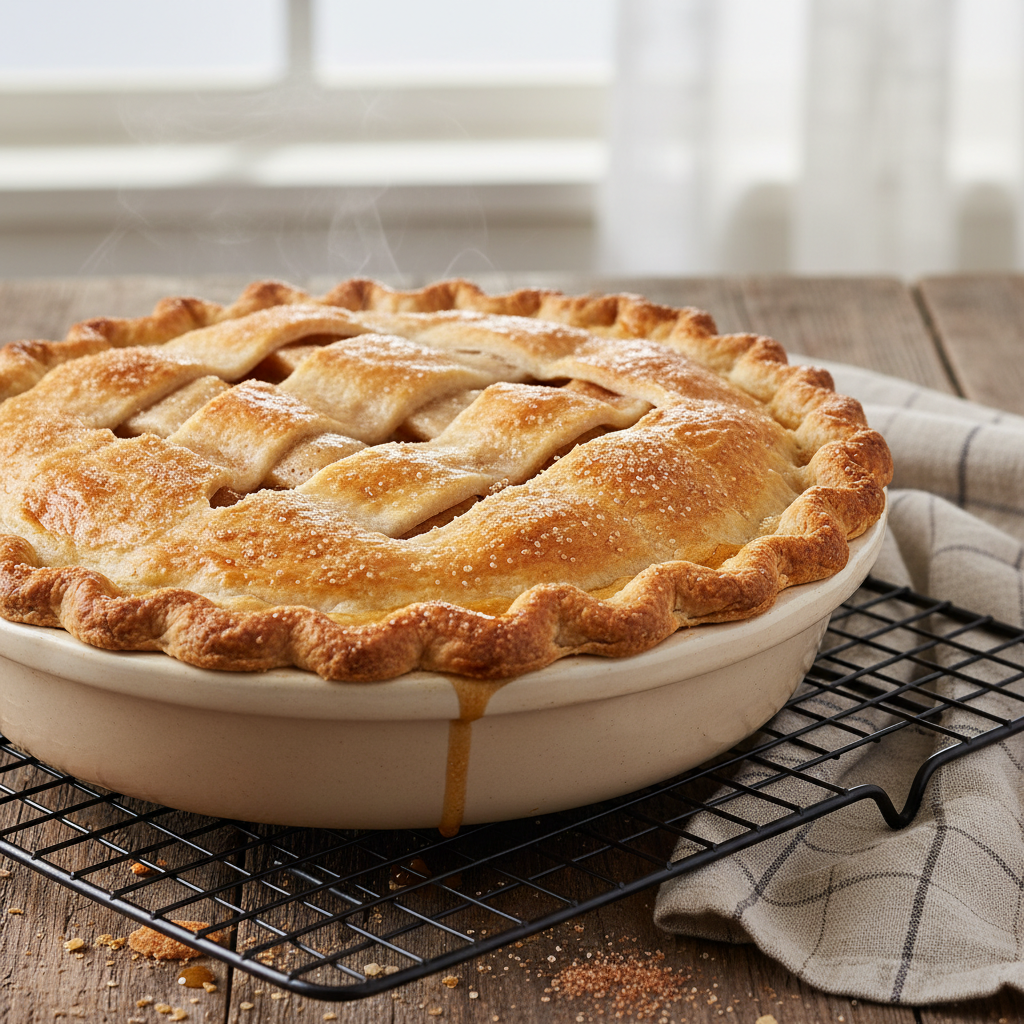
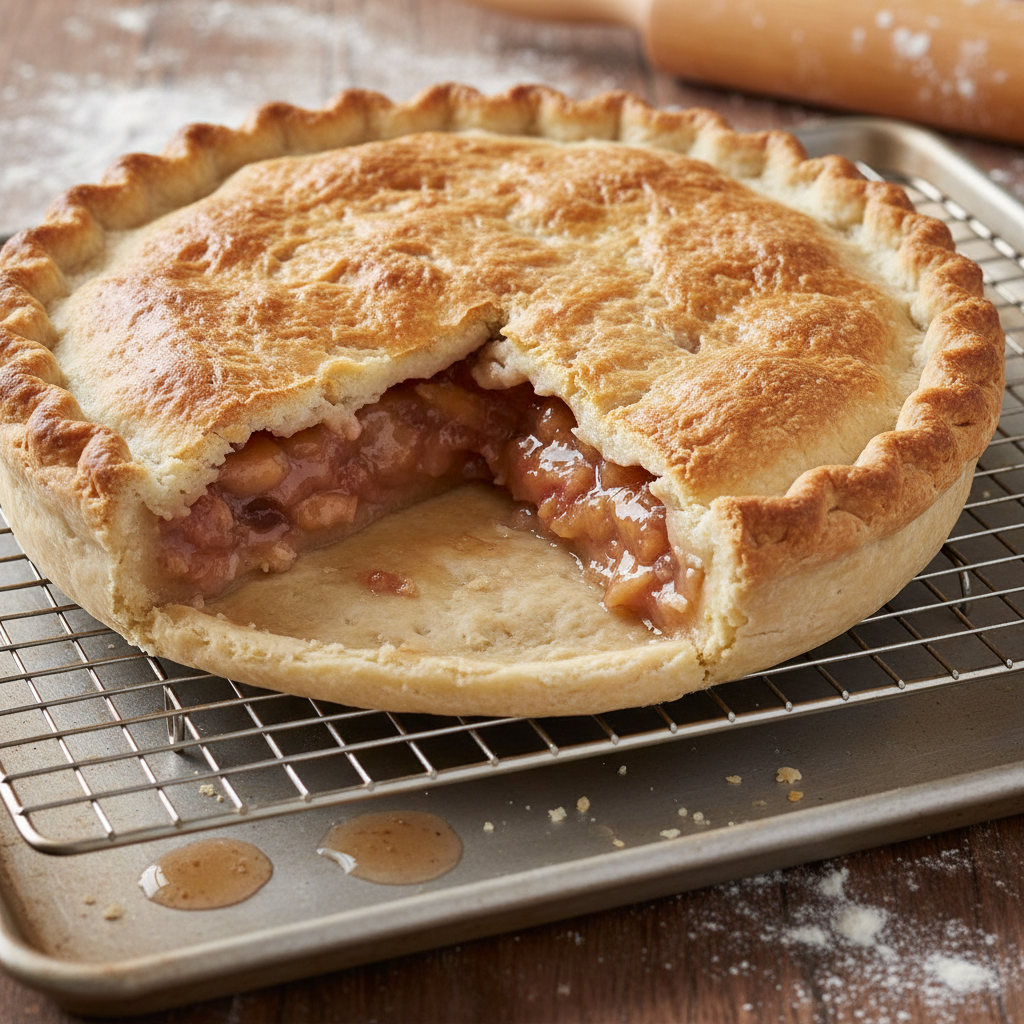
- Bake the Pie Place the pie on a baking sheet (to catch any drips). Bake at 425°F (220°C) for 15 minutes. Reduce the oven temperature to 375°F (190°C) and continue baking for 35-45 minutes, or until the crust is golden brown and the filling is bubbly. If the crust starts to brown too quickly, loosely tent with aluminum foil.
- Cool Completely Transfer the pie to a wire rack and let it cool for at least 2-3 hours before slicing and serving. This allows the filling to set properly.
Notes
- For an extra flaky crust, ensure all butter and water are very cold.
- Don’t overwork the dough; this can make it tough.
- Adjust sugar in the filling based on the sweetness of your apples and personal preference.
- If you don’t have a pastry blender, you can use two knives or your fingertips to cut in the butter.
Tips and Variations
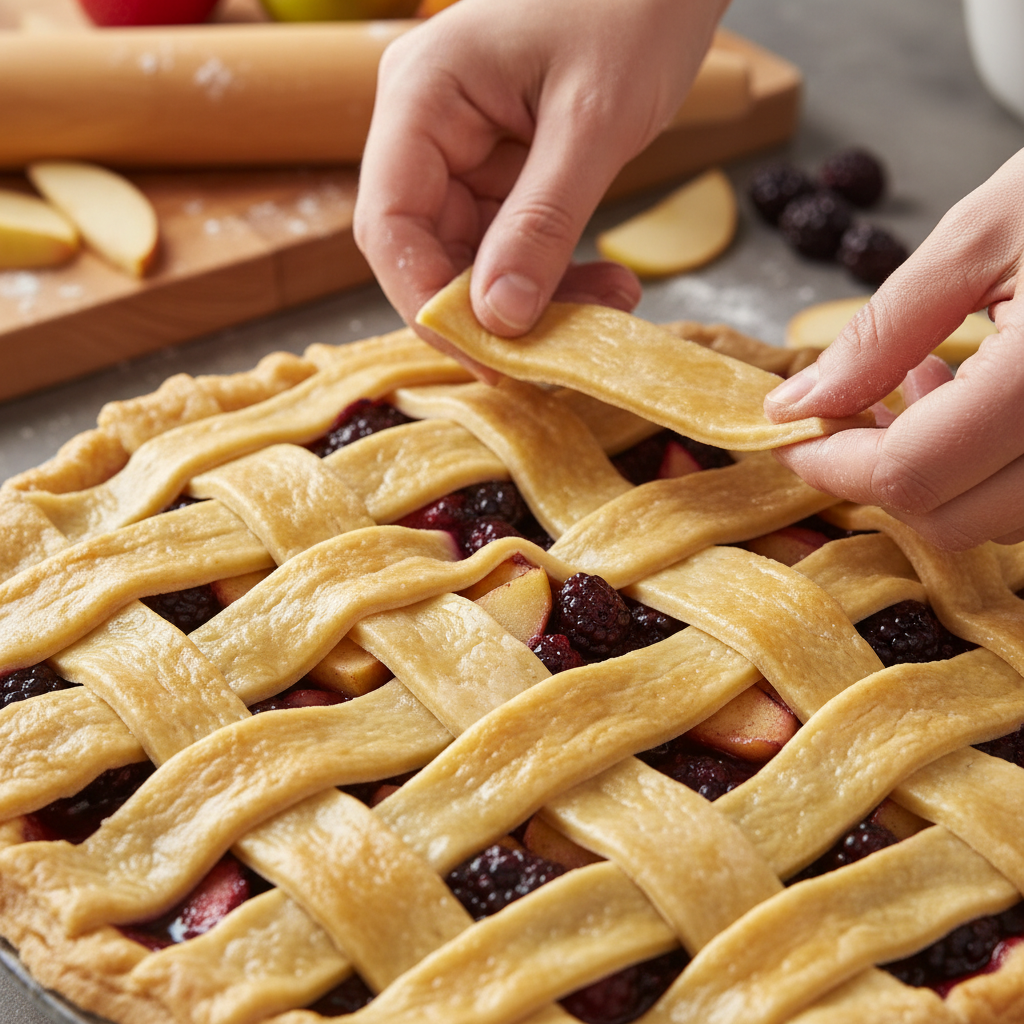
- Lattice Top For a beautiful presentation, try a lattice top crust instead of a solid one. It also allows more steam to escape.
- Caramel Apple Pie Drizzle 2-3 tablespoons of store-bought or homemade caramel sauce over the apples before adding the top crust.
- Crumble Topping If you prefer, replace the top crust with a simple oat crumble topping for a different texture.
- Spiced Crust Add ½ teaspoon of cinnamon or a pinch of nutmeg to your pie crust flour mixture for an extra layer of flavor.
- Apple Varieties Experiment with different apple combinations to find your favorite balance of sweet and tart.
Pro Chef Tips
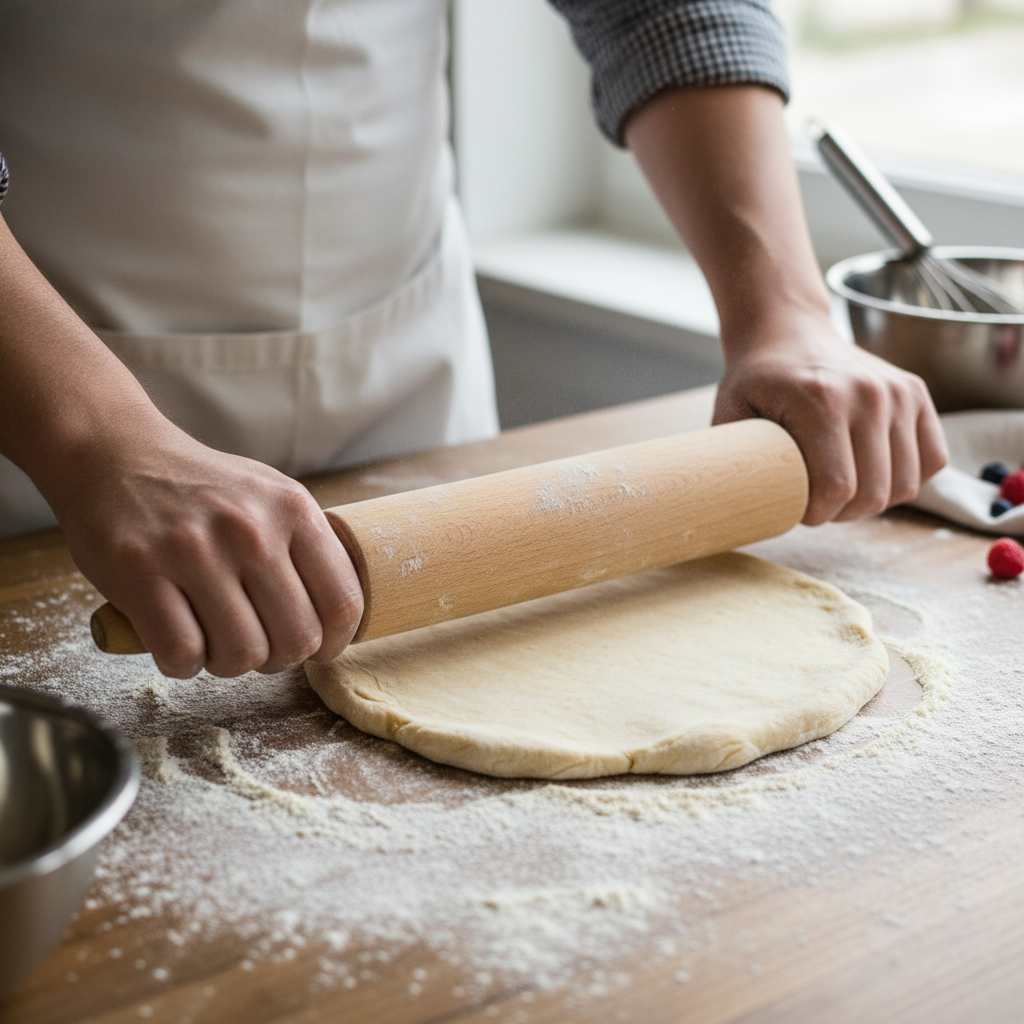
- Keep it Cold The golden rule of pie crust is to keep your ingredients, especially the butter and water, as cold as possible. This creates pockets of steam in the oven, leading to that incredible flakiness.
- Don’t Overmix Overmixing develops gluten, resulting in a tough crust. Mix just until the dough barely comes together.
- Rest the Dough Chilling the dough not only keeps the butter cold but also allows the gluten to relax, making it easier to roll out and preventing shrinkage during baking.
- Ventilation is Key Always cut slits in your top crust (or use a lattice) to allow steam to escape. Otherwise, your crust might get soggy, or worse, explode!
- Watch for Doneness The pie is done when the crust is deeply golden brown and the filling is bubbly and thick. If you see the filling bubbling through the vents, that’s a good sign it’s cooked through.
Common Mistakes to Avoid
- Warm Butter Using warm or room temperature butter will result in a tough, greasy crust, not a flaky one.
- Too Much Water Adding too much water to your dough makes it sticky and hard to handle, and can lead to a less tender crust.
- Not Chilling the Dough Skipping the chilling step makes the dough difficult to roll and prone to shrinking.
- Cutting into a Hot Pie Patience is a virtue! Cutting into a hot pie means the filling hasn’t had time to set, resulting in a runny, messy slice.
- Underbaking An underbaked pie will have a pale, soggy bottom crust and potentially hard apples. Bake until truly golden and bubbly.
Storage and Meal Prep
Once baked and cooled, apple pie can be stored at room temperature for up to 2 days, loosely covered with plastic wrap or foil. For longer storage, refrigerate for up to 4-5 days. While it’s best enjoyed fresh, a refrigerated slice can be gently reheated in the oven (around 300°F/150°C) for 10-15 minutes to crisp up the crust.
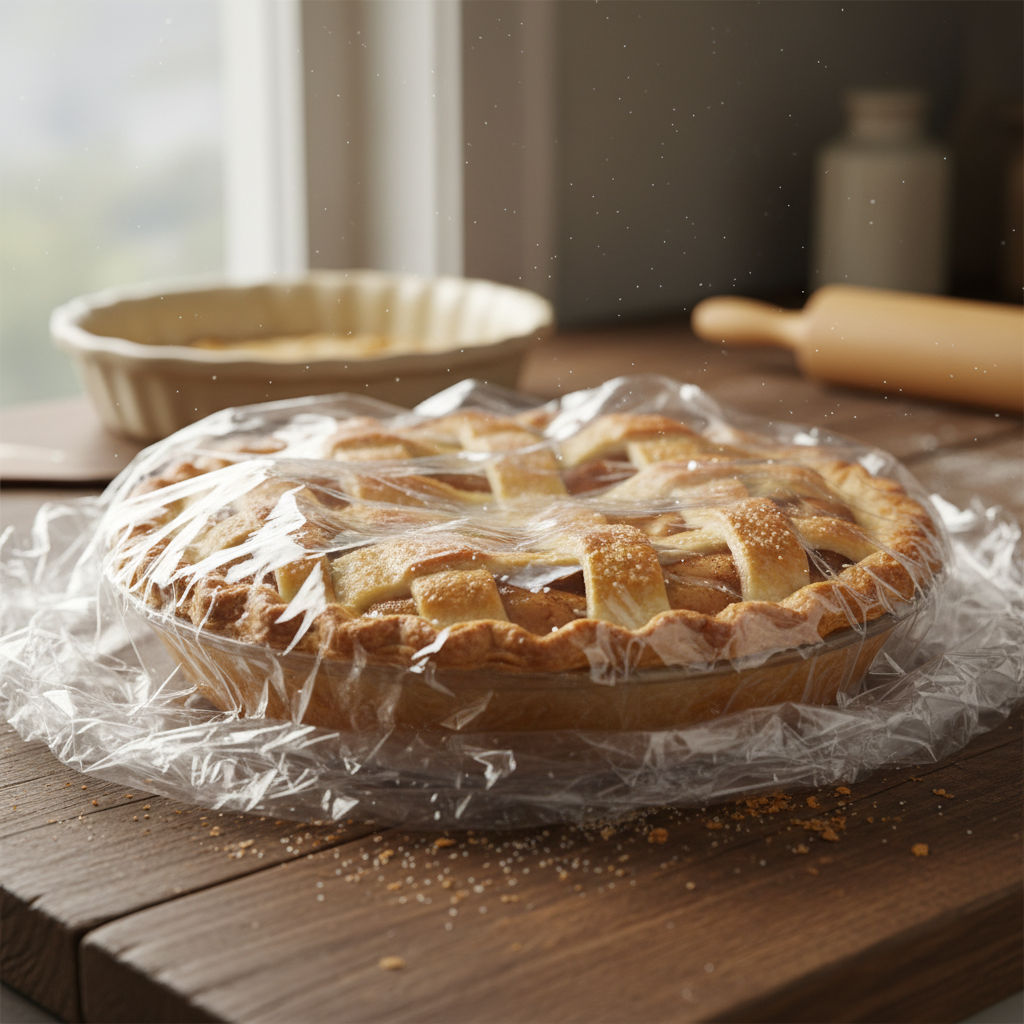
Make-Ahead and Freezer Notes
- Dough Pie dough disks can be made up to 2 days in advance and stored in the refrigerator, or frozen for up to 1 month. Thaw in the refrigerator before rolling.
- Filling The apple filling can be prepared a few hours in advance and kept refrigerated. Toss with lemon juice to prevent browning.
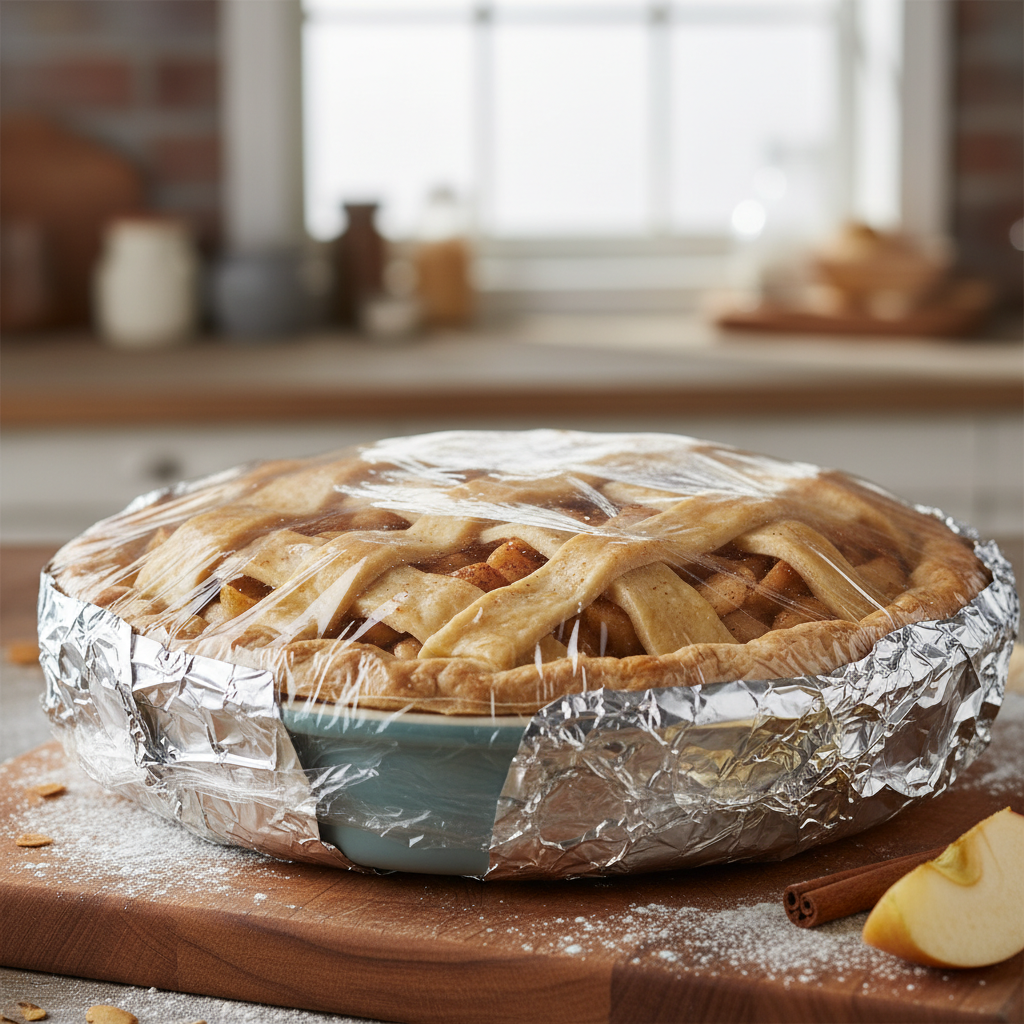
- Unbaked Pie You can assemble the entire pie, then wrap it tightly in several layers of plastic wrap and foil. Freeze for up to 3 months. When ready to bake, place the frozen pie directly into a preheated oven (no need to thaw), adding about 20-30 minutes to the baking time.
- Baked Pie A fully baked pie can also be frozen. Wrap cooled pie tightly in plastic wrap and then foil. Freeze for up to 2-3 months. Thaw in the refrigerator overnight and reheat gently in the oven.
Serving Suggestions
A warm slice of classic apple pie is delightful on its own, but it truly shines with a few accompaniments:
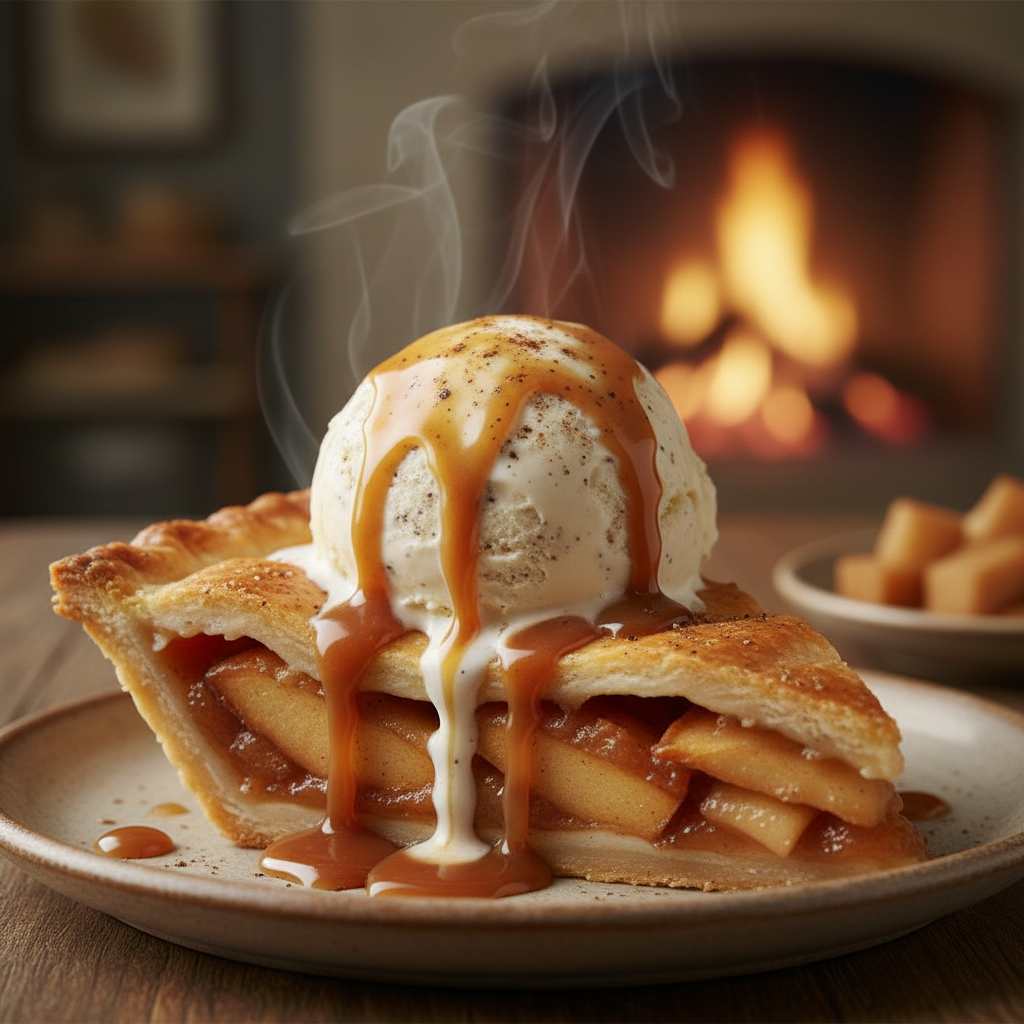
- Vanilla Ice Cream The classic pairing! The cold, creamy ice cream melts slightly into the warm, spiced apples.
- Sharp Cheddar Cheese A surprisingly delicious combination, the tanginess of cheddar beautifully contrasts the sweet apples.
- Whipped Cream A dollop of freshly whipped cream adds a light, airy touch.
- Caramel Sauce A drizzle of warm caramel sauce elevates the dessert to another level of indulgence.
- Coffee or Tea Enjoy a slice with your favorite hot beverage for a comforting treat.
Conclusion
Baking a classic apple pie with a flaky crust is a wonderfully rewarding experience. It’s a journey that culminates in a dessert that’s not only incredibly delicious but also steeped in tradition and love. From the moment the aroma fills your kitchen to that first perfect bite, you’ll understand why this humble pie holds such a special place in our hearts. Don’t be intimidated; embrace the process, follow these steps, and you’ll soon be sharing your own masterpiece with friends and family. Happy baking, and enjoy every single flaky, fruity bite!