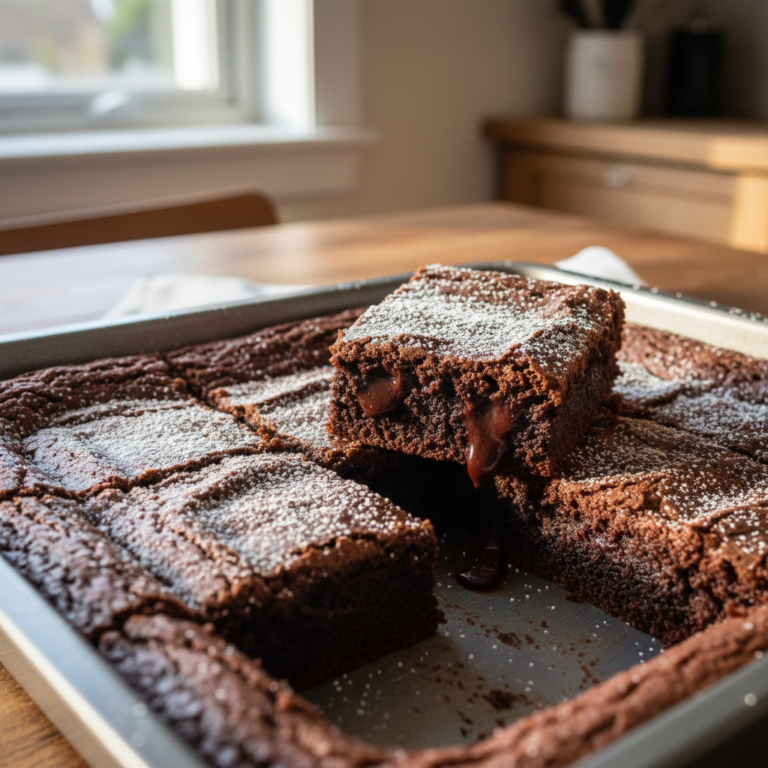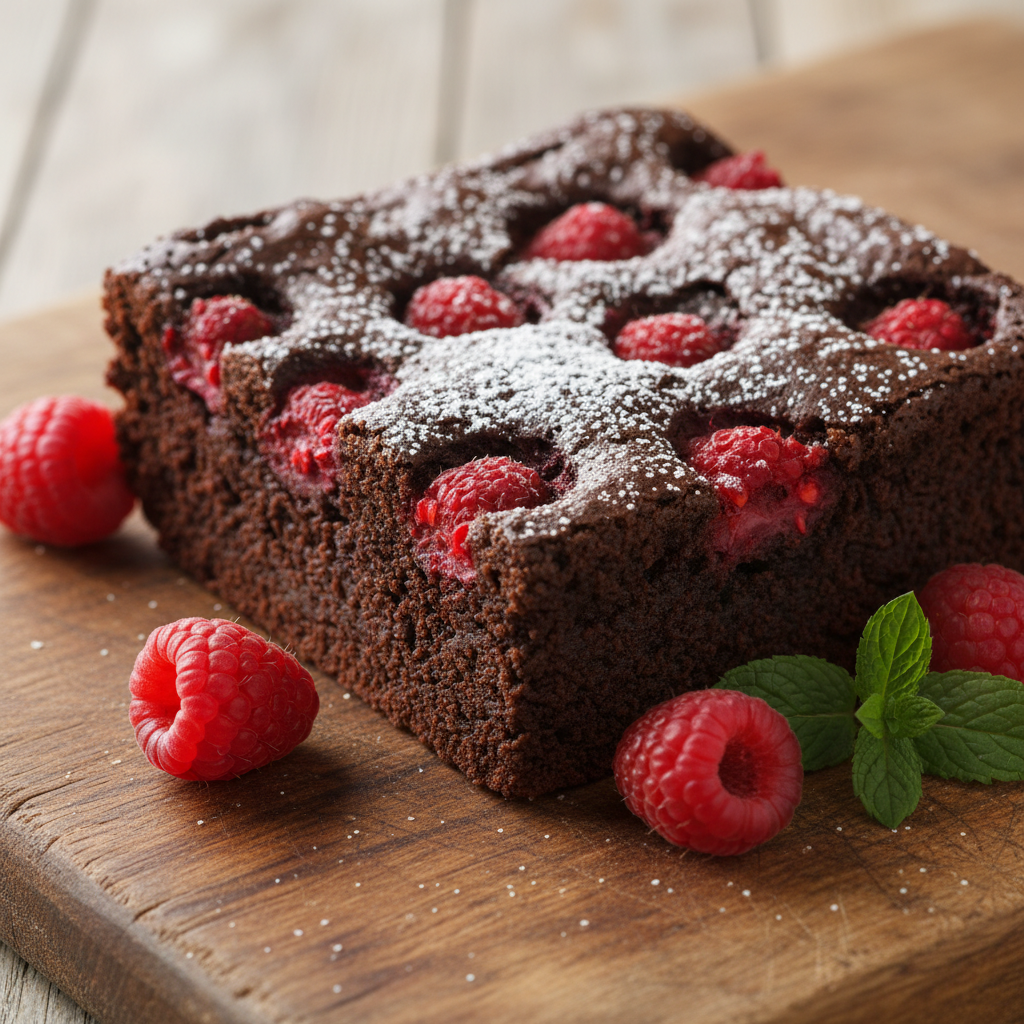
Welcome, fellow dessert lovers! If there’s one thing that brings pure joy to a kitchen, it’s the smell of freshly baked brownies. But not just any brownies—we’re talking about the kind that are so rich, so fudgy, and so perfectly balanced with a burst of fruity tang that they make your taste buds sing. Today, we’re diving into the wonderful world of raspberry brownies!
Imagine biting into a dense, chocolatey square, where every chew delivers that deep cocoa goodness, followed by the delightful surprise of sweet-tart raspberries. It’s a match made in heaven, a symphony of flavors that’s both comforting and exciting. Whether you’re a seasoned baker or just starting your culinary journey, this recipe is designed to be straightforward, rewarding, and utterly delicious. Get ready to bake some magic!
A Sweet History and Background
Brownies, those beloved squares of chocolatey delight, have a fascinating history that dates back to the late 19th and early 20th centuries in the United States. Legend has it that the first brownie was created by a chef at the Palmer House Hotel in Chicago for the World’s Columbian Exposition in 1893. Bertha Palmer, a prominent socialite, requested a dessert that was cake-like but small enough to be eaten from boxed lunches.
From those early days, brownies evolved from a more cakey consistency to the fudgy texture we often crave today. The addition of fruits, nuts, and other mix-ins came later, transforming the humble brownie into a versatile canvas for culinary creativity. Raspberries, with their bright color and tangy flavor, became a popular choice, cutting through the richness of the chocolate and adding an elegant touch. Our recipe pays homage to this evolution, blending classic fudgy brownie goodness with the vibrant zest of fresh raspberries.
Why You’ll Love This Recipe
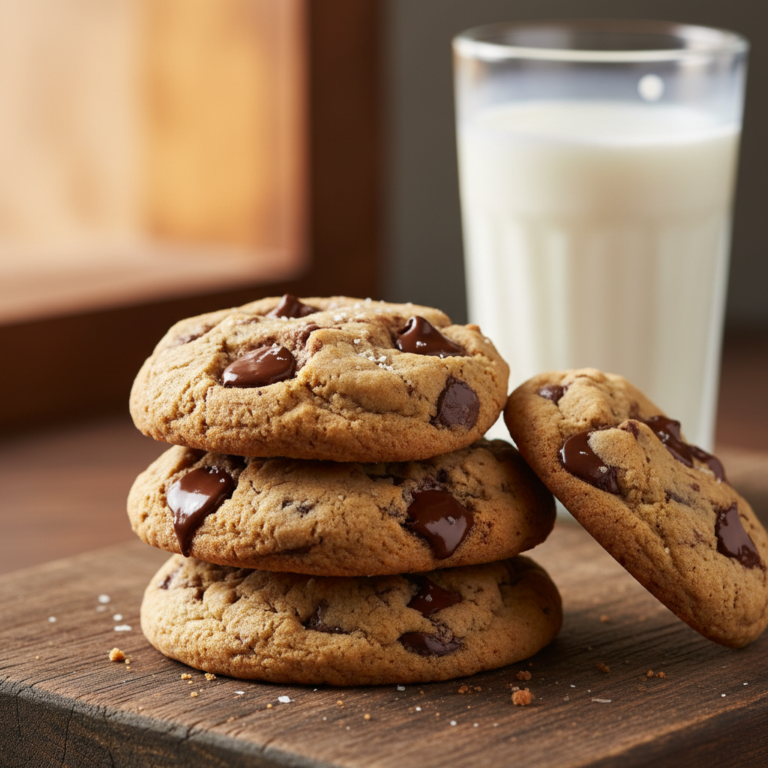
- Unbelievably Fudgy Texture Our secret combination of ingredients ensures a dense, moist, and intensely fudgy brownie every single time. No dry, cakey brownies here!
- Perfect Sweet-Tart Balance The fresh raspberries cut through the richness of the chocolate, creating a harmonious flavor profile that isn’t overly sweet.
- Simple and Beginner-Friendly Even if you’re new to baking, the step-by-step instructions make this recipe easy to follow and incredibly rewarding.
- Impressive for Any Occasion These brownies look as good as they taste, making them perfect for potlucks, parties, or a cozy night in.
- Customizable We’ll share tips for variations, so you can make these brownies truly your own.
Ingredient Notes
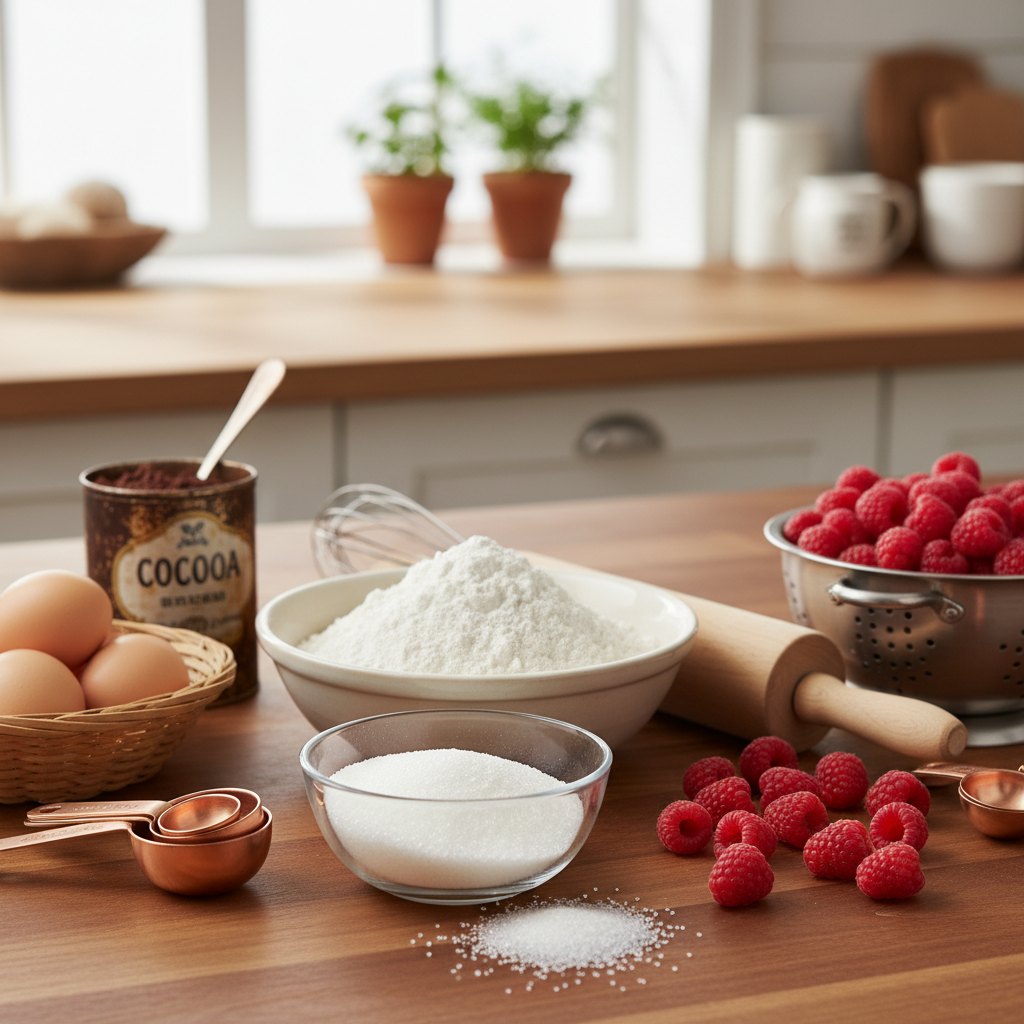
Great brownies start with great ingredients. Here’s a quick guide to what you’ll need and why each component is important:
- Unsalted Butter Using unsalted butter gives you control over the overall saltiness of the recipe. It’s the foundation of that rich, fudgy texture.
- Granulated Sugar and Brown Sugar The combination of both sugars adds depth of flavor and contributes to the chewiness and moisture of the brownies. Brown sugar adds a lovely caramel note.
- Large Eggs Eggs are crucial for binding the ingredients together and providing structure. Make sure they’re at room temperature for better emulsion.
- Vanilla Extract A good quality vanilla extract enhances all the chocolate flavors. Don’t skip it!
- All-Purpose Flour Just enough to bind without making the brownies cakey. Measuring correctly is key!
- Unsweetened Cocoa Powder This is where the deep chocolate flavor comes from. Use a good quality cocoa powder for the best results.
- Salt A pinch of salt balances the sweetness and brings out the chocolate flavor.
- Fresh or Frozen Raspberries The star of the show! Fresh raspberries are wonderful, but frozen ones work just as well—just don’t thaw them first.
- Chocolate Chips or Chunks Optional, but highly recommended for an extra burst of chocolatey goodness. Dark chocolate works beautifully.
Equipment Needed
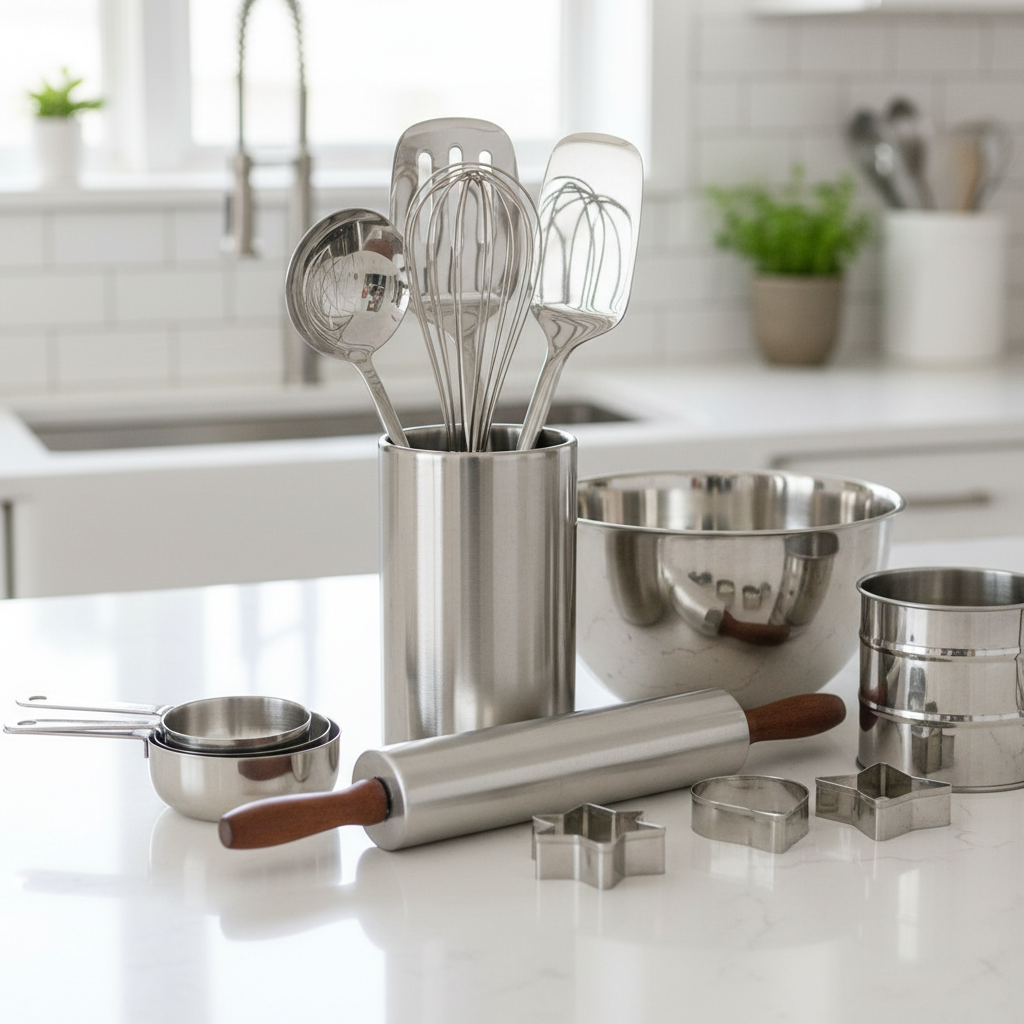
You don’t need a professional kitchen to make amazing brownies, but a few key tools will make the process smooth:
- 9×13 inch Baking Pan A standard size for a generous batch of brownies.
- Parchment Paper Essential for easy removal and clean-up.
- Large Mixing Bowls You’ll need at least two—one for wet ingredients, one for dry.
- Whisk For combining dry ingredients and light mixing.
- Rubber Spatula Perfect for folding in ingredients gently.
- Saucepan or Microwave-Safe Bowl For melting butter and chocolate.
Full Recipe Card
Let’s get baking! Follow these simple steps for the most delicious raspberry brownies.
Ingredients

- 1 cup (226g) unsalted butter, melted
- 2 cups (400g) granulated sugar
- 1/2 cup (100g) light brown sugar, packed
- 4 large eggs, room temperature
- 2 teaspoons vanilla extract
- 1 cup (120g) all-purpose flour
- 3/4 cup (75g) unsweetened cocoa powder
- 1 teaspoon salt
- 1 1/2 cups fresh or frozen raspberries
- 1 cup (170g) chocolate chips or chunks (optional)
Instructions

- Preheat Oven and Prepare Pan Preheat your oven to 350°F (175°C). Line a 9×13 inch baking pan with parchment paper, leaving an overhang on the sides for easy lifting. Lightly grease the parchment paper.
- Melt Butter and Sugars In a large microwave-safe bowl or saucepan, melt the butter. Remove from heat and stir in the granulated sugar and brown sugar until well combined.
- Add Wet Ingredients Whisk in the eggs one at a time, ensuring each is fully incorporated before adding the next. Stir in the vanilla extract. The mixture should be glossy.
- Combine Dry Ingredients In a separate medium bowl, whisk together the flour, cocoa powder, and salt.
- Combine Wet and Dry Gradually add the dry ingredients to the wet ingredients, mixing with a rubber spatula until just combined. Be careful not to overmix; overmixing can lead to tough brownies.
- Fold in Raspberries and Chocolate Gently fold in the raspberries and chocolate chips (if using). If using frozen raspberries, do not thaw them.
- Bake Pour the batter into the prepared baking pan and spread evenly.
- Bake Bake for 30-35 minutes, or until a toothpick inserted into the center comes out with moist crumbs, but not wet batter. The edges should be set, and the center still slightly soft.
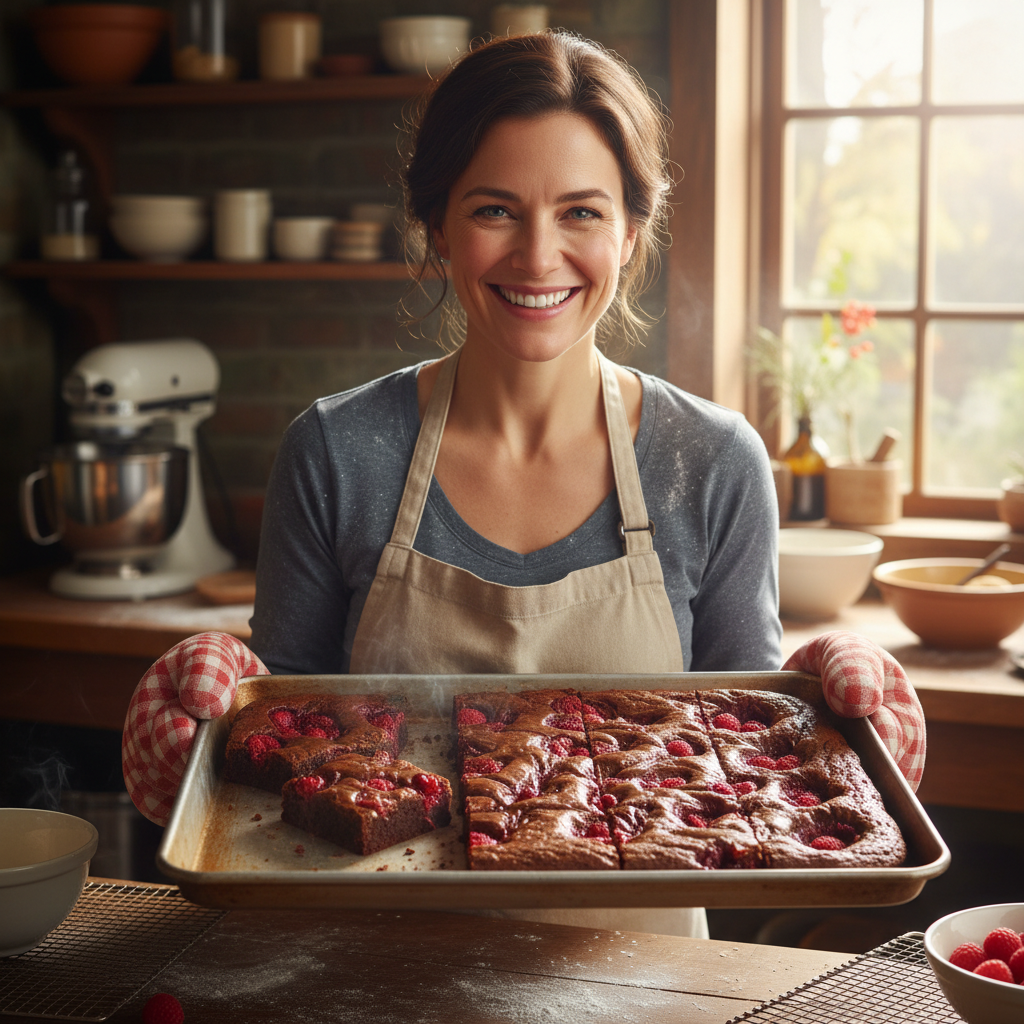
- Cool Completely Let the brownies cool completely in the pan on a wire rack before lifting out and cutting. This is crucial for fudgy brownies that hold their shape.
Notes
- For extra fudginess, slightly underbake the brownies.
- Do not overmix the batter once flour is added.
- Cooling completely prevents crumbling and enhances the fudgy texture.
Tips and Variations
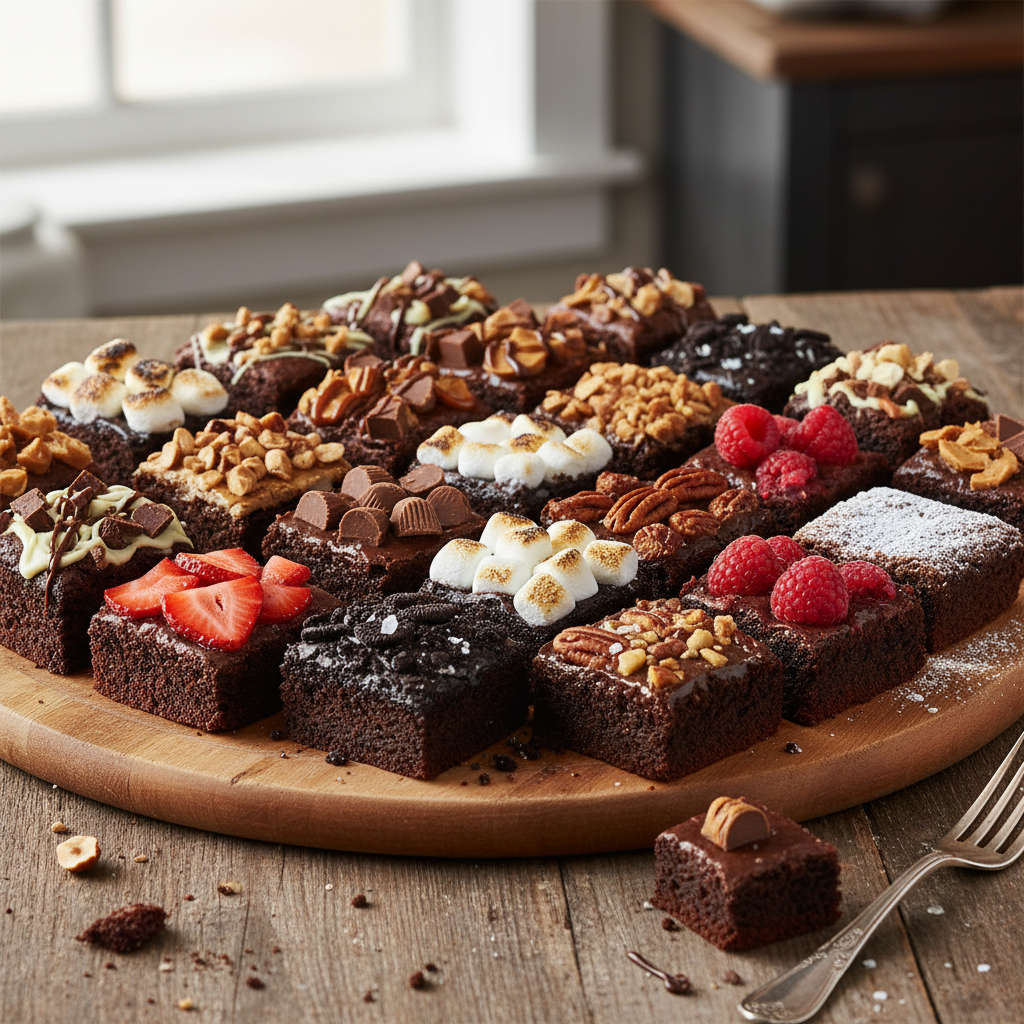
- Nutty Crunch Add 1/2 cup of chopped walnuts or pecans to the batter along with the raspberries for a delightful crunch.
- White Chocolate Swirl Melt 1/2 cup of white chocolate chips and drizzle over the batter before baking. Use a knife to swirl it in gently.
- Citrus Zest A teaspoon of orange or lemon zest can brighten the flavor of the chocolate.
- Espresso Boost Add 1 teaspoon of instant espresso powder to the cocoa powder for an intensified chocolate flavor without a coffee taste.
- Boozy Brownies A tablespoon of raspberry liqueur or Kahlua can add a sophisticated twist.
Pro Chef Tips
- Quality Ingredients Matter Use good quality butter, cocoa powder, and vanilla extract. The difference in flavor is noticeable.
- Don’t Overbake This is the golden rule for fudgy brownies. When a toothpick comes out with moist crumbs, they’re done. The residual heat will continue to cook them as they cool.
- Room Temperature Eggs This helps the eggs emulsify better with the melted butter and sugar, leading to a smoother, more uniform batter.
- Cool Completely Patience is a virtue here! Cutting warm brownies will result in a messy, crumbly experience. Let them cool fully for clean, perfect squares.
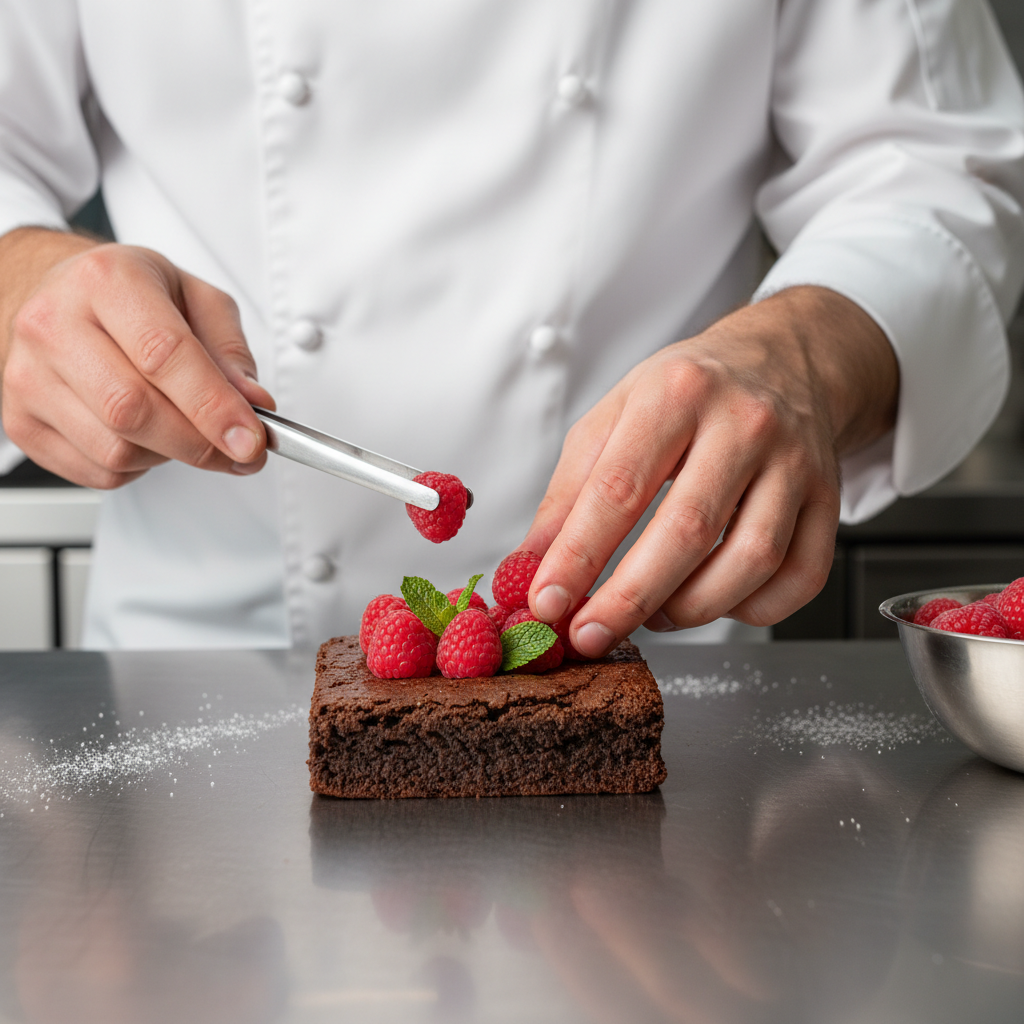
- A Touch of Flaky Sea Salt A sprinkle of flaky sea salt on top of the baked brownies just after they come out of the oven can elevate the flavors beautifully, enhancing both the chocolate and raspberry notes.
Common Mistakes to Avoid
- Overmixing the Batter Once you add the flour, mix only until just combined. Overmixing develops gluten, leading to tough, cakey brownies.
- Overbaking As mentioned, this is the enemy of fudgy brownies. Keep an eye on the oven and trust the moist crumb test.
- Cutting While Warm Resist the urge! Warm brownies are delicate and will fall apart. Let them cool for at least 2-3 hours, or even chill them for easier, cleaner cuts.
- Not Lining the Pan Parchment paper is your best friend for easy removal and clean-up. Don’t skip it!
- Using Cold Eggs Cold eggs don’t emulsify as well, which can affect the texture of your brownies.
Storage and Meal Prep
These brownies are so delicious, they might not last long! But if you have leftovers, here’s how to store them:
- Countertop Store cooled brownies in an airtight container at room temperature for up to 3-4 days.
- Refrigeration For a firmer, chewier brownie, you can store them in an airtight container in the refrigerator for up to a week. Bring to room temperature before serving for optimal flavor.
- Meal Prep These are fantastic for meal prep! Bake a batch on Sunday, cut them into individual squares, and store them for a week of delicious treats.
Make-Ahead and Freezer Notes
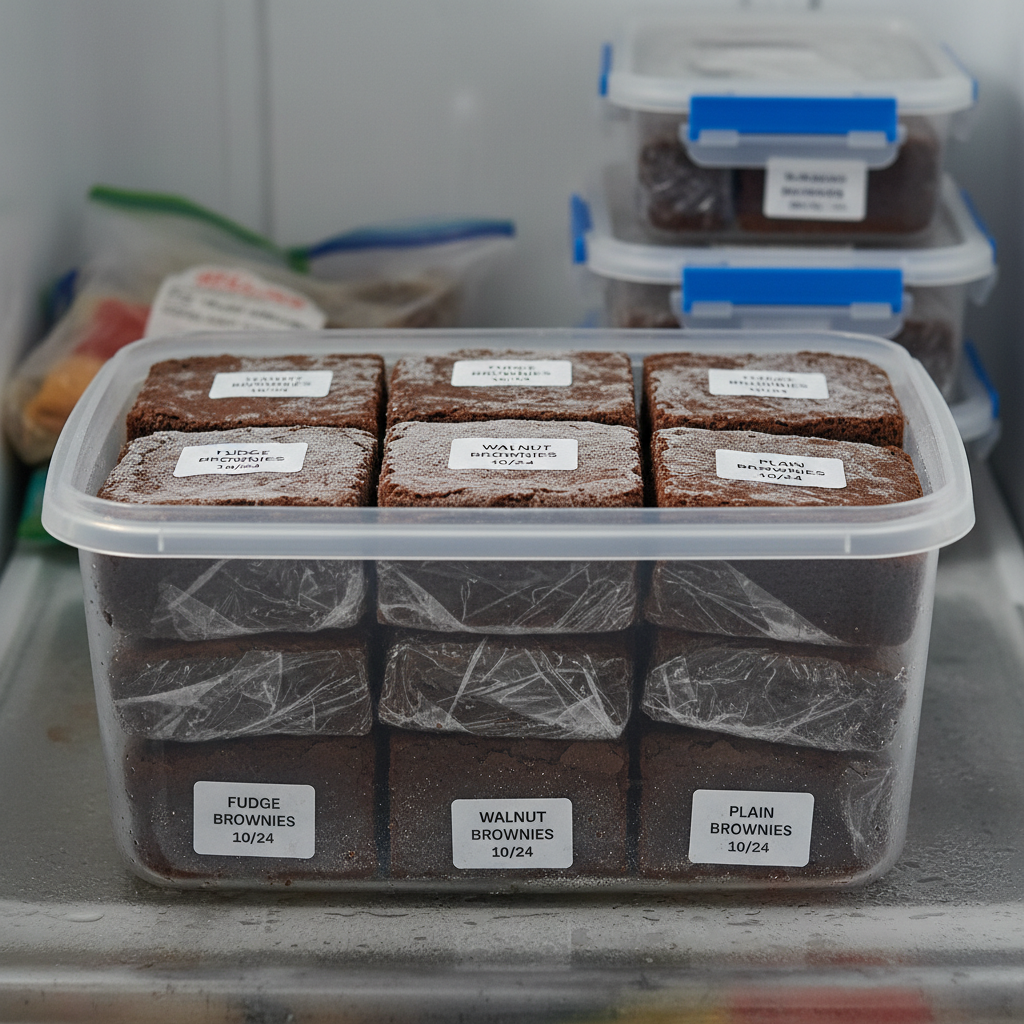
Want to get ahead? These brownies are freezer-friendly!
- Freezing Baked Brownies Once completely cooled, cut the brownies into individual squares. Wrap each square tightly in plastic wrap, then place them in an airtight freezer-safe container or freezer bag. They can be frozen for up to 2-3 months.
- Thawing Thaw frozen brownies at room temperature for a few hours, or overnight in the refrigerator. You can also gently warm them in the microwave for a few seconds for a freshly baked feel.
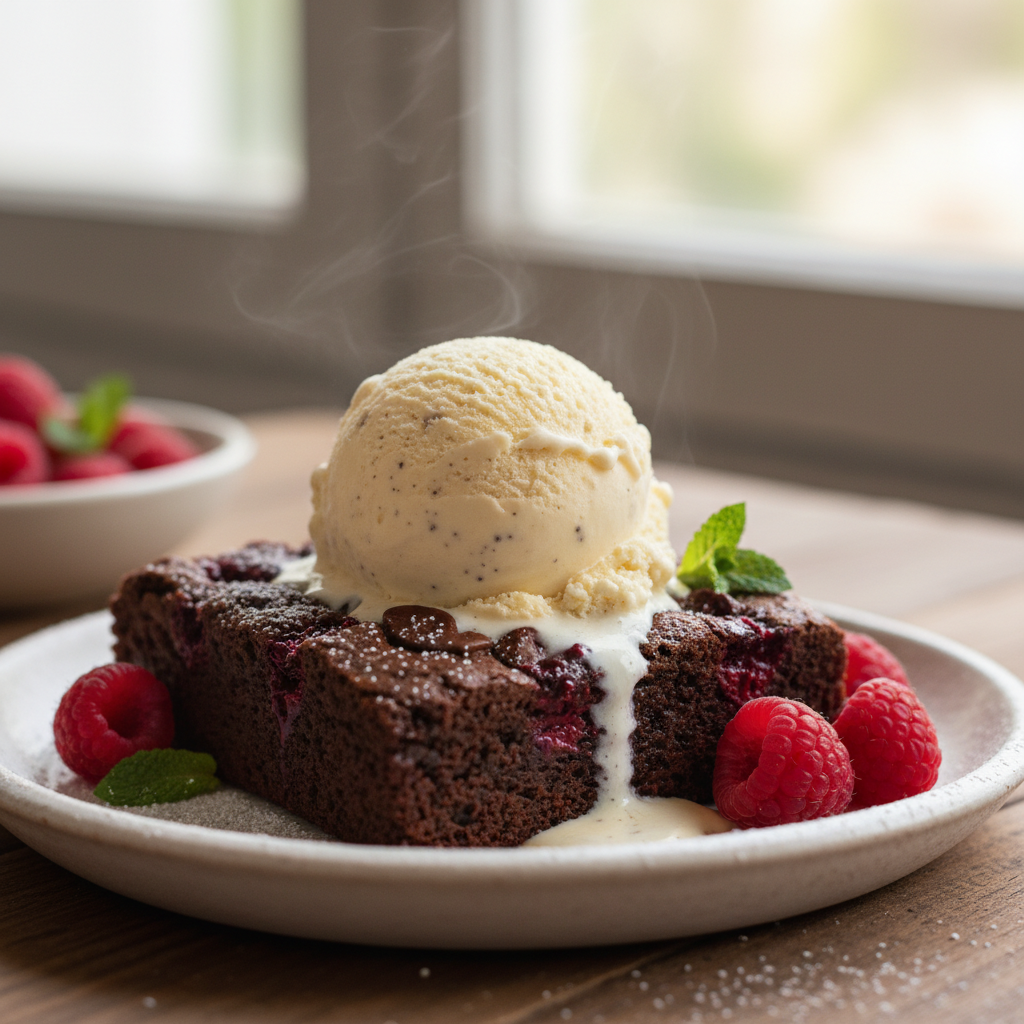
Serving Suggestions
While these raspberry brownies are perfect on their own, a few additions can take them to the next level:
- A La Mode A scoop of vanilla bean ice cream or raspberry sorbet is a classic pairing.
- Whipped Cream A dollop of freshly whipped cream adds a light, airy contrast.
- Chocolate Drizzle A simple drizzle of melted chocolate or a raspberry coulis can make them extra special.
- Coffee or Tea Enjoy with a warm cup of coffee or your favorite herbal tea for a comforting treat.