Welcome, fellow dessert lovers! Are you ready to bake a classic that’s as delightful to look at as it is to eat? The Pineapple Upside Down Cake is a true showstopper, a dessert that brings smiles and a touch of retro charm to any table. If you’ve ever felt intimidated by baking, fear not! This guide is designed to make mastering this iconic cake simple, straightforward, and incredibly fun. We’ll walk you through every step, ensuring your cake comes out perfectly golden, moist, and bursting with sweet, tangy pineapple flavor.
History and Background

The concept of upside down cakes isn’t new; it actually dates back centuries, to when cooks would bake cakes in cast iron skillets over open fires, placing fruit at the bottom to caramelize. This method ensured the fruit was beautifully cooked and presented when flipped. The pineapple version, however, truly soared in popularity in America during the 1920s and 30s, thanks to the widespread availability of canned pineapple. It became a household staple, a symbol of delicious home baking, and a testament to clever presentation. Its enduring appeal lies in its simplicity and the irresistible combination of tender cake, sweet pineapple, and sticky, buttery caramel.
Why You’ll Love This Recipe
- It’s Incredibly Easy Even if you’re a baking beginner, this recipe is designed for success.
- Visually Stunning The caramelized pineapple and cherry topping makes for a beautiful presentation.
- Moist and Flavorful A tender cake base perfectly complements the sweet and tangy fruit.
- Classic Comfort It’s a nostalgic dessert that brings back warm memories and creates new ones.
- Versatile Easy to adapt with different fruits or spices to suit your taste.
Ingredient Notes
Gathering your ingredients correctly is the first step to baking success. Here’s a quick rundown of what you’ll need and why each component is important:
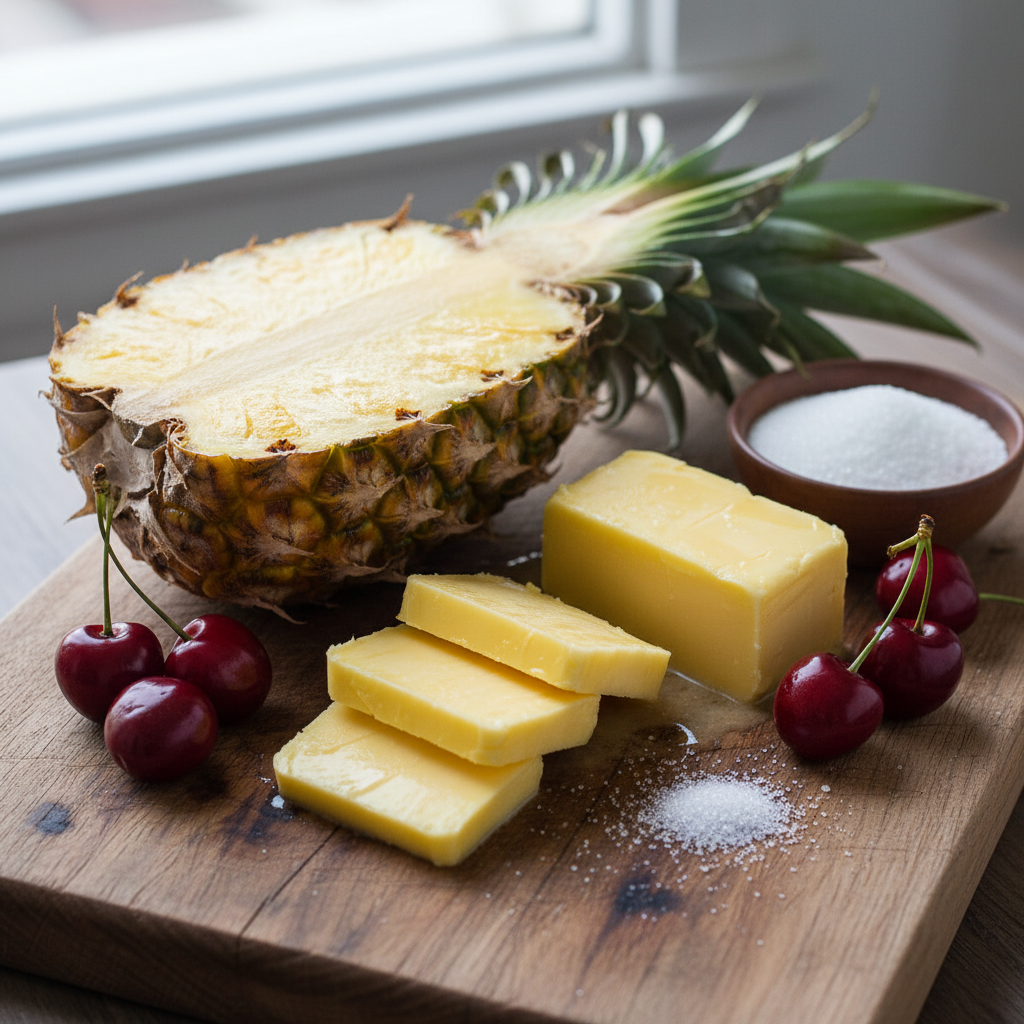
- Canned Pineapple Rings The star of our show! Make sure they’re in juice, not syrup, for the best flavor balance. Drain them well.
- Melted Butter For the caramel topping. It creates that rich, golden base.
- Brown Sugar This sweetens and caramelizes beautifully with the butter, forming a delicious sticky layer.
- Maraschino Cherries These add a pop of color and a touch of extra sweetness.
- All-Purpose Flour The structure of our cake. Sift it for a lighter texture.
- Granulated Sugar Sweetens the cake batter.
- Baking Powder Our leavening agent, ensuring a light and fluffy cake.
- Salt A pinch balances the sweetness.
- Eggs Bind the ingredients and add richness.
- Milk Adds moisture to the batter.
- Vanilla Extract Enhances all the flavors.
Equipment Needed

You don’t need a fancy kitchen to make this cake, just a few basic items:
- 9-inch Round Cake Pan Essential for the classic shape.
- Mixing Bowls For combining wet and dry ingredients.
- Whisk For stirring the batter.
- Rubber Spatula For scraping down bowls and folding ingredients.
- Measuring Cups and Spoons Accuracy is key in baking!
- Small Saucepan For melting butter and making the caramel.
- Oven Mitts Safety first!
Full Recipe Card
Here it is, the moment you’ve been waiting for! Follow these steps carefully for a perfect Pineapple Upside Down Cake.
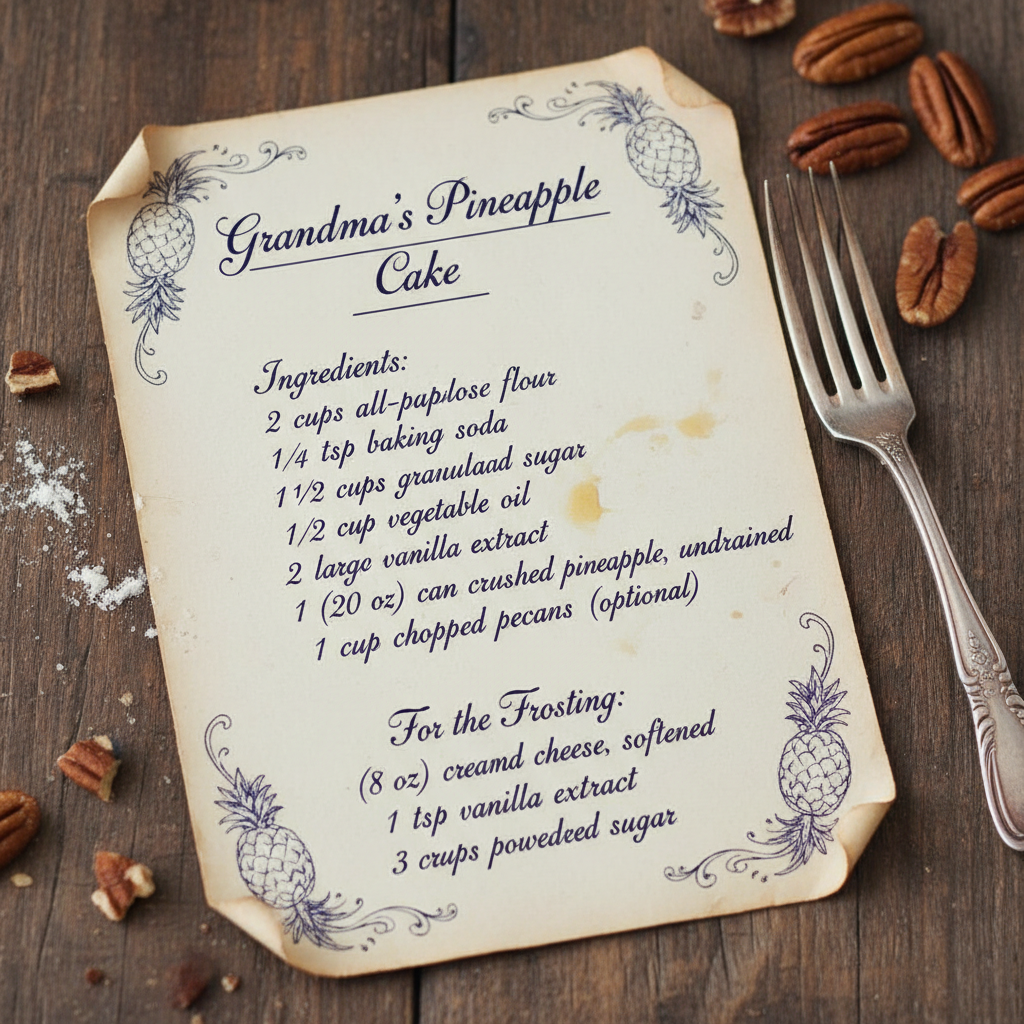
Ingredients
- 1/2 cup (1 stick) unsalted butter, melted, plus 1/4 cup (1/2 stick) softened butter
- 1 cup packed light brown sugar
- 1 (20-ounce) can pineapple rings in juice, well drained
- 10-12 maraschino cherries, stems removed, patted dry
- 1 1/2 cups all-purpose flour
- 1 1/2 teaspoons baking powder
- 1/4 teaspoon salt
- 1 cup granulated sugar
- 2 large eggs
- 1 teaspoon vanilla extract
- 1/2 cup milk
Instructions
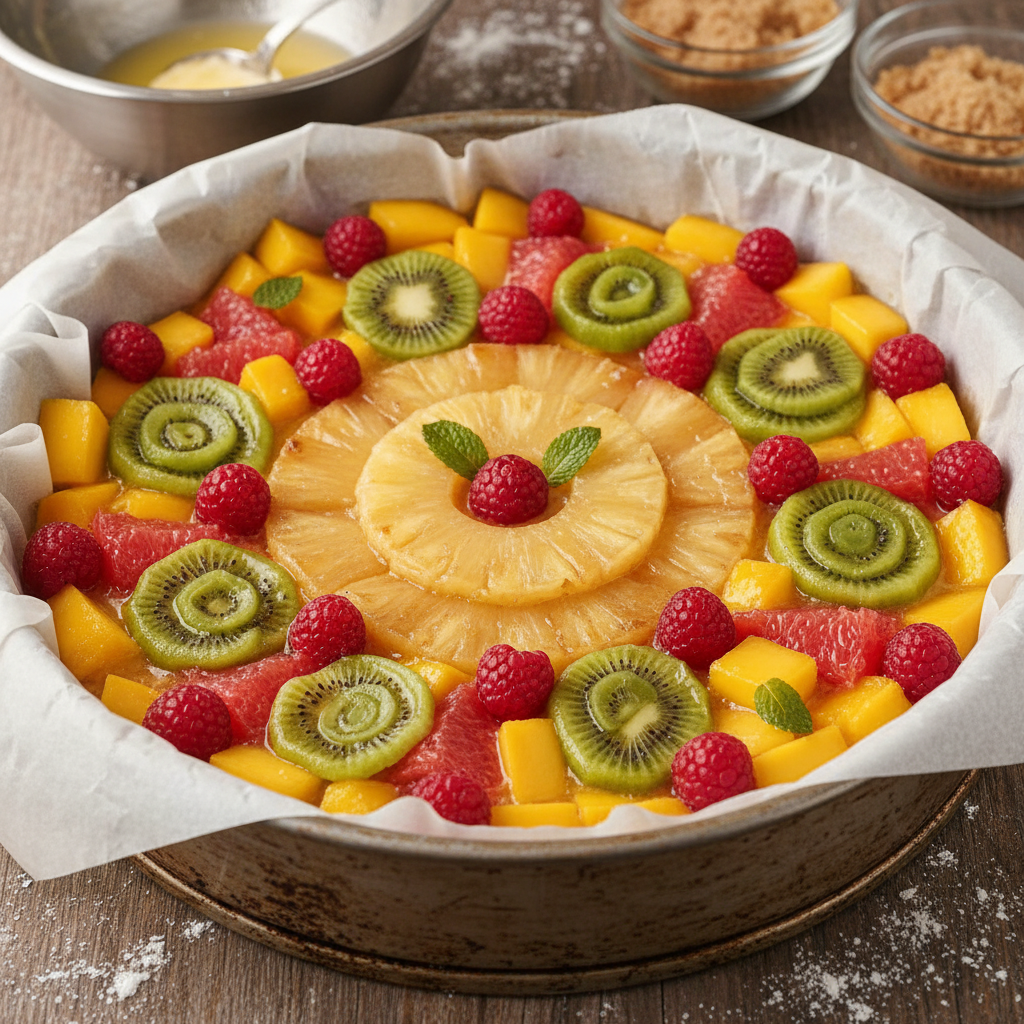
- Prepare the Pan Preheat your oven to 350°F (175°C). Pour the 1/2 cup melted butter into a 9-inch round cake pan. Sprinkle the brown sugar evenly over the butter.
- Arrange the Fruit Arrange the drained pineapple rings over the brown sugar. Place one maraschino cherry in the center of each pineapple ring, and scatter remaining cherries in the gaps.
- Mix Dry Ingredients In a medium bowl, whisk together the flour, baking powder, and salt. Set aside.
- Cream Wet Ingredients In a large bowl, using an electric mixer, cream together the 1/4 cup softened butter and granulated sugar until light and fluffy. Beat in the eggs one at a time, then stir in the vanilla extract.
- Combine Wet and Dry Gradually add the dry ingredients to the wet ingredients, alternating with the milk, beginning and ending with the dry ingredients. Mix until just combined; do not overmix.
- Pour and Bake Carefully spoon the cake batter over the pineapple and cherries in the prepared pan, spreading it gently and evenly.
- Bake Bake for 35-40 minutes, or until a wooden skewer inserted into the center comes out clean.
- Cool and Flip Let the cake cool in the pan on a wire rack for only 5-10 minutes. This is crucial! Too long, and the caramel might stick.
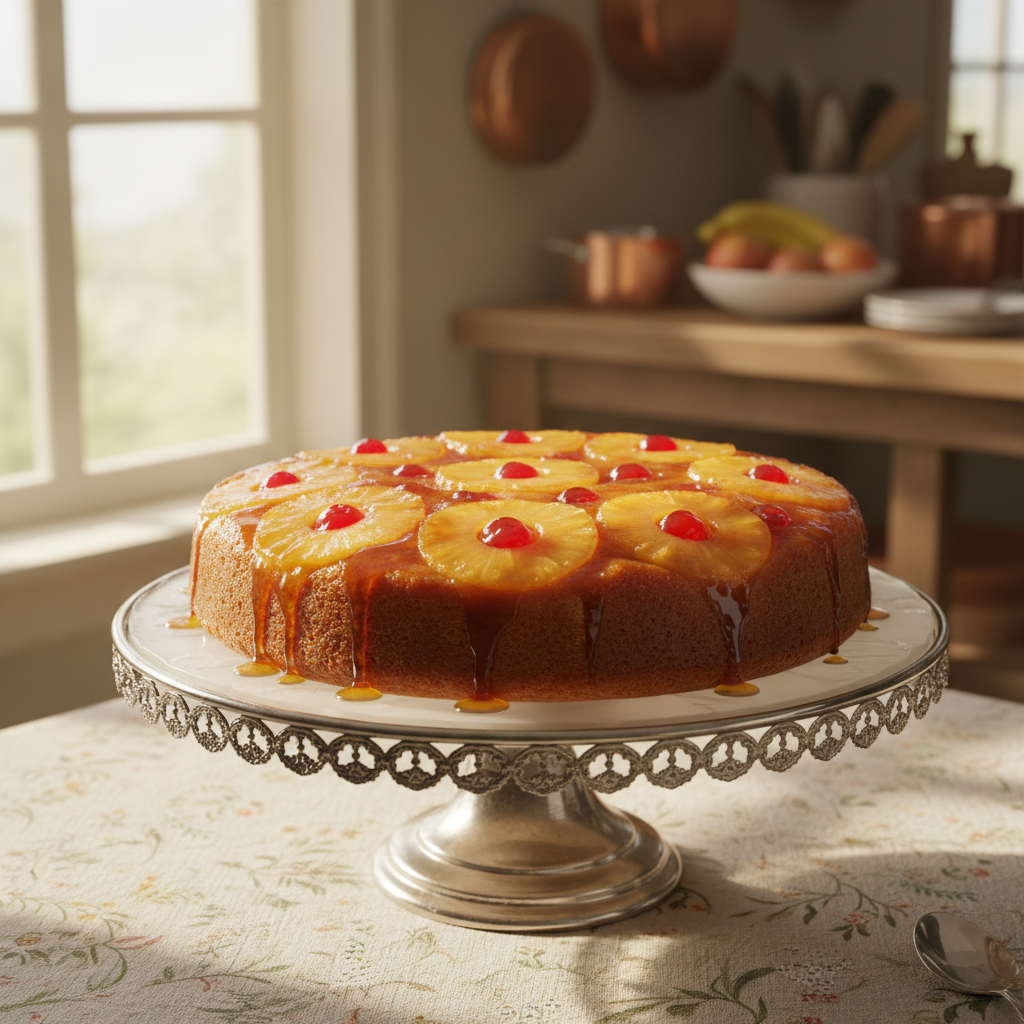
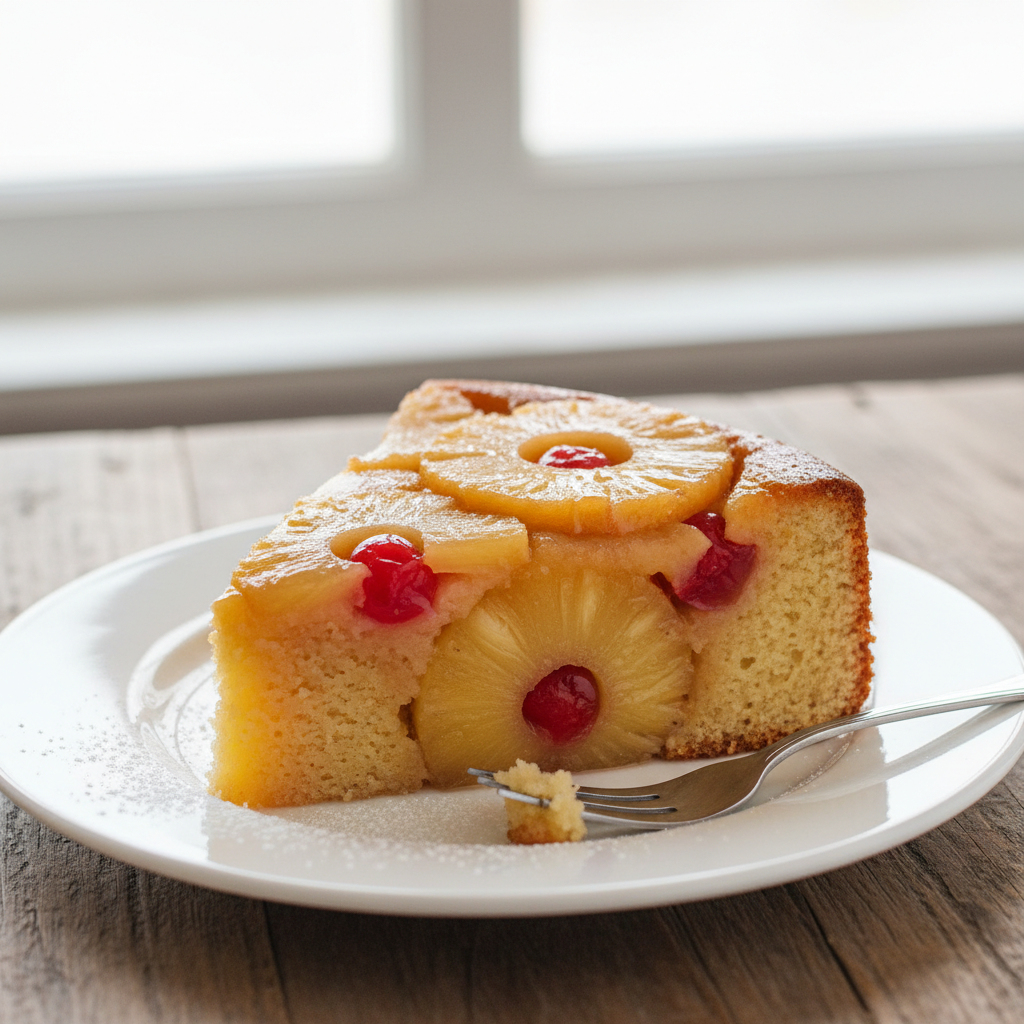
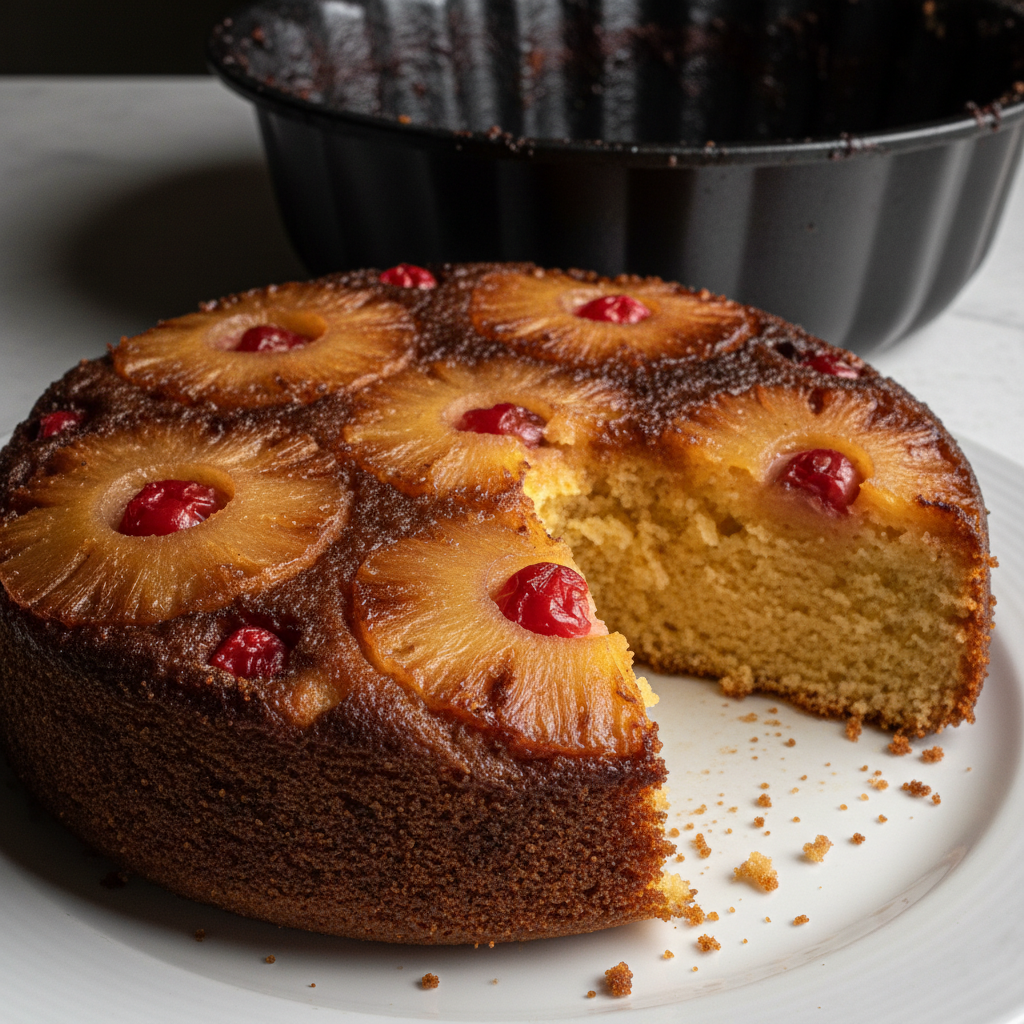
- Invert Place a serving plate upside down over the cake pan. Carefully, but confidently, flip the cake and plate together. Lift the pan off slowly. If any fruit sticks, gently place it back on the cake.
- Serve Allow to cool slightly before slicing and serving. Enjoy!
Notes
For best results, ensure your eggs and milk are at room temperature. This helps them incorporate better into the batter, leading to a smoother, more uniform cake.
Tips and Variations
Don’t be afraid to get creative once you’ve mastered the basic recipe!
- Spice It Up Add a pinch of cinnamon or nutmeg to the cake batter for a warm, spiced flavor.
- Citrus Zest A little lemon or orange zest in the batter can brighten the flavor beautifully.
- Different Fruits Try sliced peaches, apples, or even a mix of berries for a seasonal twist. Just make sure to adjust baking time if the fruit is very juicy.
- Nutty Crunch Sprinkle some chopped pecans or walnuts over the brown sugar layer before adding the pineapple for a delightful crunch.
- Coconut Flavor Add a teaspoon of coconut extract to the batter or sprinkle toasted coconut flakes on top after flipping.
Pro Chef Tips

Elevate your baking with these professional insights:
- Room Temperature Ingredients This is a golden rule in baking! Room temperature eggs and milk emulsify better, leading to a smoother, more consistent batter and a lighter cake.
- Don’t Overmix Once you add the flour, mix only until just combined. Overmixing develops the gluten too much, resulting in a tough, dry cake.
- The Flip is Key The timing of the flip is critical. Too soon, and the cake might fall apart. Too late, and the caramel can harden and stick to the pan. 5-10 minutes cooling in the pan is usually perfect.
- Grease Your Plate For extra insurance against sticking, lightly grease your serving plate before flipping the cake onto it.
- Use a Springform Pan If you’re nervous about the flip, a springform pan can make removal easier, though you’ll need to line the bottom well to prevent leaks.
Common Mistakes to Avoid
Even seasoned bakers make mistakes. Here’s how to steer clear of common pitfalls:
- Not Draining Pineapple Well Enough Excess liquid can make your caramel watery and prevent it from setting properly. Pat those rings dry!
- Overcooling Before Flipping As mentioned, this is a big one. The caramel will harden and weld the cake to the pan. Stick to the 5-10 minute rule.
- Underbaking An underbaked cake will be gooey in the middle and might collapse when flipped. Always check for doneness with a wooden skewer.
- Overmixing the Batter Leads to a dense, chewy cake rather than a light and fluffy one.
- Not Spreading Batter Evenly This can lead to uneven baking and a lopsided cake. Gently spread the batter to the edges.
Storage and Meal Prep

Once your delicious cake is baked, you’ll want to enjoy it for as long as possible!
- Room Temperature The cake can be stored at room temperature, covered tightly with plastic wrap or in an airtight container, for up to 2 days.
- Refrigeration For longer storage, especially in warmer climates, refrigerate the cake. It will last for 4-5 days. Bring it to room temperature or warm slightly before serving for the best texture.
- Airtight Container Always use an airtight container to prevent the cake from drying out and absorbing odors from your fridge.
Make-Ahead and Freezer Notes
Planning ahead can save you time and stress, especially when entertaining.
- Make-Ahead You can bake the cake a day in advance. Store it covered at room temperature. The flavors often meld and deepen overnight!
- Freezing Whole Cake Wrap the cooled cake tightly in plastic wrap, then in aluminum foil. Freeze for up to 1 month. Thaw in the refrigerator overnight, then bring to room temperature before serving.
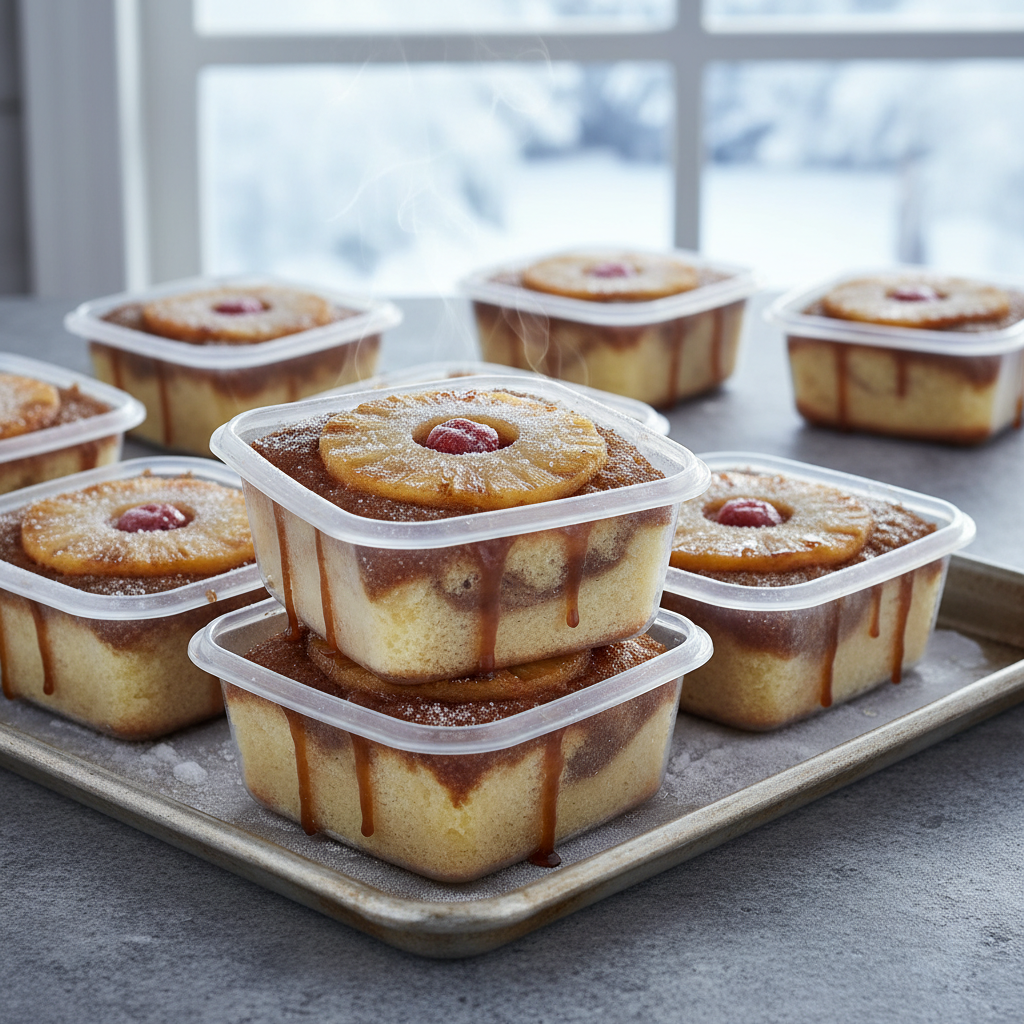
- Freezing Individual Slices Cut the cake into individual slices, wrap each slice tightly in plastic wrap, then place them in a freezer-safe bag or container. This is perfect for portion control and quick treats!
Serving Suggestions
While this cake is absolutely delicious on its own, a few simple additions can take it to the next level.
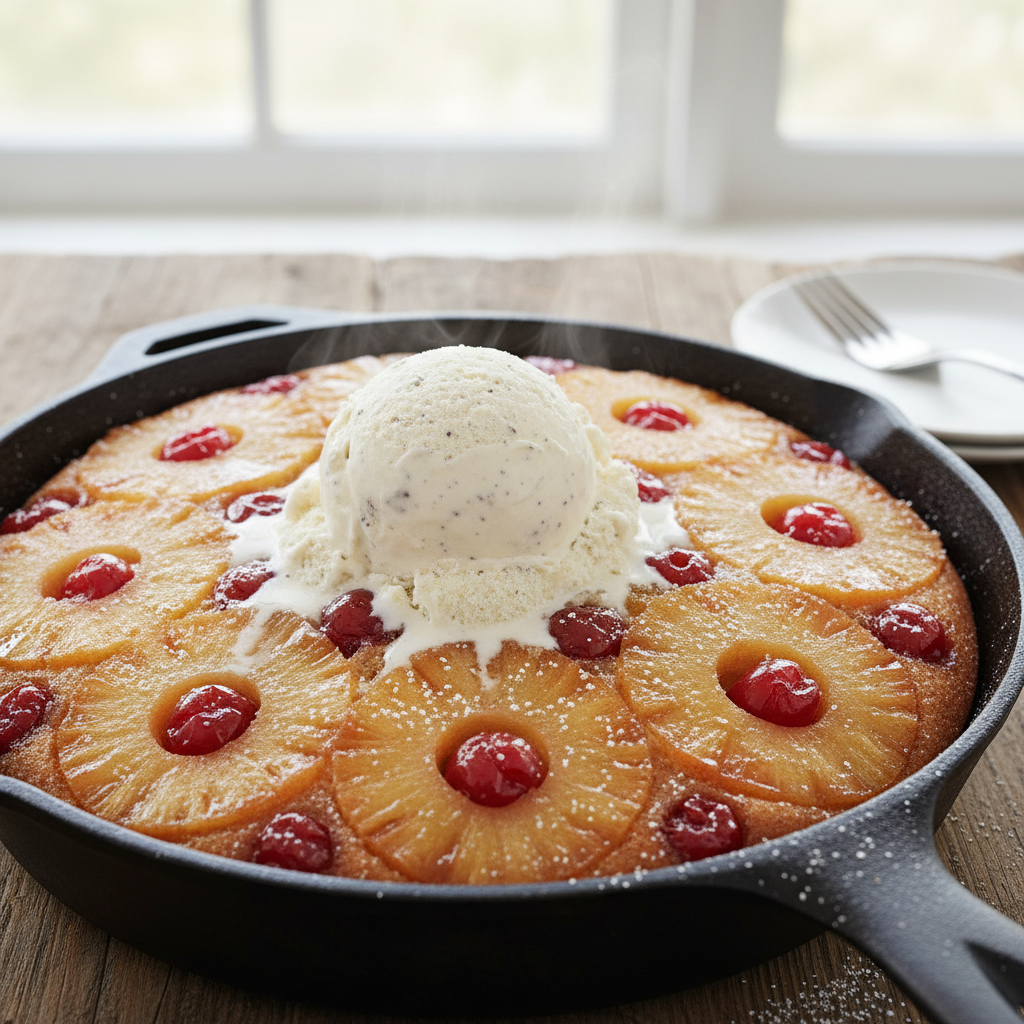
- Vanilla Ice Cream A classic pairing! The cold, creamy ice cream is a perfect contrast to the warm, sweet cake.
- Whipped Cream A dollop of freshly whipped cream adds a light and airy touch.
- A Drizzle of Caramel Sauce If you’re feeling extra indulgent, a little extra caramel never hurt anyone!
- With Coffee or Tea A slice of this cake is a wonderful accompaniment to your morning coffee or afternoon tea.