Welcome, fellow dessert lovers! Are you ready to embark on a culinary adventure that promises to delight your taste buds and impress your friends and family? Today, we’re diving into the enchanting world of Japanese Cheesecake – often called soufflé cheesecake or cotton cheesecake. Forget everything you thought you knew about cheesecake; this isn’t your dense, New York-style cousin. This is a cloud-like dream, a dessert so light and airy it practically floats off the plate, boasting a signature jiggly texture that’s as fun to watch as it is to eat. If you’ve ever been intimidated by its delicate reputation, fear not! Our easy-to-follow guide will walk you through every step, ensuring a perfect, jiggly, melt-in-your-mouth experience.
History and Background
The story of Japanese cheesecake begins not in Japan, but with a happy accident (or rather, a delicious inspiration!) from a German chef named Tomotaro Kuzuno. During a trip to Berlin in the 1960s, he encountered a local käsekuchen (German cheesecake) and was so captivated that he decided to bring the concept back to Japan. However, he adapted it to suit Japanese palates, which often prefer lighter, less sweet desserts. He reduced the sugar, incorporated more egg whites for that signature airy texture, and baked it using a water bath technique to ensure a supremely moist and delicate crumb. The result was a revolutionary cheesecake that quickly became a sensation, known for its unique soufflé-like consistency and gentle flavor. It’s a testament to culinary fusion, blending European tradition with Japanese refinement to create something truly special.
Why You’ll Love This Recipe

- Unbelievably Light and Airy It feels like eating a sweet cloud!
- Perfectly Jiggly Texture Its signature wobble is mesmerizing and delicious.
- Subtly Sweet Flavor Not overly rich, making it incredibly enjoyable.
- Melts in Your Mouth A truly delightful and unique texture experience.
- Impressive Yet Achievable Looks fancy, but our recipe makes it beginner-friendly.
- Versatile Great on its own or with fresh fruit and cream.
Ingredient Notes
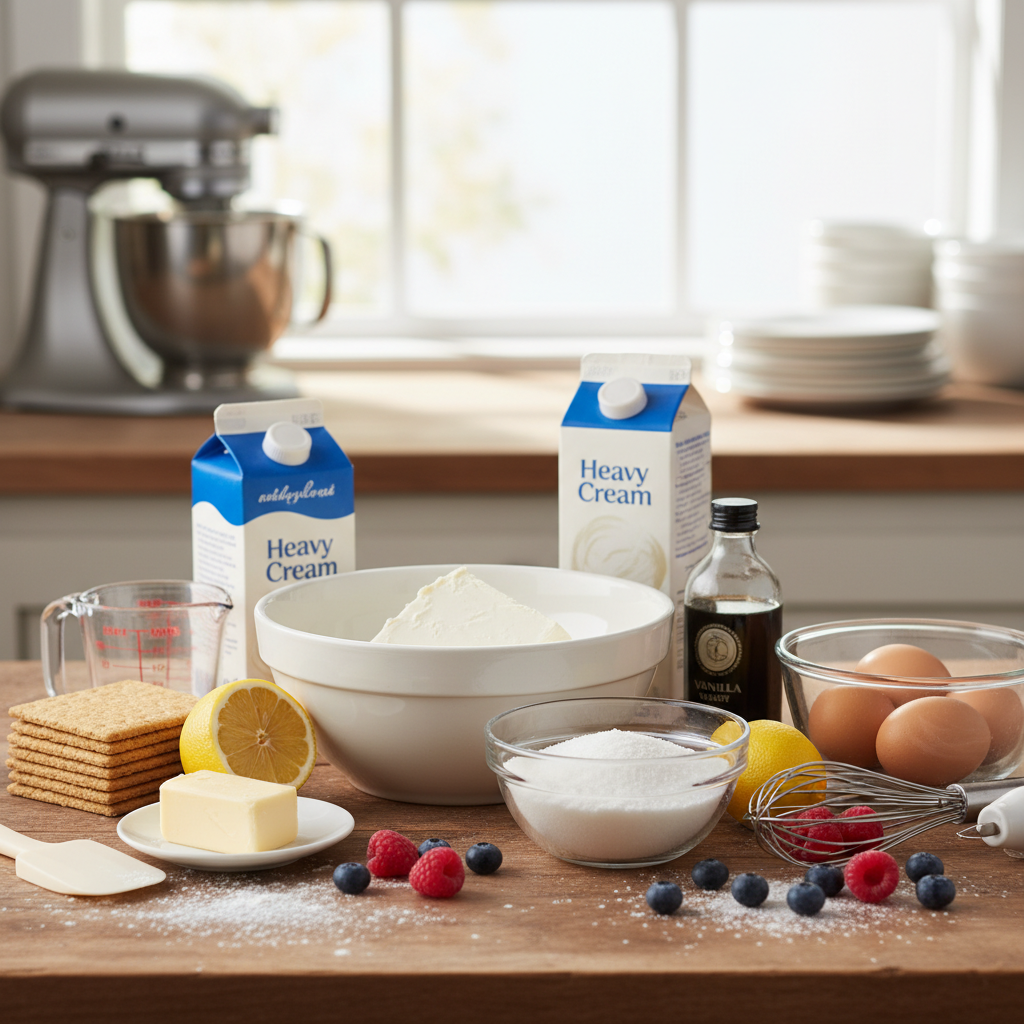
Gathering the right ingredients is the first step to success. Here’s a quick rundown of what you’ll need and why each plays a crucial role:
- Cream Cheese Use full-fat block cream cheese, softened at room temperature. This is the base of our cheesecake and needs to be smooth for a lump-free batter.
- Butter Unsalted butter, melted. It adds richness and helps with the cake’s tender structure.
- Milk Whole milk is preferred for moisture and a creamy texture.
- Egg Yolks These provide richness, color, and act as an emulsifier for a smooth batter.
- All-Purpose Flour Just a small amount to give the cake structure without making it dense. Sift it for best results.
- Cornstarch Helps stabilize the batter and contributes to the cake’s delicate texture.
- Egg Whites The stars of the show! Whipped to stiff peaks, they create the soufflé-like lightness and jiggly texture. Ensure your bowl and whisk are absolutely clean and grease-free.
- Granulated Sugar Sweetens the cake and stabilizes the egg white meringue.
- Lemon Juice or Cream of Tartar A tiny bit helps stabilize the egg whites, ensuring they hold their volume.
Equipment Needed

Having the right tools makes the baking process smooth and enjoyable:
- 9-inch Round Springform Pan Essential for easily releasing the delicate cheesecake. Make sure it’s leak-proof or wrap it securely in foil.
- Large Roasting Pan or Baking Dish For the water bath. It needs to be large enough to hold the springform pan.
- Electric Mixer (Stand or Handheld) Crucial for whipping cream cheese and, especially, egg whites to perfection.
- Large Mixing Bowls You’ll need at least two – one for the cream cheese mixture and one for egg whites.
- Whisk and Spatula For mixing and gently folding.
- Fine-Mesh Sieve For sifting flour and cornstarch.
- Parchment Paper To line the bottom and sides of the springform pan, preventing sticking.
- Aluminum Foil To wrap the springform pan for the water bath.
Full Recipe Card
Ingredients
- 250g (8.8 oz) full-fat cream cheese, softened
- 60g (2.1 oz) unsalted butter, melted
- 100ml (3.4 fl oz) whole milk
- 6 large egg yolks
- 60g (2.1 oz) all-purpose flour, sifted
- 20g (0.7 oz) cornstarch, sifted
- 6 large egg whites
- 100g (3.5 oz) granulated sugar
- 1/2 tsp lemon juice or cream of tartar (optional, for egg whites)
Instructions
- Prepare Your Pan and Preheat Oven Grease and line the bottom and sides of a 9-inch springform pan with parchment paper. Wrap the bottom and sides of the pan securely with 2-3 layers of aluminum foil to prevent water from seeping in during the water bath. Preheat your oven to 160°C (325°F). Boil a kettle of water for the water bath.
- Make the Cream Cheese Base In a large heatproof bowl, combine the softened cream cheese, melted butter, and milk. Place the bowl over a pot of simmering water (bain-marie style), ensuring the bottom of the bowl does not touch the water. Stir constantly until the mixture is smooth and lump-free. Remove from heat.
- Add Yolks and Dry Ingredients Whisk in the egg yolks one at a time until fully incorporated. Sift the flour and cornstarch directly into the cream cheese mixture. Whisk until just combined and smooth. Set aside.
- Whip Egg Whites In a separate, very clean large bowl, beat the egg whites with an electric mixer on medium speed. Once foamy, add the lemon juice or cream of tartar (if using). Gradually add the granulated sugar, a spoonful at a time, while continuing to beat on medium-high speed until stiff peaks form. The meringue should be glossy and hold its shape.
- Combine Mixtures Gently fold one-third of the meringue into the cream cheese batter using a spatula until mostly combined. Then, carefully fold in the remaining meringue in two additions, taking care not to deflate the air. Mix until just combined, ensuring no streaks of egg white remain.
- Bake in a Water Bath Pour the batter into the prepared springform pan. Place the springform pan into the larger roasting pan. Carefully pour the hot water from the kettle into the roasting pan until it comes about halfway up the sides of the springform pan.
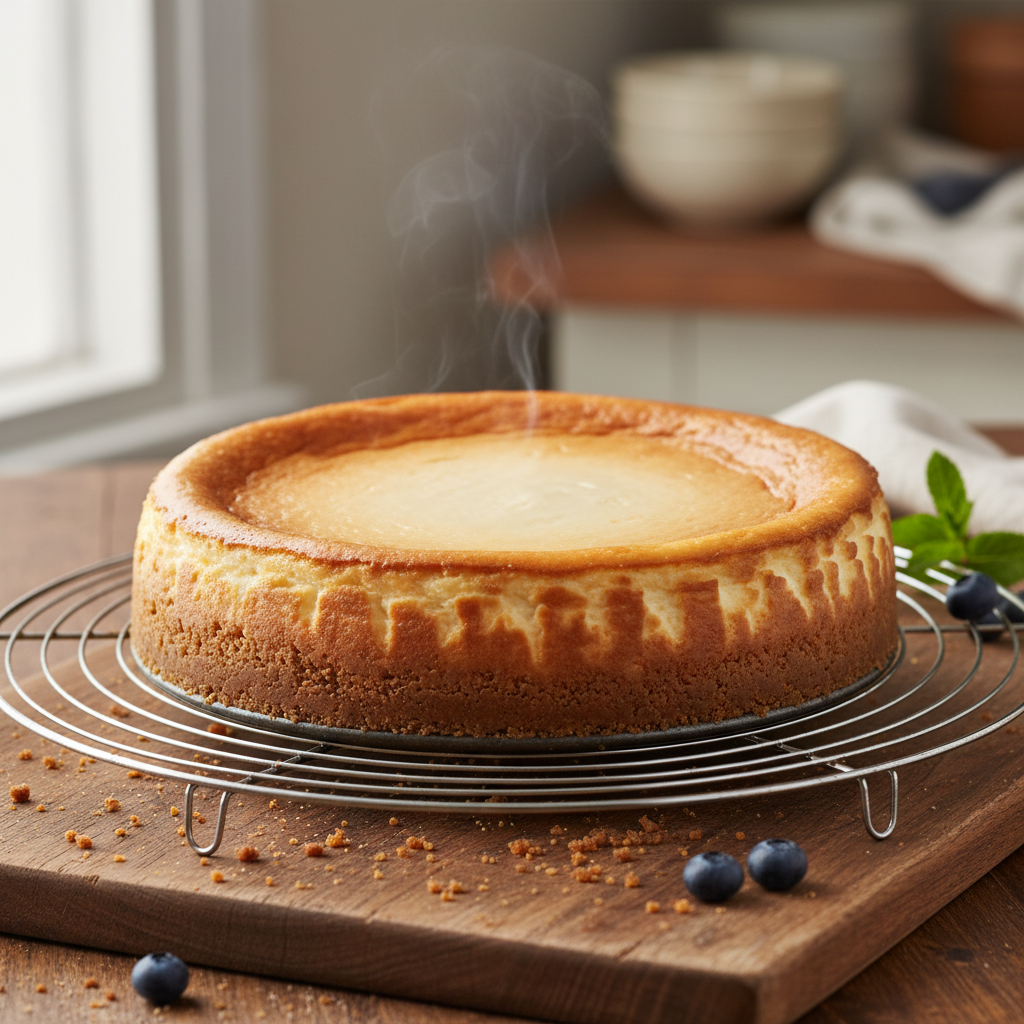
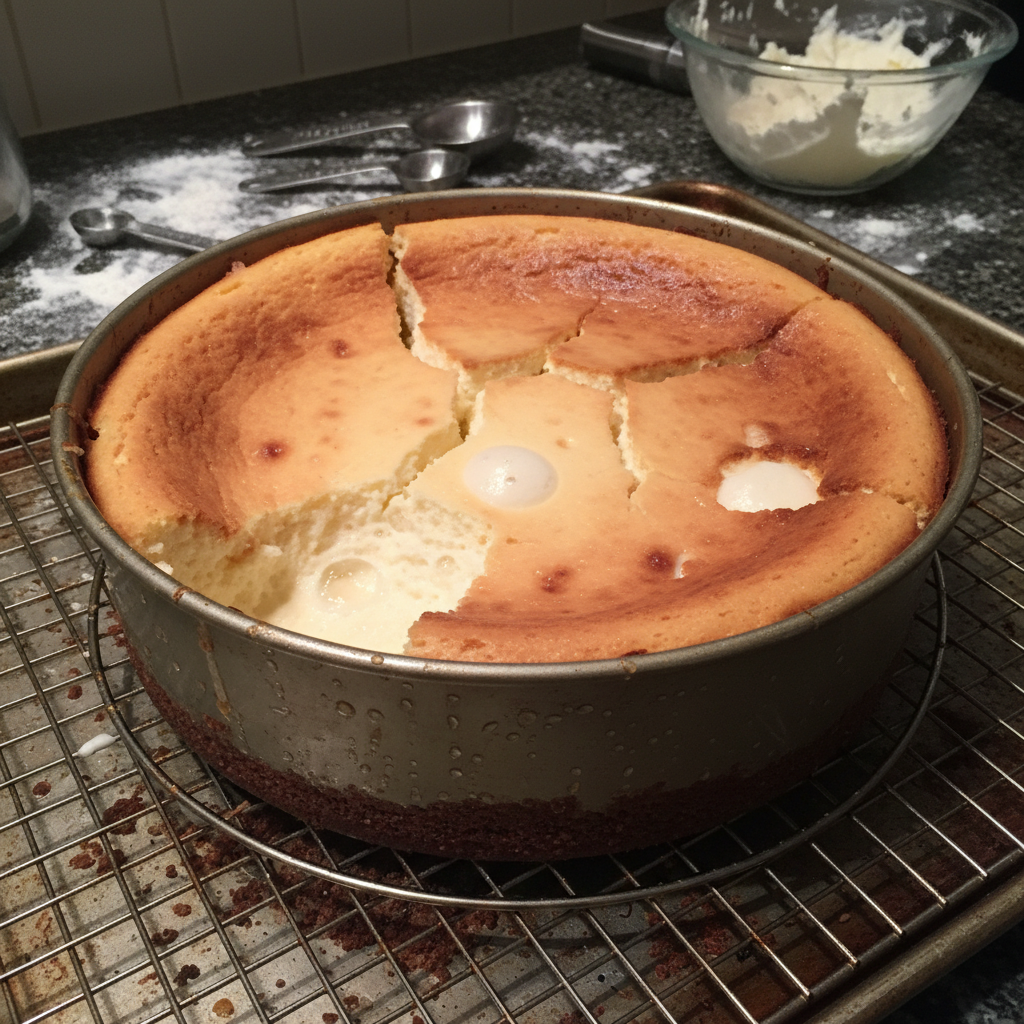
- Baking Schedule Bake for 1 hour and 15 minutes to 1 hour and 30 minutes, or until the top is golden brown and the cheesecake is jiggly but set. The exact time can vary by oven.
- Cooling Once baked, turn off the oven and leave the cheesecake inside with the oven door slightly ajar for another 30-60 minutes. This slow cooling prevents cracking.
- Chill Remove from the oven and water bath. Let it cool completely on a wire rack before refrigerating for at least 4 hours, or preferably overnight, before serving.
Notes
- Ensure all dairy ingredients are at room temperature for a smooth batter.
- Do not overmix the batter once flour is added, or the meringue when folding.
- The water bath is crucial for even baking and a moist texture.
- Every oven is different; adjust baking time as needed.
Tips and Variations
Even though this recipe is fantastic as is, there are always ways to personalize it or ensure even greater success:
- Temperature Matters Ensure all your cold ingredients like cream cheese, butter, and milk are at room temperature. This helps them combine smoothly without lumps.
- Don’t Overmix Once you add the flour, mix just until combined. Overmixing can develop gluten, leading to a tougher cake. The same goes for folding in the meringue – be gentle!
- Perfect Meringue Your egg whites and bowl must be absolutely grease-free. Even a tiny bit of fat can prevent the egg whites from whipping up properly.
- Flavor Variations For a citrusy twist, add a teaspoon of lemon zest or orange zest to the cream cheese mixture. A touch of vanilla extract (1 tsp) is also a classic addition. You can also experiment with a hint of matcha powder for a beautiful green hue and earthy flavor.
- Chocolate Swirl Melt a few tablespoons of chocolate, let it cool slightly, and swirl it gently into the batter just before baking for a marbled effect.
Pro Chef Tips
Want to elevate your Japanese cheesecake to professional levels? Here are some insider tips:
- Double Boiler Method When melting the cream cheese, butter, and milk, using a double boiler (bain-marie) ensures gentle, even heating, preventing scorching and creating a super smooth base. Don’t let the water boil too vigorously or touch the bowl.
- Measure by Weight For baking, especially delicate recipes like this, measuring ingredients by weight (grams) is far more accurate than by volume (cups). This consistency leads to better results.
- Slow and Steady Cooling The slow cooling process in the oven with the door ajar is critical. Rapid temperature changes are a common cause of cracks in cheesecakes. Patience is key!
- Water Bath Temperature Ensure the water for your water bath is hot, but not boiling rapidly, when you add it to the roasting pan. This helps start the baking process gently.
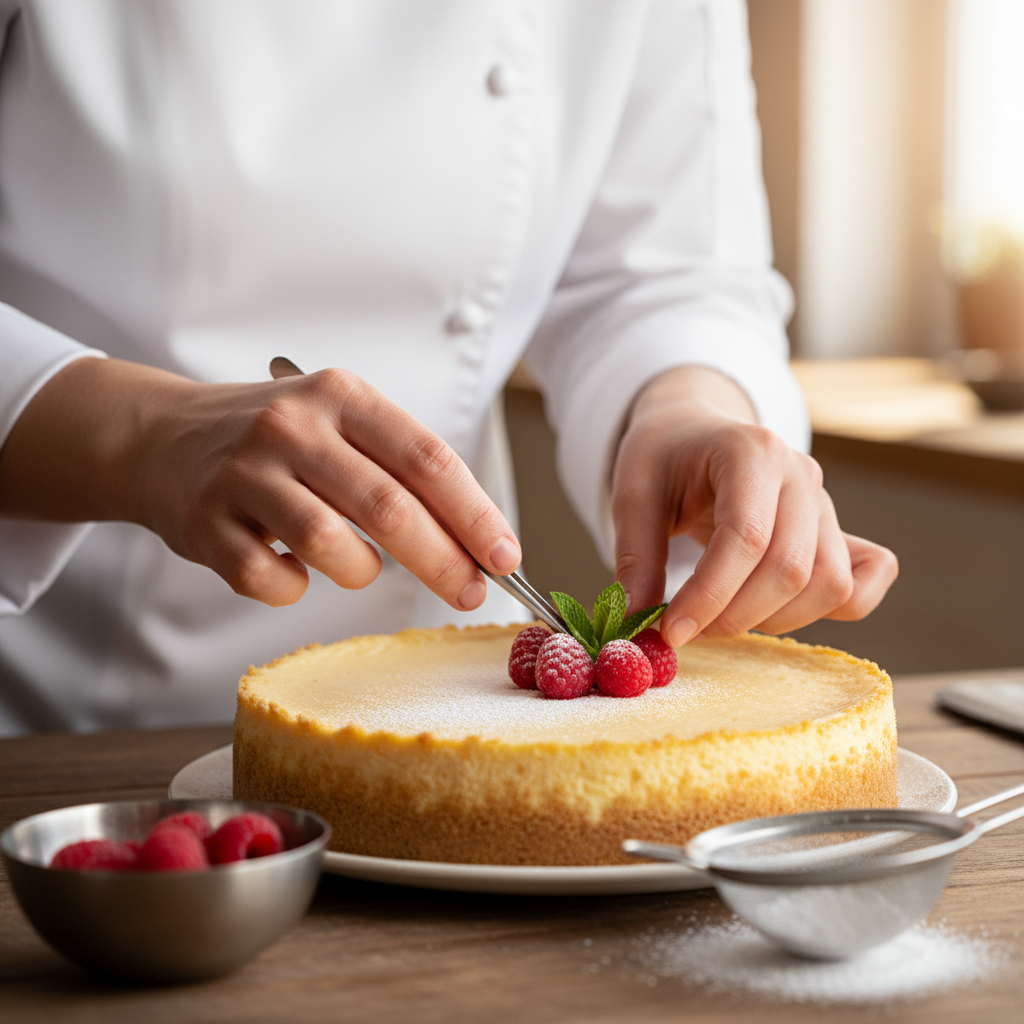
- Clean Slicing For perfectly clean slices, dip your knife in hot water and wipe it clean between each cut.
Common Mistakes to Avoid
Even experienced bakers can stumble, but knowing these common pitfalls can help you avoid them:
- Overmixing the Batter This is the number one culprit for a tough or dense cheesecake. Mix only until ingredients are just combined.
- Deflating the Meringue Be very gentle when folding the meringue into the cream cheese mixture. The air in the meringue is what gives the cheesecake its signature lightness.
- Not Using a Water Bath Skipping the water bath will result in a dry, cracked, and unevenly baked cheesecake. It provides moisture and even heat.
- Opening the Oven Door Too Early Resist the urge to peek! Opening the oven door frequently can cause temperature fluctuations, leading to cracks or a sunken cake.
- Rushing the Cooling Process Taking the cheesecake out of the oven too soon or cooling it too quickly will almost certainly lead to cracks and a less stable texture.
- Greasy Equipment for Meringue Any trace of fat on your mixing bowl or whisk will prevent your egg whites from whipping to stiff peaks.
Storage and Meal Prep
Once you’ve made your beautiful Japanese cheesecake, proper storage ensures it stays fresh and delicious:
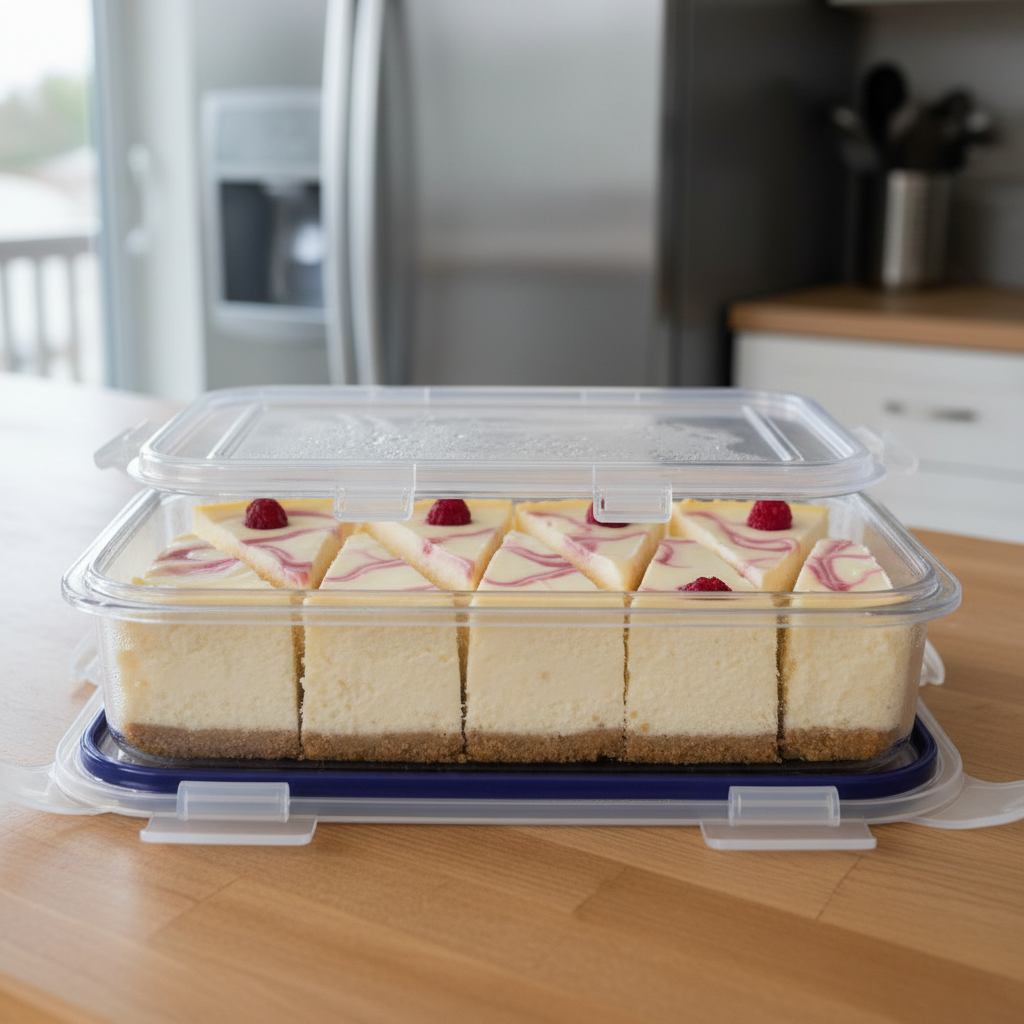
- Refrigeration This cheesecake must be stored in the refrigerator. Cover it loosely with plastic wrap or place it in an airtight container. It will stay fresh for up to 3-4 days.
- Do Not Store at Room Temperature Due to its delicate nature and dairy content, it should not be left at room temperature for extended periods.
- Meal Prep While you can’t really ‘meal prep’ a cheesecake in the traditional sense, you can certainly bake it a day or two in advance of when you plan to serve it. In fact, many find the flavor and texture improve after a day in the fridge, allowing all the flavors to meld beautifully.
Make-Ahead and Freezer Notes
This cheesecake is a fantastic make-ahead dessert, perfect for entertaining or enjoying throughout the week:
- Make-Ahead You can bake the entire cheesecake 1-2 days before you plan to serve it. Simply bake, cool completely, and then refrigerate. This allows the flavors to deepen and the texture to fully set. Always serve chilled.
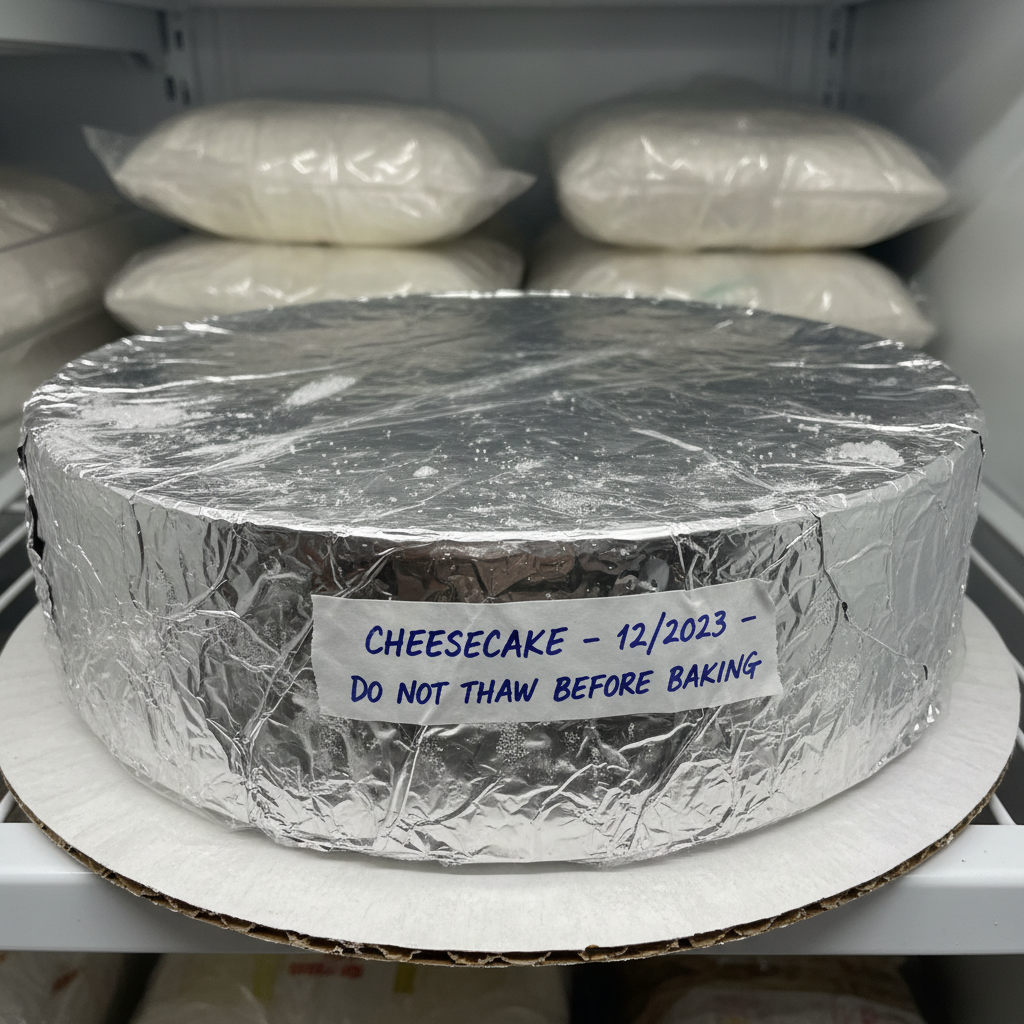
- Freezing Yes, you can freeze Japanese cheesecake! Once completely cooled and chilled, wrap the entire cheesecake (or individual slices) tightly in plastic wrap, then again in aluminum foil. Place it in an airtight freezer-safe container. It can be frozen for up to 1 month.
- Thawing To thaw, transfer the frozen cheesecake to the refrigerator overnight. Do not thaw at room temperature, as this can affect its delicate texture. Enjoy chilled once thawed.
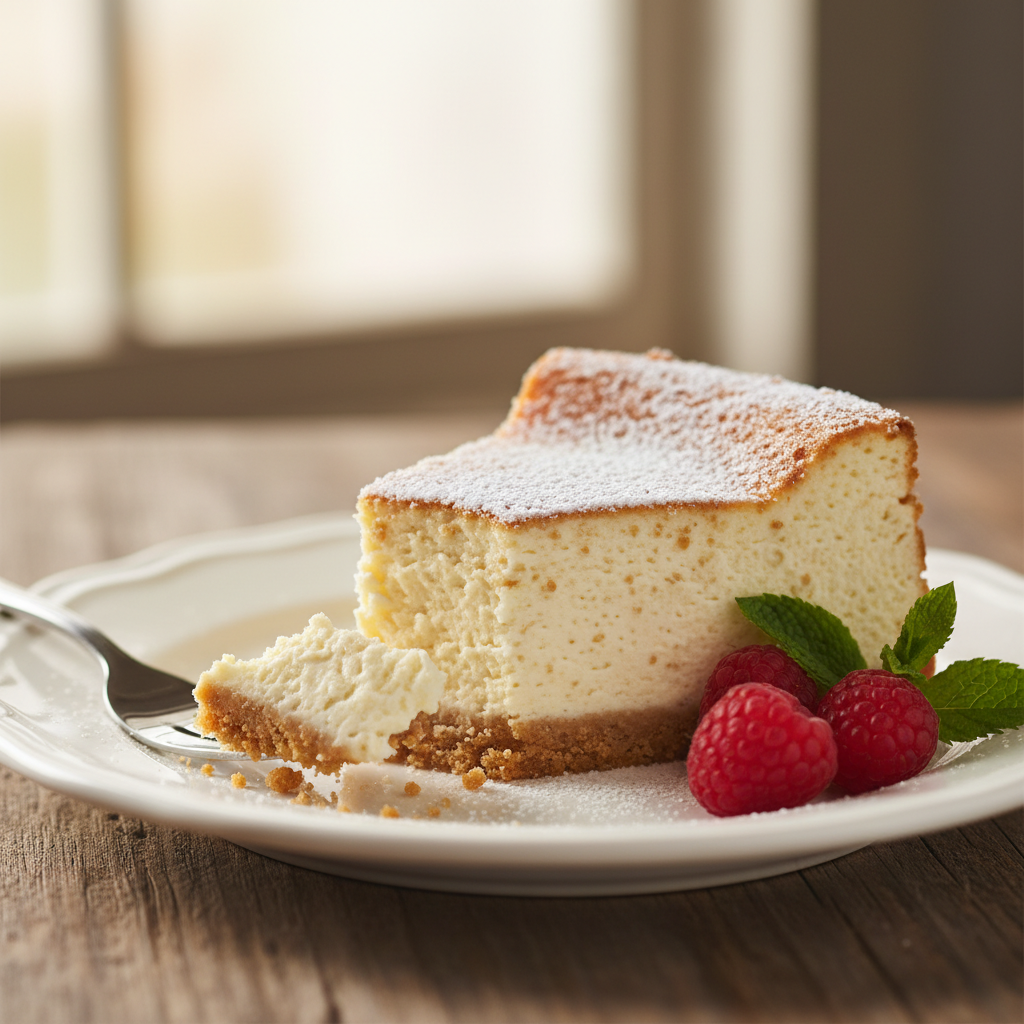
Serving Suggestions
Japanese cheesecake is wonderful on its own, but a few simple additions can elevate the experience:
- Fresh Berries A medley of fresh strawberries, blueberries, raspberries, or blackberries adds a lovely tart contrast and vibrant color.
- Dusting of Powdered Sugar A simple dusting before serving enhances its elegant appearance.
- Light Whipped Cream A dollop of unsweetened or lightly sweetened whipped cream complements its lightness beautifully.
- Fruit Coulis or Sauce A raspberry, strawberry, or passion fruit coulis drizzled over the top adds a burst of flavor.
- Matcha Dusting For an extra Japanese touch, lightly dust with matcha powder.
- Citrus Zest A sprinkle of fresh lemon or orange zest can brighten the flavor profile.