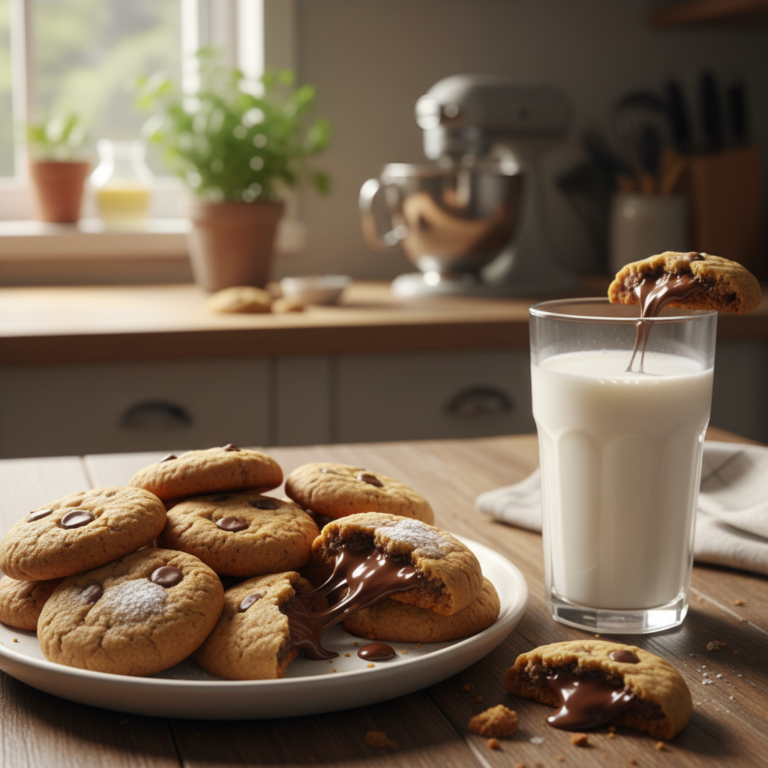
There’s something absolutely magical about dunking a crispy, golden biscotti into your morning coffee and watching it soften just enough to release all those wonderful flavors. These Italian twice-baked cookies are not just a treat, they’re an experience that transforms your ordinary coffee break into something special. Whether you’re enjoying a quiet moment alone or entertaining guests, homemade biscotti brings a touch of Italian tradition right into your kitchen.
Today, I’m sharing my foolproof biscotti recipe that delivers that perfect crunch every single time. Don’t worry if you’ve never made biscotti before. This recipe is surprisingly simple, and I’ll walk you through every step. The best part? You can customize these cookies with your favorite nuts, dried fruits, or chocolate chips. Once you make your first batch, you’ll wonder why you ever bought store-bought biscotti!
History / Background
Biscotti has a fascinating history that dates back to ancient Rome. The name “biscotti” actually comes from the Latin words “bis” (twice) and “coctus” (baked), which perfectly describes how these cookies are made. Roman soldiers would carry biscotti on long journeys because the twice-baking process removed moisture, making them last for weeks without spoiling.
The biscotti we know and love today originated in the Tuscan city of Prato during the Renaissance period. These “Cantucci di Prato” were traditionally flavored with almonds and enjoyed with Vin Santo, a sweet Italian dessert wine. Bakers discovered that baking the dough twice created an incredibly crunchy texture that was perfect for dipping.
Over the centuries, biscotti traveled throughout Italy and eventually around the world. Italian immigrants brought their beloved recipes to America, where biscotti became a coffee shop staple in the 1990s. Today, you’ll find countless variations featuring everything from chocolate and hazelnuts to cranberries and pistachios. But the traditional twice-baking method remains unchanged, creating that signature crunch that makes biscotti so irresistible.
Why You’ll Love This Recipe
- Incredibly Easy: Despite looking fancy, biscotti requires just one bowl and simple mixing. No special skills needed!
- Perfect Crunch: The twice-baking method creates that ideal crispy texture that holds up beautifully when dunked in coffee or tea.
- Long Shelf Life: These cookies stay fresh for weeks when stored properly, making them perfect for meal prep or gift-giving.
- Customizable: You can add any mix-ins you love, from classic almonds to chocolate chips, dried cranberries, or orange zest.
- Less Sugar Than Most Cookies: Biscotti are only lightly sweetened, making them a sophisticated treat that won’t overwhelm your taste buds.
- Coffee Shop Quality at Home: Save money and enjoy bakery-quality biscotti whenever you want, fresh from your own oven.
- Impressive Gift: Wrapped in a pretty bag or jar, homemade biscotti makes a thoughtful and delicious gift that everyone appreciates.
- Make-Ahead Friendly: You can prepare the dough in advance or bake and store these cookies for when cravings strike.
Ingredient Notes
All-Purpose Flour: This is your base ingredient. Make sure to measure it correctly by spooning it into your measuring cup and leveling it off. Don’t pack it down, or your biscotti will be too dense.
Granulated Sugar: Provides just the right amount of sweetness without making the cookies too sugary. You can reduce this slightly if you prefer less sweet biscotti.
Baking Powder: This is your leavening agent that helps the biscotti rise slightly and gives them a lighter texture. Make sure yours is fresh for the best results.
Salt: Just a pinch enhances all the other flavors. Don’t skip it, even though it seems like a small amount.
Eggs: These bind everything together and give the dough structure. Use large eggs at room temperature for the best results. They’ll mix more easily into the dough.
Vanilla Extract: Pure vanilla extract adds wonderful flavor depth. Avoid imitation vanilla if possible, the real stuff makes a noticeable difference.
Almond Extract (optional): A small amount adds authentic Italian flavor. It pairs beautifully with almonds, but you can skip it if you don’t have any.
Whole Almonds: Traditional biscotti use whole almonds, but you can chop them if you prefer smaller pieces. Toasting them first enhances their flavor beautifully.
Butter (optional): Some recipes include a small amount of melted butter for richness. This is optional but adds a lovely tender quality to the cookies.
Equipment Needed
You don’t need any fancy equipment to make perfect biscotti. Here’s what you’ll need:
Large Mixing Bowl: For combining all your ingredients. Glass or stainless steel works great.
Whisk and Wooden Spoon: A whisk for the wet ingredients and a sturdy wooden spoon for mixing in the flour and nuts.
Measuring Cups and Spoons: Accurate measurements are important for biscotti, so have both dry and liquid measuring tools ready.
Baking Sheet: A standard half-sheet pan works perfectly. You’ll use it twice during the baking process.
Parchment Paper: This prevents sticking and makes cleanup incredibly easy. Don’t skip this step!
Sharp Serrated Knife: Essential for slicing the baked logs. A serrated bread knife works beautifully and prevents crumbling.
Wire Cooling Rack: Allows air to circulate around the biscotti as they cool completely.
Pastry Brush (optional): Handy if you want to brush the logs with an egg wash for extra shine.
Full Recipe Card
Classic Italian Biscotti
Prep Time: 20 minutes
First Bake: 30 minutes
Second Bake: 25 minutes
Total Time: 1 hour 15 minutes
Yield: About 24 biscotti
Difficulty: Easy
Ingredients
- 2 cups (250g) all-purpose flour
- 1 cup (200g) granulated sugar
- 1 teaspoon baking powder
- ¼ teaspoon salt
- 3 large eggs, room temperature
- 1 teaspoon vanilla extract
- ½ teaspoon almond extract (optional)
- 1 cup (140g) whole almonds, lightly toasted
- 2 tablespoons melted butter (optional, for richer texture)
Instructions
Step 1: Prepare Your Oven and Pan
Preheat your oven to 350°F (175°C). Line a large baking sheet with parchment paper and set it aside. If you’re using almonds, spread them on a separate baking sheet and toast them in the preheating oven for about 5 minutes until fragrant. Let them cool slightly.
Step 2: Mix the Dry Ingredients
In your large mixing bowl, whisk together the flour, sugar, baking powder, and salt until everything is evenly combined. This ensures that the baking powder is distributed throughout the dough.
Step 3: Combine the Wet Ingredients
In a separate medium bowl, beat the eggs with a fork or whisk until they’re well blended. Add the vanilla extract and almond extract if using. If you’re adding melted butter, whisk it in now and make sure everything is smooth.
Step 4: Bring the Dough Together
Pour the egg mixture into the flour mixture. Using a wooden spoon or sturdy spatula, stir everything together until a sticky dough forms. It will seem quite wet at first, but that’s normal. Keep mixing until no dry flour remains.
Step 5: Add the Almonds
Fold in the toasted almonds, distributing them evenly throughout the dough. The dough will be sticky and slightly difficult to work with, but this is exactly what you want.
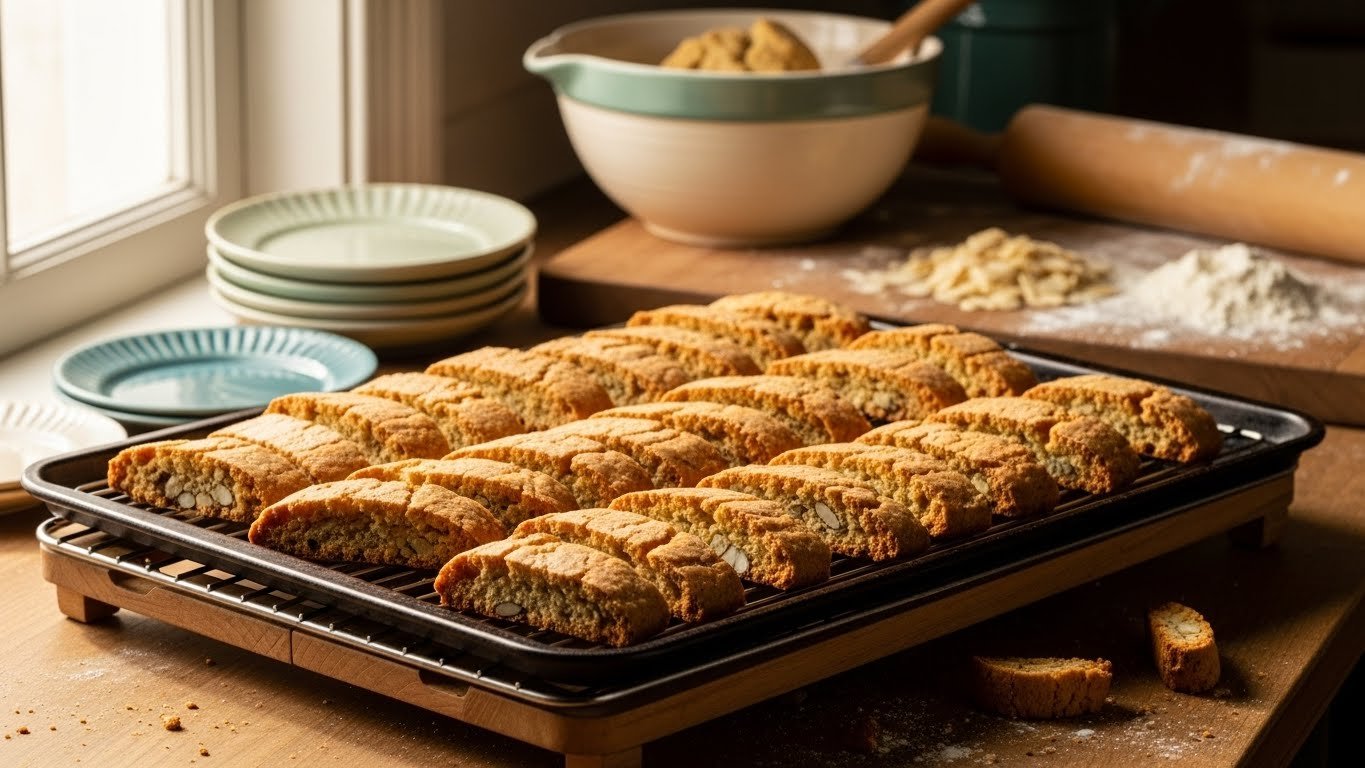
Step 6: Shape the Logs
Turn the dough out onto your prepared baking sheet. With lightly floured hands, divide the dough in half. Shape each half into a log about 12 inches long and 2 inches wide. The logs should be about 1 inch tall. Don’t worry if they’re not perfect, they’ll spread and even out during baking.
Step 7: First Bake
Place the baking sheet in your preheated oven and bake for 28 to 32 minutes. The logs should be firm to the touch, lightly golden on top, and slightly cracked. A toothpick inserted into the center should come out clean. Remove from the oven and let the logs cool on the baking sheet for about 15 minutes. Keep the oven on!
Step 8: Slice the Biscotti
Once the logs are cool enough to handle, transfer them to a cutting board. Using a sharp serrated knife, cut each log diagonally into slices about ½ to ¾ inch thick. Use a gentle sawing motion rather than pressing straight down to prevent crumbling.
Step 9: Second Bake
Arrange the biscotti slices cut-side down on the same baking sheet (you can use fresh parchment if the old one is too dark). Return them to the oven and bake for 12 minutes. Flip each biscotti over and bake for another 12 to 15 minutes until both sides are golden and crispy.
Step 10: Cool Completely
Transfer the biscotti to a wire cooling rack and let them cool completely. They’ll continue to crisp up as they cool. This is the hardest part because they smell amazing, but patience is key for that perfect crunch!
Recipe Notes
- The dough will be sticky. This is normal! Lightly flour your hands when shaping the logs, but don’t add extra flour to the dough itself.
- Don’t skip the cooling time after the first bake. If you slice the logs while they’re too hot, they’ll crumble.
- For softer biscotti, reduce the second baking time by 5 minutes. For extra-crunchy biscotti, add 5 more minutes.
- If your almonds are salted, reduce the salt in the recipe to just a pinch.
- An egg wash (one beaten egg brushed on before the first bake) will give you a shiny, professional-looking finish.
Tips & Variations
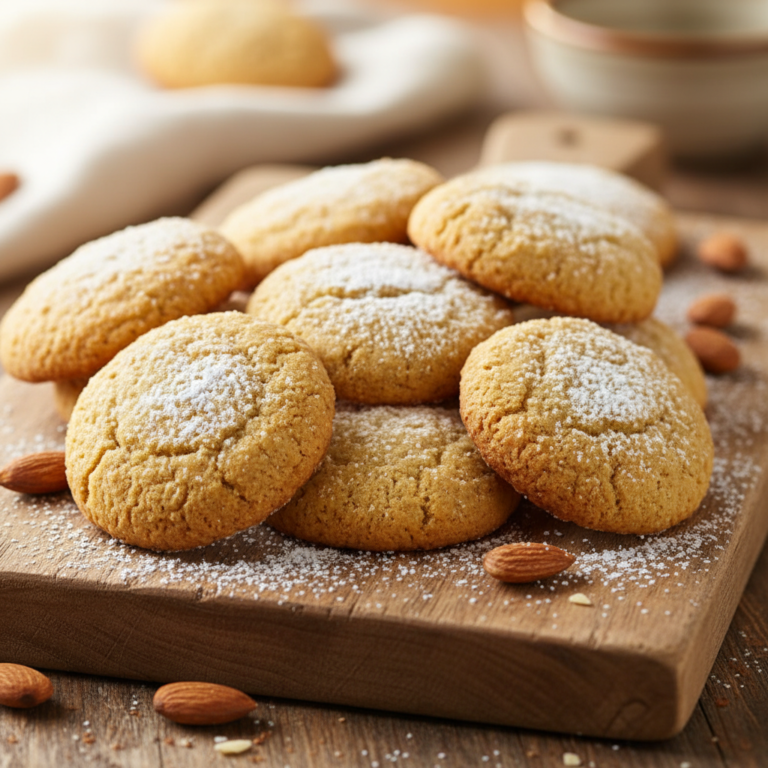
Flavor Variations: The beauty of biscotti is how easily you can customize them. Try adding the zest of one orange or lemon for a citrusy twist. Replace the almonds with hazelnuts, pistachios, or walnuts. Add ½ cup of dried cranberries, cherries, or chopped dried apricots for a fruity version. For chocolate lovers, fold in ½ cup of mini chocolate chips or drizzle the cooled biscotti with melted dark chocolate.
Anise Biscotti: For traditional Italian flavor, replace the almond extract with 1 teaspoon of anise extract and add 1 tablespoon of whole anise seeds to the dough. This creates that classic licorice flavor many authentic biscotti recipes feature.
Double Chocolate Biscotti: Replace ¼ cup of the flour with unsweetened cocoa powder and add ½ cup of chocolate chips. These are absolutely divine dunked in hot chocolate!
Slice Thickness Matters: Thinner slices (about ½ inch) will be crunchier and more delicate. Thicker slices (about ¾ inch) will have a slightly softer center with crunchy edges. Experiment to find your perfect texture.
Toast Your Nuts: Always toast your nuts before adding them to the dough. This deepens their flavor and makes your biscotti taste even better. Just watch them carefully so they don’t burn.
Adjust Sweetness: If you prefer less sweet biscotti, you can reduce the sugar to ¾ cup. They’ll still bake up beautifully but will have a more subtle sweetness that lets the nut flavor shine.
Pro Chef Tips
Use Fresh Baking Powder: Old baking powder won’t give you the lift you need. Test yours by mixing a little with hot water. If it fizzes vigorously, it’s good to use.
Room Temperature Eggs: Eggs at room temperature mix more easily into the dough and create a better texture. If you forgot to take them out, place them in a bowl of warm water for 5 minutes.
The Sawing Motion: When slicing your biscotti after the first bake, use a gentle back-and-forth sawing motion with your serrated knife. If you press straight down, the logs are more likely to crumble or crack in unwanted places.
Even Oven Temperature: Make sure your oven is fully preheated before baking. An oven thermometer is a great investment if you bake often, as many home ovens run hot or cold.
Don’t Overbake the Logs: The logs should be firm but not rock hard after the first bake. If they’re overbaked, they’ll be difficult to slice and might crumble. They should still have a tiny bit of give when you press the top gently.
Flip at the Right Time: When doing the second bake, flip the biscotti halfway through. This ensures both sides get evenly golden and crispy. Set a timer so you don’t forget!
Cool on the Sheet First: After the second bake, let the biscotti sit on the baking sheet for 5 minutes before moving them to the cooling rack. They’re still a bit fragile when hot, and this prevents breaking.
Storage Is Key: Once completely cooled, store biscotti in an airtight container with a piece of parchment paper between layers. This keeps them crispy for weeks.
Common Mistakes to Avoid
Adding Too Much Flour: The dough should be sticky. Don’t be tempted to add extra flour just because it’s difficult to handle. Extra flour will make your biscotti dry and dense instead of perfectly crunchy.
Cutting While Too Hot: I know you’re excited, but cutting the logs before they’ve cooled for at least 15 minutes will result in crumbly, broken biscotti. The cooling time allows the structure to set properly.
Uneven Slicing: Try to keep your slices uniform in thickness. Thinner slices will bake faster and might burn before thicker slices are done. Aim for consistency.
Skipping the Second Bake: Some people cut the logs and think they’re done. The second bake is essential! That’s what creates the signature biscotti crunch and allows them to be dunkable without falling apart.
Storing While Warm: Always let biscotti cool completely before storing. Any residual warmth will create condensation in your container, which makes the cookies soft and potentially moldy.
Not Toasting Nuts: Raw nuts don’t have nearly as much flavor as toasted nuts. Those few extra minutes of toasting make a huge difference in the final taste of your biscotti.
Overcrowding the Pan: Make sure your logs have plenty of space between them on the baking sheet. They’ll spread during baking, and if they’re too close, they might merge together.
Using Dull Knives: A dull knife will compress and crumble the logs instead of slicing cleanly through them. Keep your serrated knife sharp, or use a very sharp chef’s knife with a careful sawing motion.
Storage & Meal Prep
Room Temperature Storage: Once your biscotti are completely cool, store them in an airtight container or zip-top bag at room temperature. They’ll stay perfectly crispy for up to 3 weeks. I like to place a sheet of parchment paper between layers to keep them from sticking together.
Cookie Jar Perfection: Biscotti are ideal cookie jar cookies because they actually improve over the first few days. The flavors meld together, and they maintain their wonderful crunch without any special treatment.
Keeping Them Crispy: The key to long-lasting crunch is making sure no moisture gets into your container. Always seal your container tightly, and avoid storing biscotti in humid areas of your kitchen.
Portion Control: Since biscotti last so long, you can bake a big batch and have them ready whenever you want a treat. Just grab one or two for your coffee break without having to bake fresh cookies every week.
Gift-Giving Storage: If you’re giving biscotti as gifts, place them in cellophane bags tied with ribbon, or stack them in decorative jars. They’ll stay fresh for the recipient for weeks, making them a practical and delicious gift.
Make-Ahead & Freezer Notes
Freezing Baked Biscotti: Fully baked and cooled biscotti freeze beautifully for up to 3 months. Place them in a freezer-safe container or bag with parchment paper between layers. Thaw at room temperature for about 30 minutes before serving. They’ll taste freshly baked!
Freezing Shaped Logs: You can freeze the shaped logs after forming them but before the first bake. Wrap them tightly in plastic wrap, then place in a freezer bag. When you’re ready to bake, let them thaw in the refrigerator overnight, then bake as directed. This is perfect for having fresh biscotti whenever you want without all the prep work.
Freezing the Dough: The mixed dough (before shaping) can be frozen for up to 2 months. Thaw it in the refrigerator overnight, then shape and bake as normal. The texture might be slightly different, but they’ll still be delicious.
Refrigerating Dough: If you want to prep ahead but plan to bake within a few days, you can refrigerate the shaped logs for up to 2 days before the first bake. Cover them tightly with plastic wrap. Cold dough is actually easier to work with and might hold its shape even better during baking.
Refresh Frozen Biscotti: If your frozen biscotti seem a bit soft after thawing, pop them in a 300°F oven for about 5 minutes to re-crisp them. Let them cool completely again before serving.
Batch Baking: Consider making a double or triple batch when you bake. Freeze most of them, and keep one batch in your cookie jar. This way, you’ll always have biscotti on hand for unexpected guests or when you need a quick gift.
Serving Suggestions
Classic Coffee Pairing: The traditional way to enjoy biscotti is dunked in a hot cup of coffee. The cookies soften just enough to absorb the coffee flavor while still maintaining their structure. Espresso, cappuccino, or regular drip coffee all work beautifully. Try dunking for just 2 to 3 seconds for the perfect bite.
Tea Time Treat: Biscotti are equally wonderful with tea. Earl Grey, English Breakfast, or even herbal teas like chamomile pair nicely. The less-sweet nature of biscotti makes them perfect for afternoon tea.
Dessert Wine Pairing: Honor the Italian tradition by serving biscotti with Vin Santo, a sweet Italian dessert wine. Port, sherry, or Moscato also make excellent pairings for an elegant after-dinner treat.
Hot Chocolate Dunking: During winter months, serve chocolate biscotti with hot chocolate for an extra indulgent experience. Kids especially love this combination!
Gelato or Ice Cream: Serve biscotti alongside a scoop of vanilla gelato, pistachio ice cream, or coffee ice cream. The temperature and texture contrast is absolutely delightful.
Breakfast Basket: Include biscotti in a breakfast basket with fresh fruit, yogurt, and coffee for a lovely brunch spread. They add an elegant touch to any morning meal.
Cheese Board Addition: Surprisingly, biscotti work wonderfully on a cheese board! Serve them with soft cheeses like mascarpone or ricotta, along with fresh fruit and honey.
Gift Presentation: Package biscotti in a clear cellophane bag tied with ribbon, or arrange them standing up in a tall jar. Attach a tag with serving suggestions and your recipe if you’d like. They make such thoughtful gifts for teachers, neighbors, or anyone who appreciates homemade treats.
FAQs
Why are my biscotti too hard?
If your biscotti are harder than you’d like, you probably baked them too long during the second bake. Remember, they continue to crisp up as they cool, so they should still have a tiny bit of give when you remove them from the oven. Next time, reduce the second baking time by 3 to 5 minutes.
Can I make biscotti without nuts?
Absolutely! You can make nut-free biscotti by simply omitting the nuts and replacing them with seeds like pepitas or sunflower seeds, or adding extra chocolate chips, dried fruit, or even leaving them plain. The dough might be slightly wetter without the nuts, so you may need to add 2 tablespoons of flour.
My logs spread too much during baking. What happened?
This usually means the dough was too warm or too wet. Make sure you’re measuring flour correctly (spoon and level, don’t scoop). If your kitchen is very warm, you can refrigerate the shaped logs for 30 minutes before baking to help them hold their shape better.
How do I prevent my biscotti from crumbling when I slice them?
Use a sharp serrated knife and a gentle sawing motion rather than pressing down. Make sure the logs have cooled for at least 15 minutes after the first bake. If they’re still crumbly, let them cool a bit longer. Also, don’t overbake the logs in the first bake, they should be firm but not rock hard.
Can I use other extracts instead of vanilla and almond?
Yes! Try orange extract, lemon extract, anise extract, or even maple extract. Each will give your biscotti a unique flavor profile. Start with ½ teaspoon of any extract and adjust to taste in future batches.
Are biscotti supposed to be very hard?
Traditional biscotti are quite hard and crunchy, designed specifically for dunking. However, you can make them slightly softer by reducing the second baking time or by adding a tablespoon of butter or oil to the dough. They won’t be soft cookies, but they’ll be less tooth-breaking if that’s your preference.
Can I make smaller or larger biscotti?
Definitely! For smaller biscotti, shape your logs narrower and shorter, then slice them about ½ inch thick. They’ll bake faster, so reduce your baking times accordingly. For larger biscotti, make wider logs and slice them thicker, adding a few minutes to both baking times.
My biscotti have a cake-like texture. What went wrong?
This usually happens when too much liquid is added or if the biscotti aren’t baked long enough during the second bake. Make sure you’re measuring ingredients accurately and baking until the slices are golden and dry to the touch. The second bake is crucial for removing moisture and creating that signature crunch.
Conclusion
Congratulations! You now have everything you need to make absolutely perfect Italian biscotti at home. These twice-baked cookies are so much more than just a treat, they’re a delicious tradition that brings a little bit of Italy into your everyday life. The wonderful thing about biscotti is that once you master this basic recipe, you can experiment endlessly with different flavors and add-ins to create your own signature variety.
Don’t be intimidated by the twice-baking process. I promise it’s much easier than it sounds, and the results are so worth it. That satisfying crunch when you bite into a perfectly baked biscotti, the way it holds together when dunked in your morning coffee, and the amazing flavor that develops over a few days of storage, these are the simple pleasures that make homemade baking so rewarding.
Remember, your first batch might not be absolutely perfect, and that’s completely okay! Even slightly imperfect biscotti taste wonderful. With each batch you make, you’ll get better at shaping the logs, slicing evenly, and knowing exactly when they’re done baking. Before you know it, you’ll be that friend who always brings the best homemade treats to every gathering.
So grab your apron, preheat that oven, and get ready to fill your kitchen with the most amazing aroma. Your coffee cup is waiting for its perfect crunchy companion. Happy baking, and enjoy every single crispy, delicious bite!