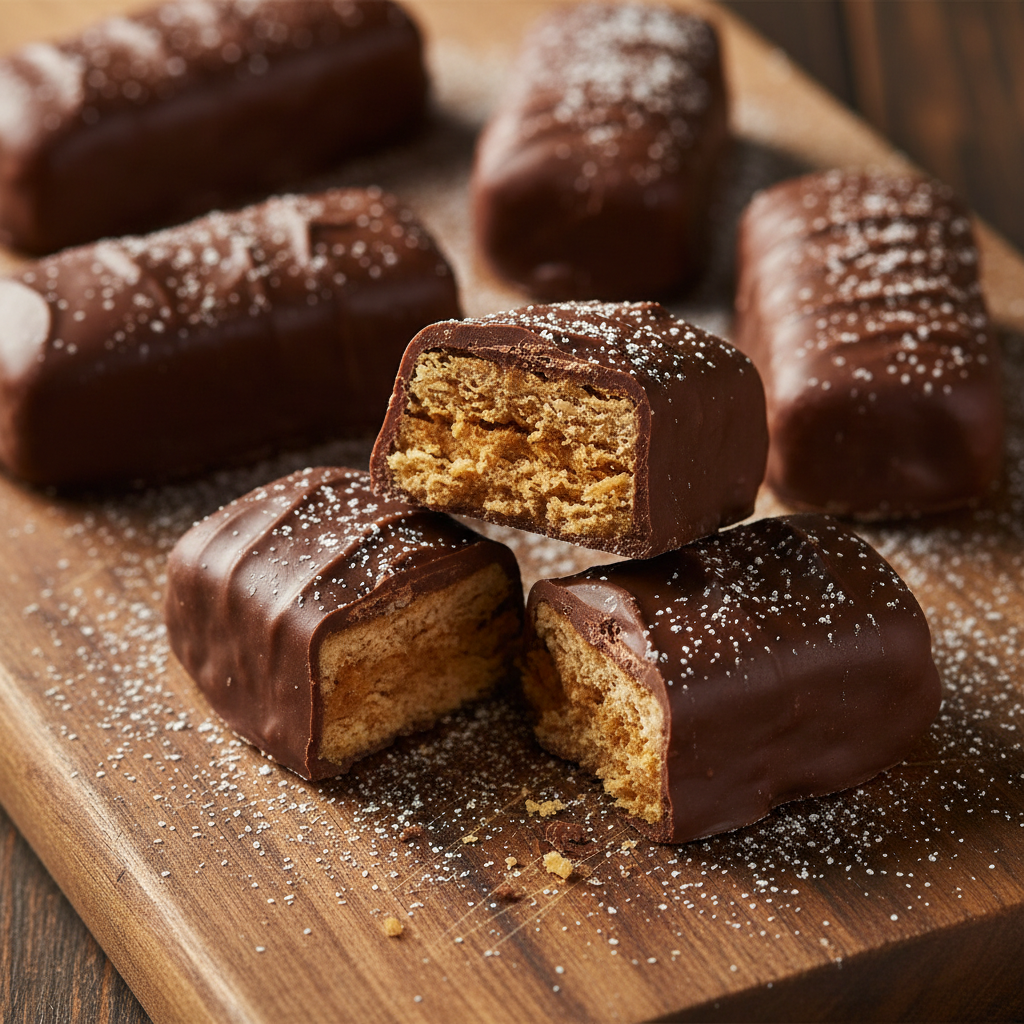
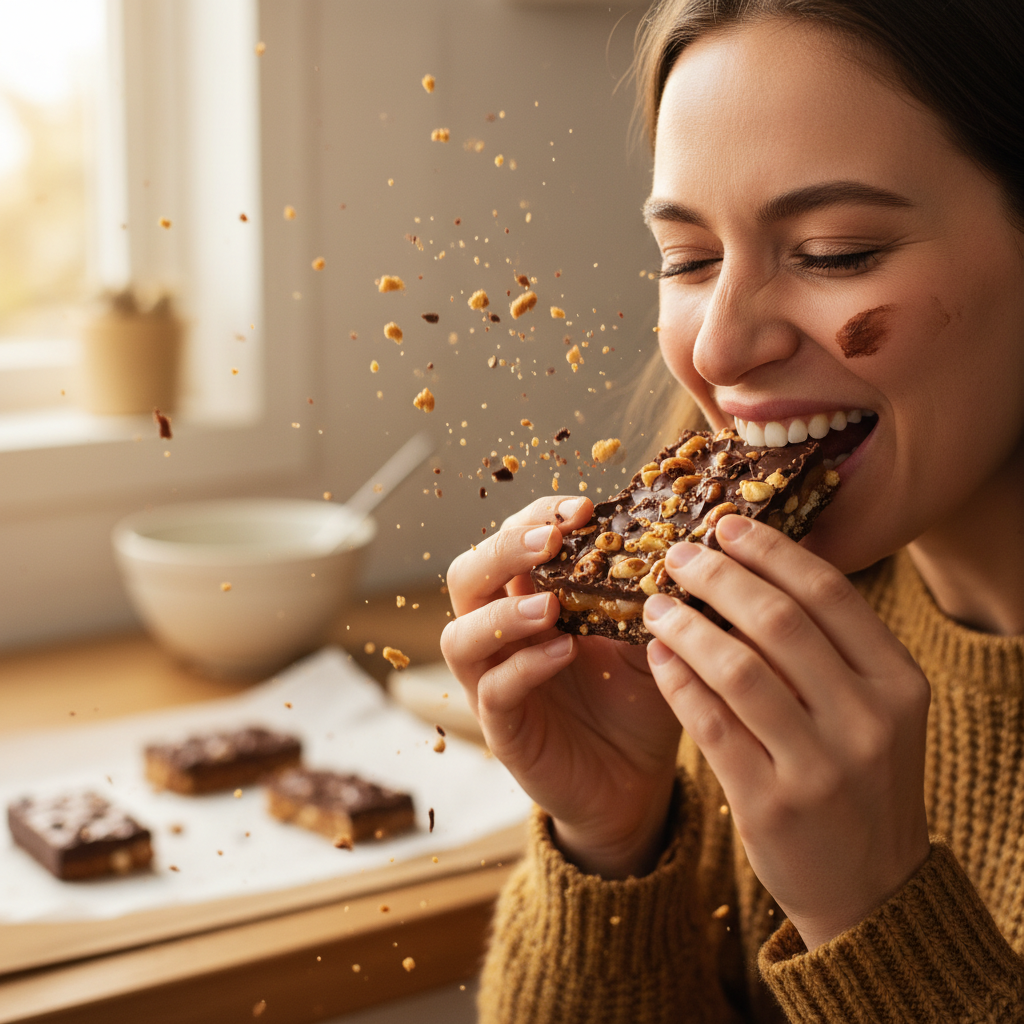
Have you ever dreamed of recreating your favorite candy bar right in your own kitchen? Well, get ready to make that dream a delicious reality! Today, we’re diving into the wonderful world of homemade candy with a recipe for everyone’s beloved crispy, peanut buttery delight – the Butterfinger candy bar. Forget store-bought; once you taste these homemade marvels, you’ll be hooked on the fresh flavors and incredible texture.
This recipe is designed for home cooks of all skill levels. We’ll walk you through each step with clear, friendly instructions, ensuring you achieve that perfect crunchy, flaky center enrobed in smooth chocolate. Get ready to impress your friends, delight your family, and perhaps even discover a new favorite kitchen project!
A Sweet History – The Story Behind Butterfinger

The Butterfinger candy bar has a rich and fascinating history, much like its flavor profile. First introduced by the Curtiss Candy Company in 1923, it quickly became a household name. The name itself was chosen through a public contest, reflecting its unique characteristic – a tendency to crumble and flake, much like a person with “butterfingers” might drop things! Over the decades, this iconic candy, known for its distinct crisp, peanut-butter flavored core covered in chocolate, has seen various owners, including Nabisco and Nestlé, and is now produced by Ferrero. Its enduring popularity is a testament to that irresistible combination of sweet, salty, crunchy, and smooth. Now, you get to be part of that sweet legacy by crafting your very own version!
Why You’ll Adore This Homemade Treat
- Unbeatable Freshness: Nothing beats the taste of freshly made candy.
- Customizable Goodness: Adjust sweetness or chocolate type to your liking.
- Kitchen Adventure: A fun and rewarding project for any home baker.
- Impressive Results: Your friends and family will be amazed by your skills.
- No Mystery Ingredients: You control exactly what goes into your treats.
- That Iconic Crunch: Perfectly replicates the flaky, crispy texture you love.
Gather Your Ingredients – What You’ll Need
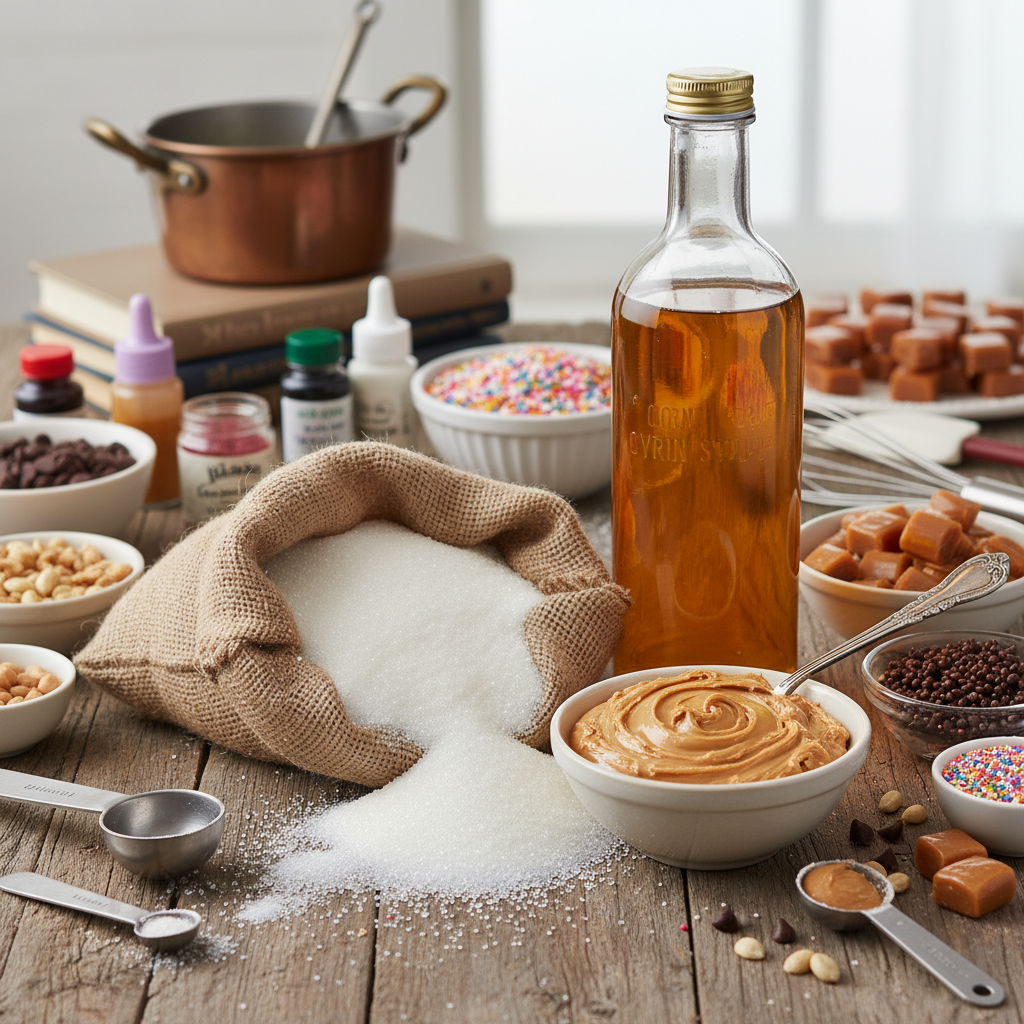
Making homemade Butterfinger candy bars requires a few key ingredients, most of which you probably already have in your pantry. The magic happens when these simple components come together to create something truly special. Quality ingredients make a difference, especially when it comes to flavor and texture.
Key Ingredient Notes
- Granulated Sugar: This forms the base of our candy, providing sweetness and structure.
- Light Corn Syrup: Crucial for preventing crystallization and giving the candy its smooth, chewy texture before it hardens. Don’t substitute this with high-fructose corn syrup.
- Water: Helps dissolve the sugar and corn syrup to start the cooking process.
- Creamy Peanut Butter: Use a good quality, creamy peanut butter. Avoid natural peanut butter that separates, as it can affect the texture.
- Baking Soda: This is the secret ingredient! It reacts with the hot sugar mixture to create tiny air bubbles, giving the candy its signature flaky, aerated texture.
- Vanilla Extract: Enhances the overall flavor profile.
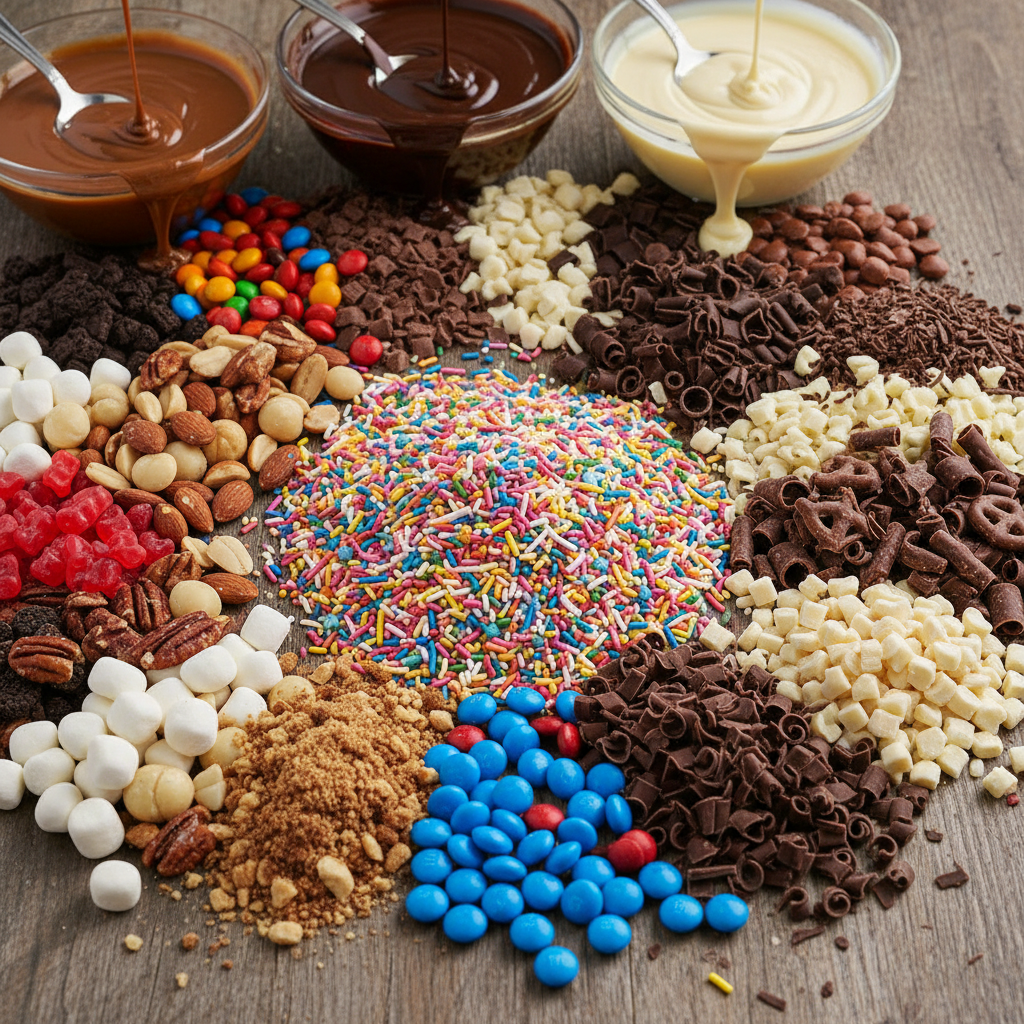
- Chocolate Chips or Melting Wafers: For the coating. Milk chocolate is traditional, but semi-sweet or dark chocolate works beautifully too. Melting wafers (like Ghirardelli or Wilton) are often easier to temper and provide a smoother finish.
- Vegetable Oil or Coconut Oil: A small amount added to the chocolate helps create a smoother, more manageable coating.
Essential Tools – Equipment for Success
Having the right tools makes candy making much easier and more successful. Don’t worry, you won’t need anything too fancy, but a few specific items are highly recommended.
- Heavy-Bottomed Saucepan: Essential for even heat distribution and preventing burning.
- Candy Thermometer: A non-negotiable! Accurate temperature is critical for candy making.
- Parchment Paper or Silicone Mat: For lining your baking sheet, preventing sticking.
- 9×13 Inch Baking Dish or Sheet Pan: To shape your candy.
- Rubber Spatula or Wooden Spoon: For mixing.
- Whisk: For combining ingredients.
- Double Boiler or Microwave-Safe Bowl: For melting chocolate.
- Fork or Dipping Tools: For coating the candy in chocolate.
The Ultimate Homemade Butterfinger Recipe Card
Here it is, the moment you’ve been waiting for! Follow these instructions carefully, and you’ll be enjoying your own homemade Butterfinger bars in no time.
Ingredients
- 2 cups granulated sugar
- 1/2 cup light corn syrup
- 1/4 cup water
- 1 cup creamy peanut butter
- 1 tablespoon baking soda
- 1 teaspoon vanilla extract
- 2 cups chocolate chips or melting wafers
- 1 teaspoon vegetable oil or coconut oil (optional, for chocolate coating)
Instructions
- Prepare Your Pan: Line a 9×13 inch baking dish or sheet pan with parchment paper, leaving an overhang on the sides for easy lifting. Lightly grease the parchment paper.
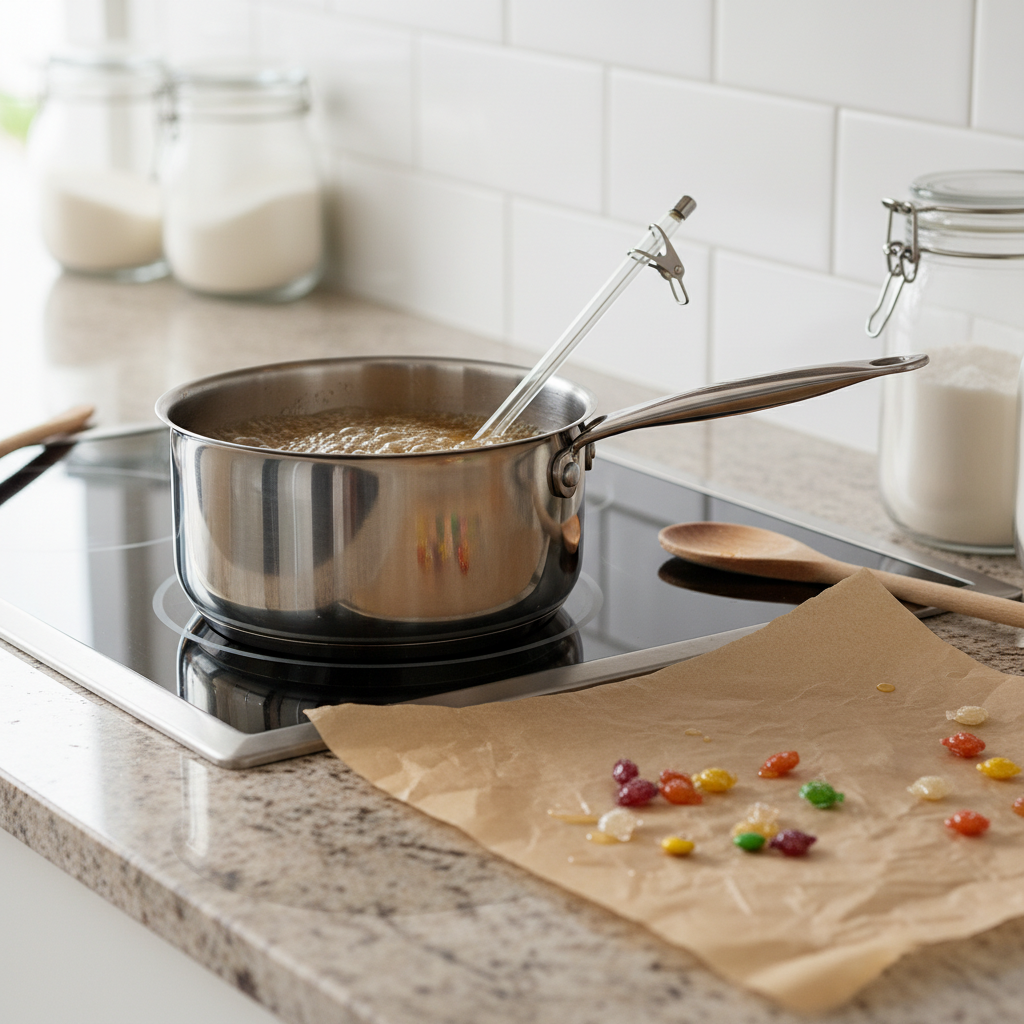
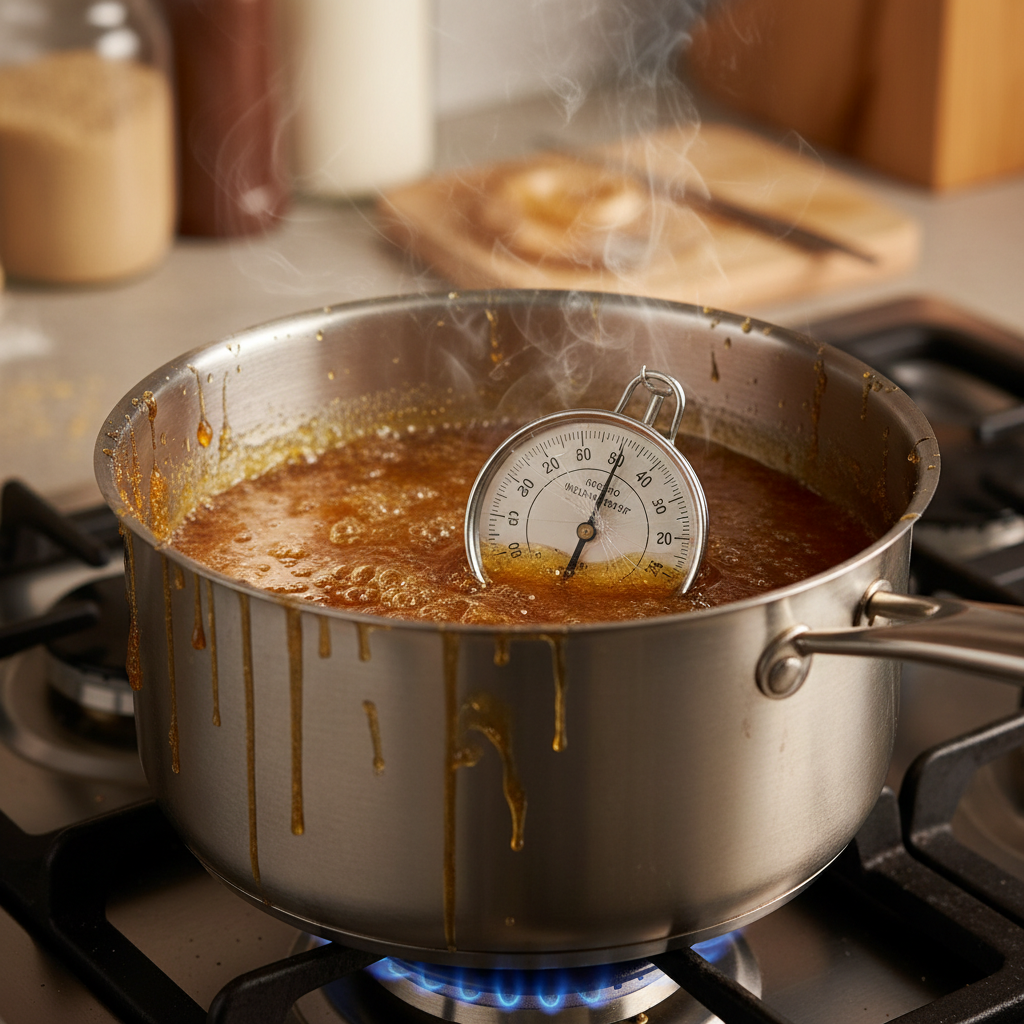
- Make the Sugar Syrup: In a heavy-bottomed saucepan, combine the granulated sugar, light corn syrup, and water. Stir gently over medium heat until the sugar dissolves.
- Cook to Hard Crack: Insert a candy thermometer. Continue to cook, without stirring, until the mixture reaches 300°F (149°C) – the hard crack stage. This can take 10-15 minutes.
- Add Peanut Butter and Vanilla: Remove the saucepan from the heat. Quickly stir in the peanut butter and vanilla extract until well combined. The mixture will be thick and bubbly.
- Incorporate Baking Soda: Immediately add the baking soda and stir vigorously for about 30 seconds. The mixture will foam up and lighten in color, creating the signature aerated texture. Work quickly!
- Pour and Cool: Pour the hot candy mixture onto your prepared baking dish. Spread it evenly using an offset spatula or the back of a greased spoon. Do not press down too hard; let it maintain its airy texture. Let it cool completely at room temperature for at least 1-2 hours, or until firm.
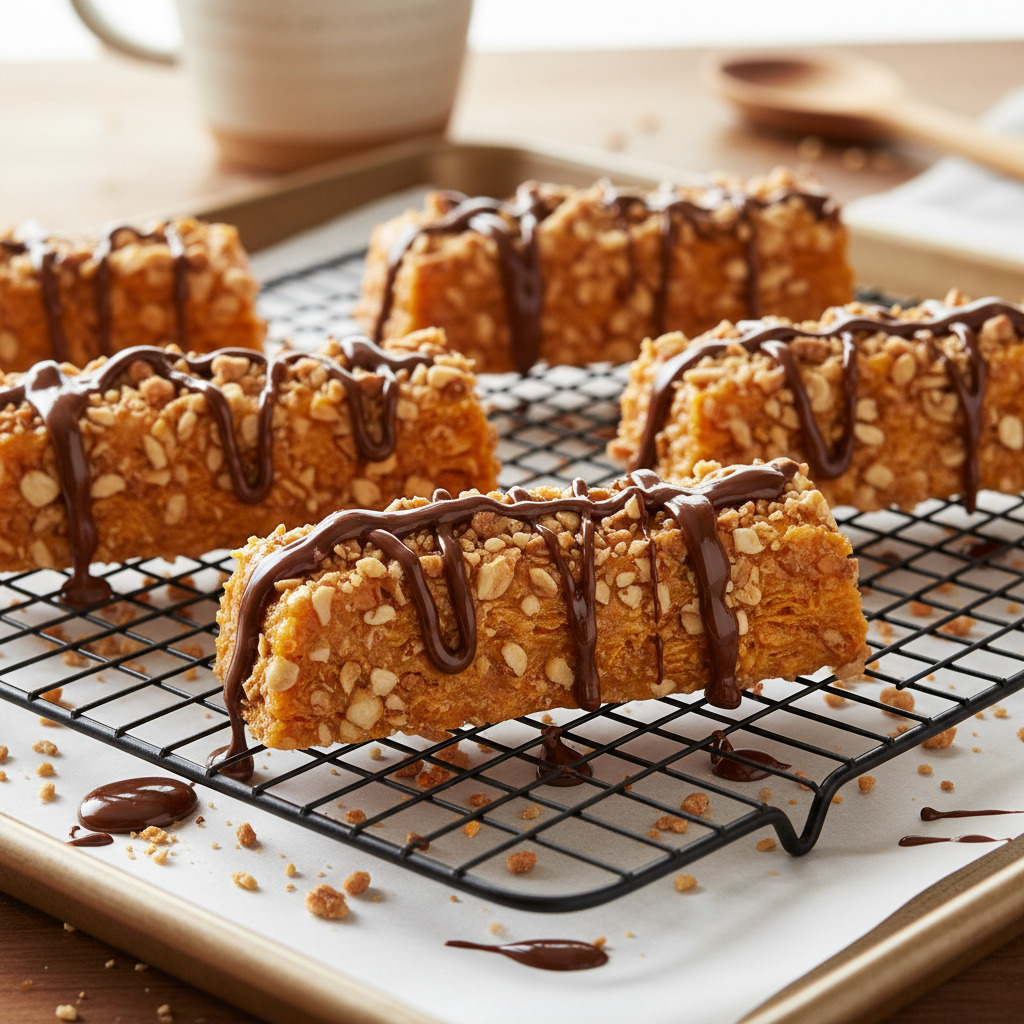
- Break into Pieces: Once cooled and hardened, lift the candy out of the pan using the parchment paper. Gently break or cut the candy into irregular, bite-sized pieces.
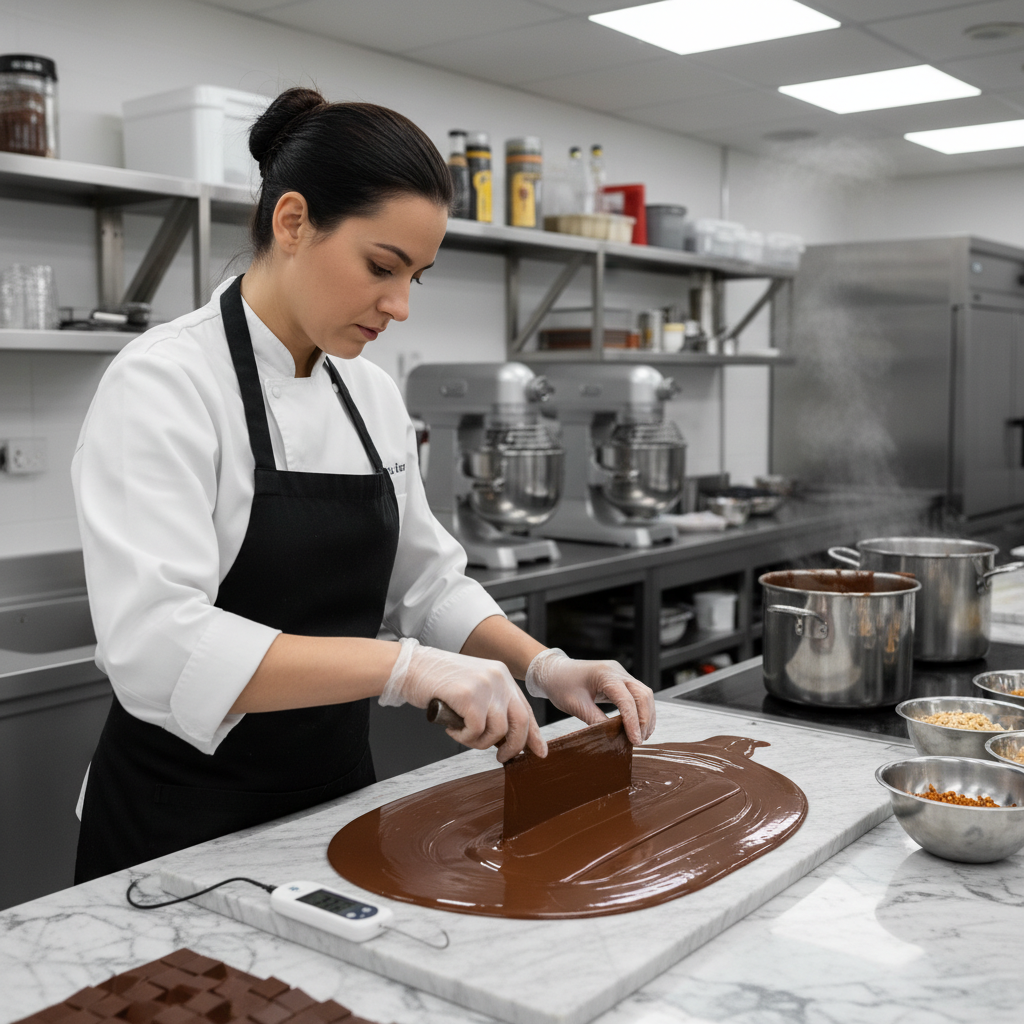
- Melt the Chocolate: In a double boiler or microwave-safe bowl, melt the chocolate chips with the optional vegetable or coconut oil until smooth. If using the microwave, heat in 30-second intervals, stirring between each, until melted.
- Coat the Candy: Using a fork or dipping tool, dip each candy piece into the melted chocolate, ensuring it’s fully coated. Lift it out, tapping gently against the side of the bowl to remove excess chocolate.
- Chill to Set: Place the coated candy pieces back onto the parchment-lined pan. Refrigerate for 15-20 minutes, or until the chocolate is completely set.
- Enjoy: Once set, your homemade Butterfinger bars are ready to be devoured!
Recipe Notes
- Speed is Key: When adding the baking soda, work quickly to ensure even distribution and proper aeration.
- Don’t Stir Too Much: While cooking the sugar syrup, resist the urge to stir once the sugar dissolves, as this can cause crystallization.
- Accurate Thermometer: Calibrate your candy thermometer if you haven’t recently, as accuracy is crucial.
- Adjusting Thickness: For thinner bars, use a larger sheet pan. For thicker bars, use a smaller pan or simply don’t spread the mixture too thin.
Customizing Your Candy – Tips and Variations
One of the joys of homemade treats is the ability to customize them! Here are some ideas to make your Butterfinger bars uniquely yours:
- Chocolate Choices: Experiment with dark chocolate, white chocolate, or even a blend for the coating.
- Nutty Additions: Before coating, sprinkle some chopped peanuts or other nuts onto the melted chocolate for extra crunch and flavor.
- Flavor Boost: A tiny pinch of sea salt on top of the chocolate coating enhances all the flavors.
- Mini Bars: Cut the candy into smaller pieces for bite-sized delights, perfect for parties.
- Spices: A pinch of cinnamon or a tiny dash of cayenne pepper in the peanut butter mixture can add an unexpected twist.
Secrets from the Pros – Chef Tips for Perfection
- Mise en Place: Have all your ingredients measured and ready before you start. Candy making moves fast!
- Cleanliness Matters: Ensure your saucepan and tools are spotless. Any sugar crystals can ruin your batch by causing the entire mixture to crystallize.
- Don’t Rush Cooling: Let the candy cool completely and naturally. Rushing it can affect the texture.
- Tempering Chocolate (Advanced): For a truly professional, shiny, and snap-able chocolate coating that resists melting at room temperature, consider learning how to temper chocolate. Otherwise, the oil trick works perfectly for home use.
- Humidity Check: Avoid making candy on very humid days, as moisture in the air can cause sugar to crystalize.
Avoid These Common Candy-Making Mistakes
- Not Using a Candy Thermometer: Guessing the temperature is a recipe for disaster in candy making.
- Stirring the Sugar Syrup too Much: Once dissolved, stirring can cause sugar crystals to form on the sides of the pan, leading to a grainy texture.
- Overcooking or Undercooking: Both will result in an undesirable texture – either too brittle or too soft. Stick to 300°F (149°C).
- Not Working Quickly Enough: Especially after adding baking soda, the mixture sets fast. Have your pan ready and be prepared to pour.
- Using Natural Peanut Butter: The oil separation in natural peanut butter can interfere with the candy’s setting and texture.
Keeping Them Fresh – Storage and Meal Prep
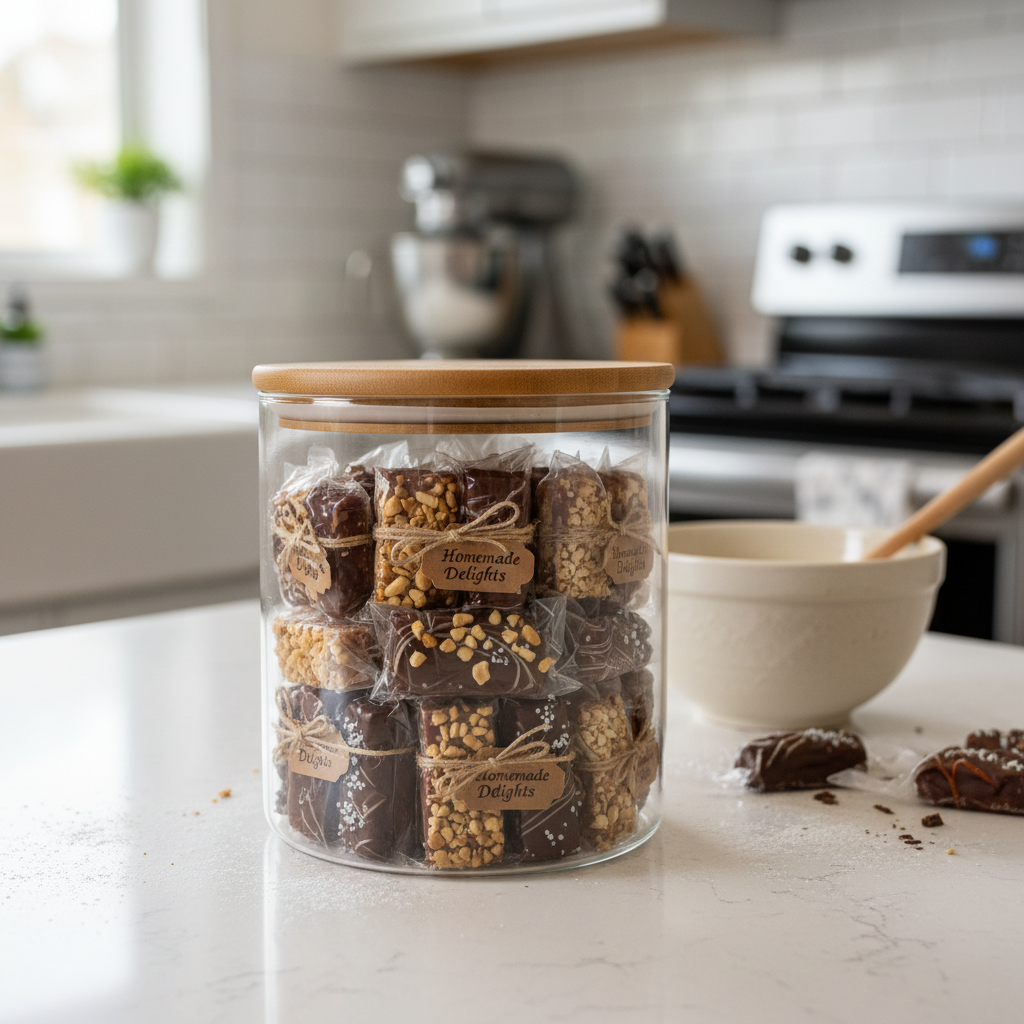
Once your delicious homemade Butterfinger bars are ready, you’ll want to store them properly to maintain their freshness and crunch. Store them in an airtight container at room temperature for up to 1 week. If your kitchen is very warm, you can keep them in the refrigerator, but let them come to room temperature for a few minutes before serving for the best texture and flavor. Stacking them with parchment paper between layers can prevent sticking.
Plan Ahead – Make-Ahead and Freezer Notes
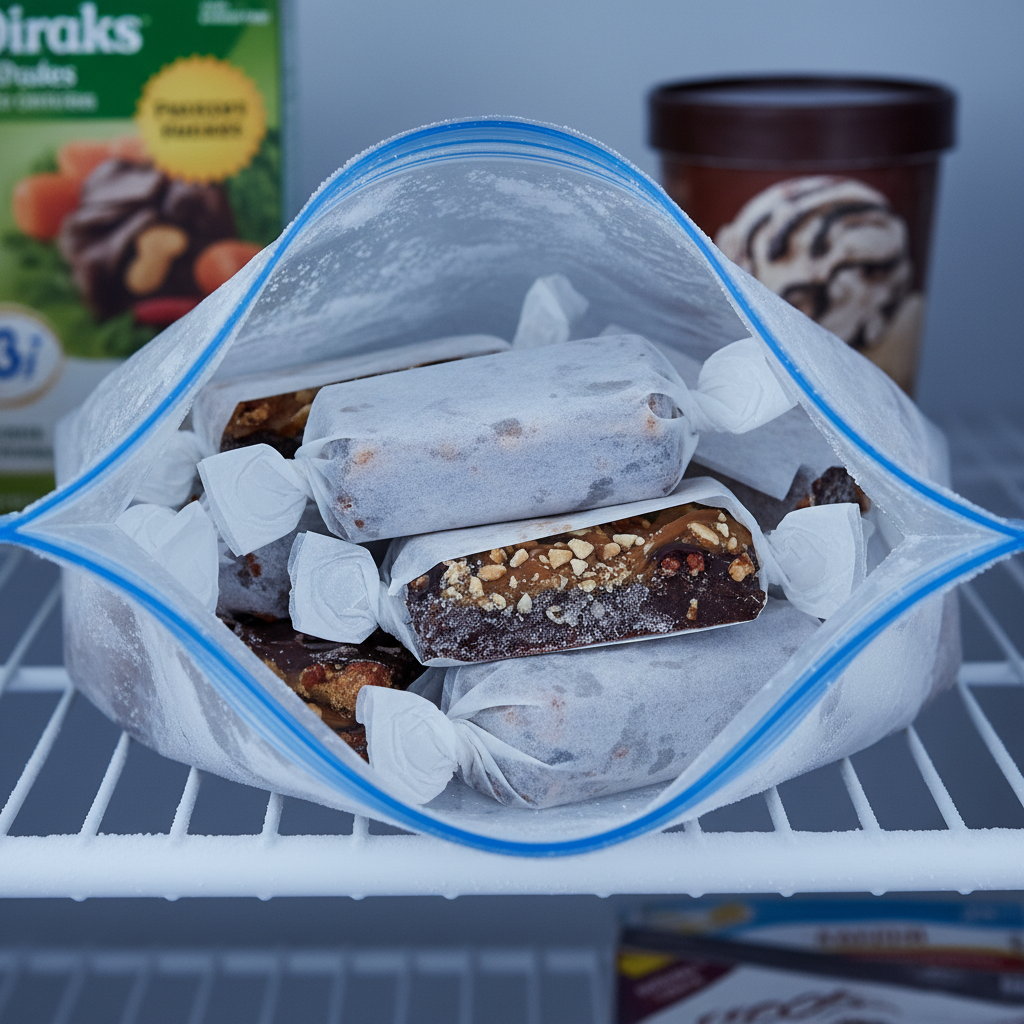
These candy bars are fantastic for making ahead! The uncoated candy base can be made several days in advance and stored in an airtight container at room temperature. When you’re ready, simply break it into pieces and coat with chocolate. For longer storage, you can freeze the uncoated candy base for up to 1 month. Wrap it tightly in plastic wrap, then place it in a freezer-safe bag. Thaw at room temperature before breaking and coating. You can also freeze the finished, chocolate-coated bars for up to 3 months. Place them in a single layer on a baking sheet to freeze solid, then transfer to an airtight freezer bag or container, separating layers with parchment paper. Thaw in the refrigerator, then bring to room temperature before enjoying.
Delicious Ways to Serve Your Butterfingers
While these homemade Butterfinger bars are absolutely incredible on their own, they’re also a fantastic addition to other desserts!
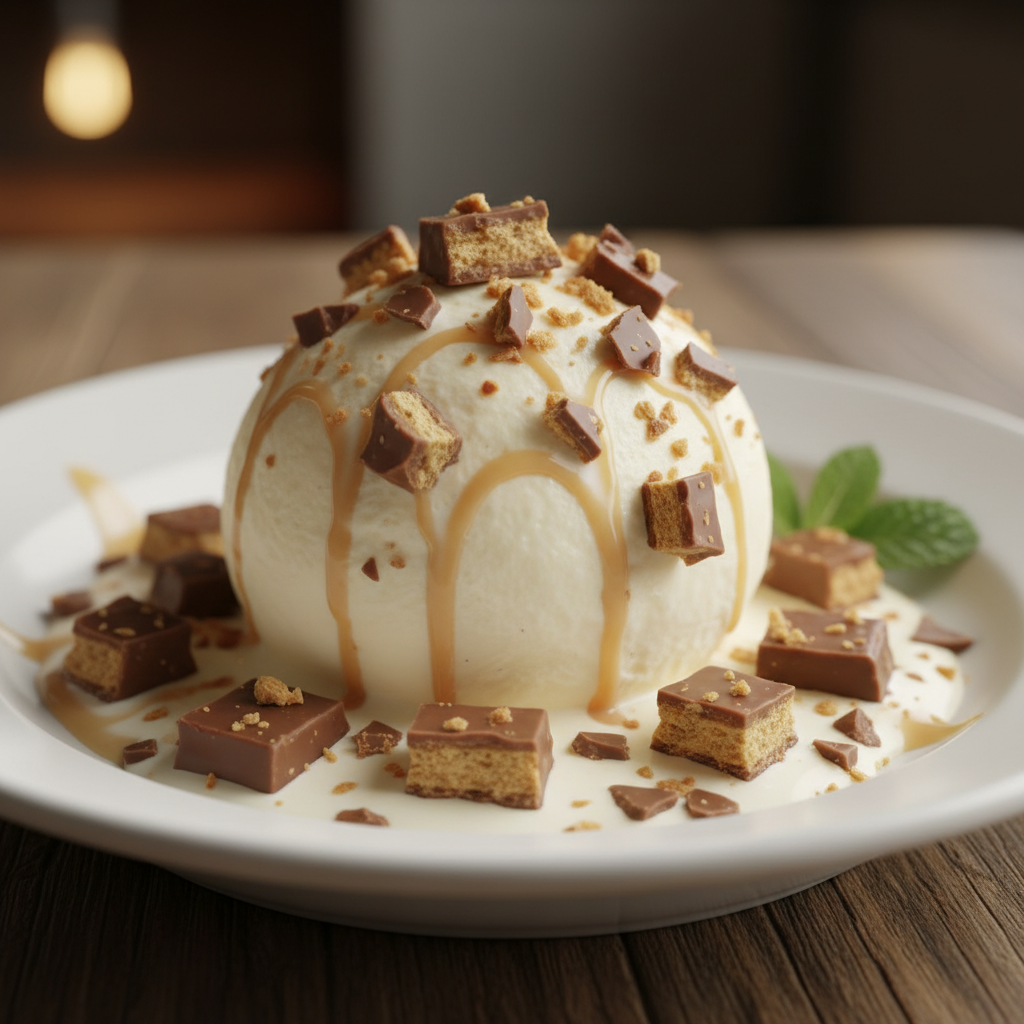
- Ice Cream Topping: Chop them up and sprinkle over vanilla or chocolate ice cream.
- Milkshakes: Blend pieces into a thick, creamy milkshake for an ultimate treat.
- Baking Ingredient: Incorporate chopped pieces into cookie dough, brownies, or blondies for an extra layer of crunch and flavor.
- Dessert Platter: Arrange them alongside other homemade cookies and candies for an impressive dessert spread.
Frequently Asked Questions About Homemade Butterfingers

We’ve gathered some common questions to help you master this recipe. The answers below provide more detail.
Your Sweet Success Awaits – Conclusion

And there you have it! Your very own batch of homemade Butterfinger candy bars, crafted with love and care right in your kitchen. The satisfaction of biting into that crispy, peanut buttery goodness, knowing you made it yourself, is truly unparalleled. This recipe is more than just a sweet treat; it’s an experience, a journey into the delightful world of candy making that we hope you’ve thoroughly enjoyed.
Don’t be afraid to get creative with variations, and most importantly, have fun with the process. Share your creations, enjoy every crunchy bite, and savor the sweet success. Happy candy making!