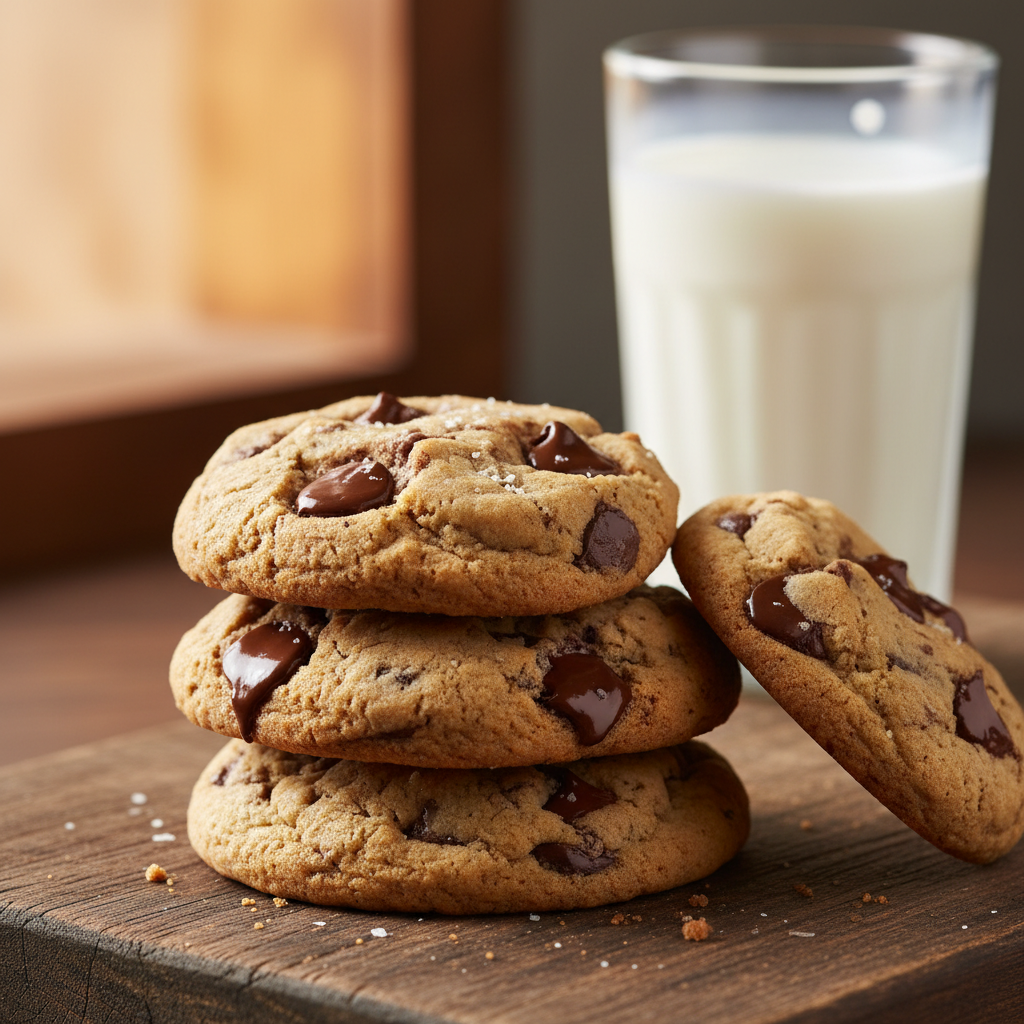
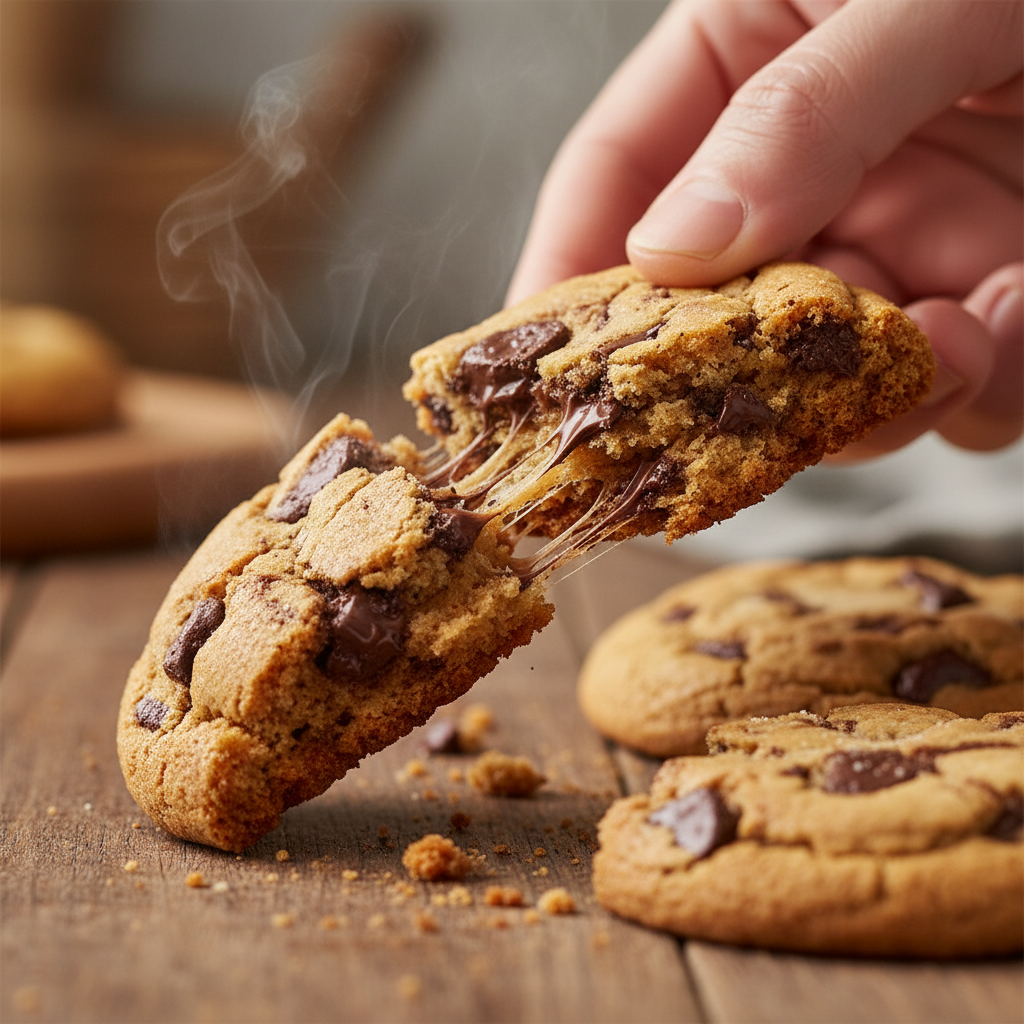
Welcome, fellow cookie lovers! If you’ve ever dreamed of biting into a chocolate chip cookie that rivals those from your favorite bakery – you know, the ones that are impossibly soft, delightfully chewy, and bursting with melty chocolate – then you’ve come to the right place. Forget dry, crumbly cookies; today, we’re unlocking the secrets to achieving that perfect, tender texture and rich flavor right in your own kitchen. This isn’t just a recipe; it’s a journey to cookie nirvana, designed for home bakers of all skill levels. Get ready to impress your friends, family, and most importantly, your taste buds!
History / Background

The humble chocolate chip cookie has a fascinating origin story. It was invented by Ruth Graves Wakefield in 1938 at the Toll House Inn in Whitman, Massachusetts. Legend has it she ran out of nuts for her butter drop cookies and, as a substitute, chopped up a Nestlé semi-sweet chocolate bar, expecting the chocolate to melt and disperse throughout the dough. To her surprise, the chocolate pieces held their shape, creating what we now know and love as the chocolate chip cookie! It quickly became a local favorite, and its popularity exploded when Nestlé started printing the recipe on their chocolate bar wrappers. Over the decades, countless variations have emerged, but the quest for the ultimate soft, chewy, bakery-style cookie remains a beloved pursuit for bakers everywhere.
Why You’ll Love This Recipe
- Unbelievably Soft and Chewy: We’re talking melt-in-your-mouth texture that stays soft for days.
- Rich, Deep Flavor: A perfect balance of buttery sweetness with notes of brown sugar and vanilla.
- Generously Loaded with Chocolate: Every bite is packed with gooey, delicious chocolate chips.
- Easy to Follow: Detailed instructions make this recipe accessible for even beginner bakers.
- Bakery-Quality at Home: Impress everyone with cookies that taste professionally made.
- Perfect for Any Occasion: From a simple snack to a party dessert, these cookies are always a hit.
Ingredient Notes
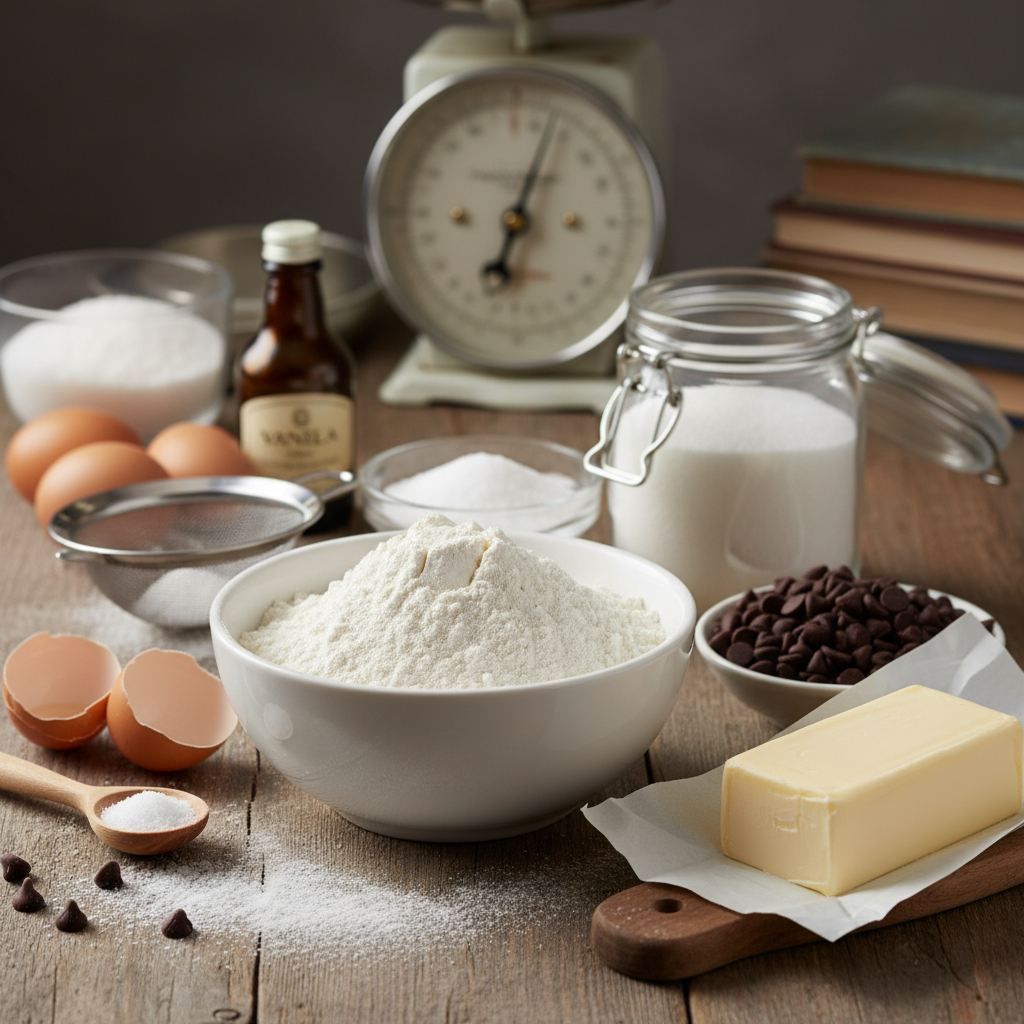
Each ingredient plays a crucial role in achieving that bakery-style perfection. Let’s break them down:
- Unsalted Butter: Using unsalted butter allows you to control the salt content. Make sure it’s softened, but not melted, for the best creaming.
- Granulated Sugar and Brown Sugar: The combination is key! Granulated sugar provides crispness, while brown sugar (especially dark brown sugar) adds moisture, chewiness, and a lovely molasses flavor that is essential for a soft cookie.
- Eggs: Large eggs, at room temperature, help bind the ingredients and add richness.
- Vanilla Extract: Don’t skimp on good quality vanilla! It enhances all the flavors.
- All-Purpose Flour: Measure it correctly! Too much flour leads to dry, tough cookies.
- Baking Soda: This leavening agent helps the cookies spread and become tender.
- Salt: A pinch of salt balances the sweetness and brings out the chocolate flavor.
- Chocolate Chips: A mix of semi-sweet and milk chocolate chips, or even chopped chocolate bars, will give you a wonderful variety of melty pockets. High-quality chocolate makes a difference!
Equipment Needed
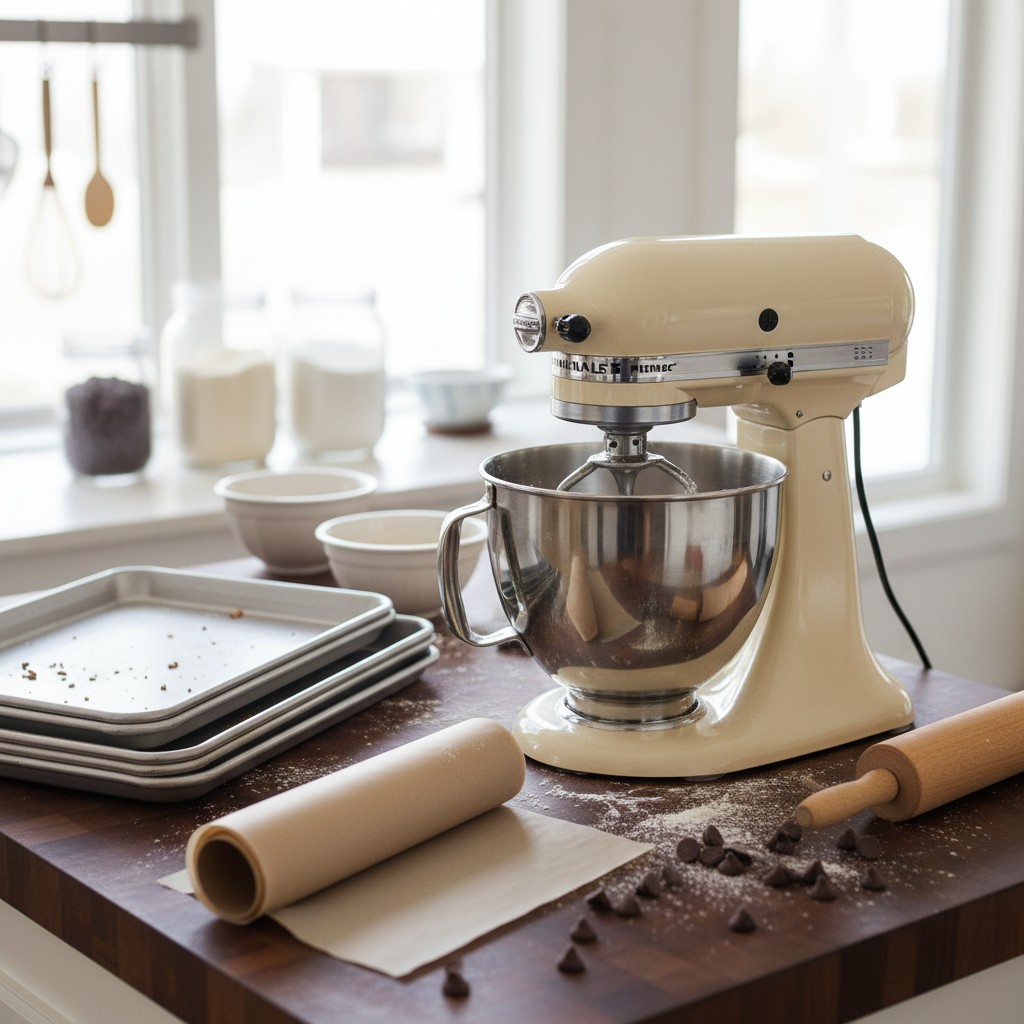
Having the right tools makes baking a breeze. Here’s what you’ll need:
- Stand Mixer or Hand Mixer: Essential for creaming butter and sugar until light and fluffy.
- Large Mixing Bowls: For combining wet and dry ingredients.
- Rubber Spatula: For scraping down the sides of the bowl and folding.
- Measuring Cups and Spoons: For accurate ingredient measurements.
- Baking Sheets: Heavy-duty baking sheets prevent scorching.
- Parchment Paper or Silicone Baking Mats: For non-stick baking and easy cleanup.
- Wire Rack: For cooling the cookies evenly.
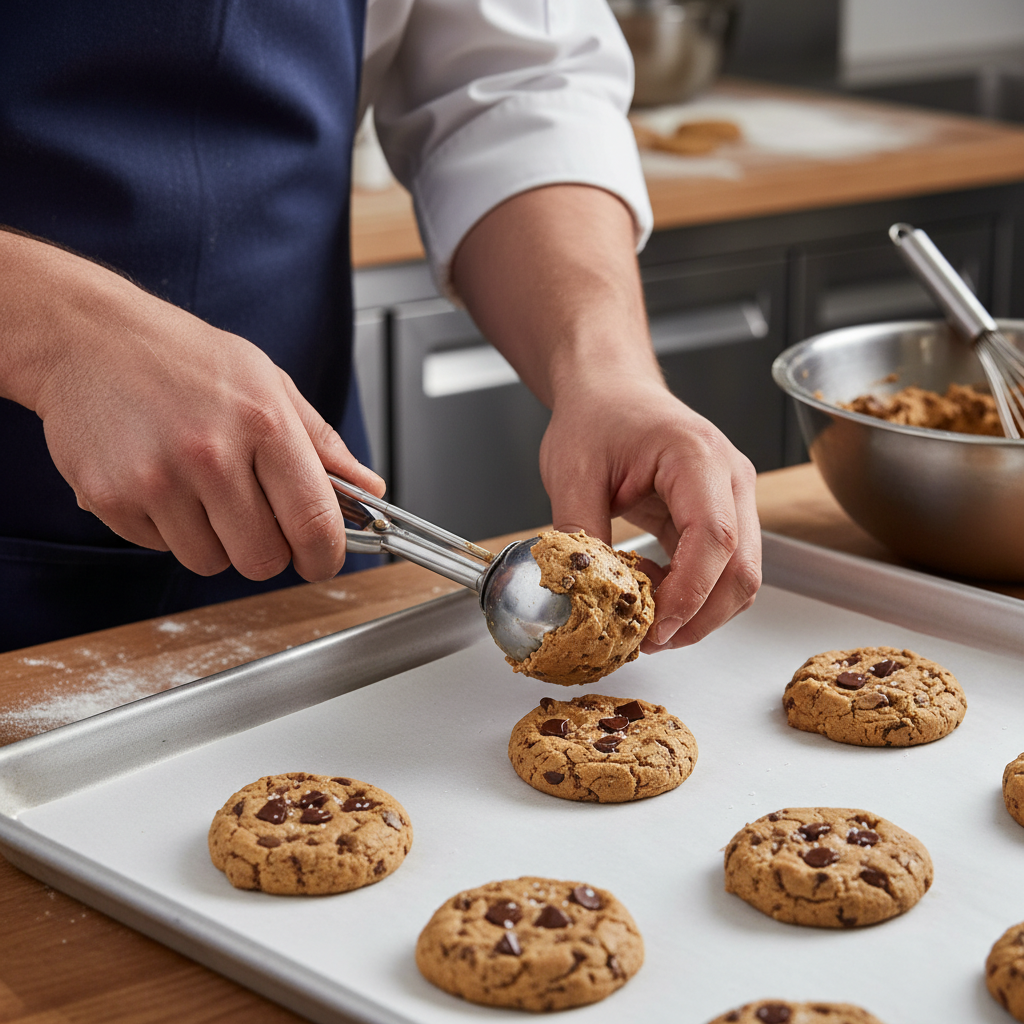
- Cookie Scoop (1.5-2 tablespoon size): Ensures uniform cookie size for even baking.
Full Recipe Card
Ingredients
- 1 cup (2 sticks) unsalted butter, softened
- 3/4 cup granulated sugar
- 1 1/4 cups packed light or dark brown sugar
- 2 large eggs, room temperature
- 2 teaspoons pure vanilla extract
- 2 1/4 cups all-purpose flour
- 1 teaspoon baking soda
- 1 teaspoon salt
- 1 1/2 cups (about 9 oz) semi-sweet chocolate chips
- 1/2 cup (about 3 oz) milk chocolate chips (optional, for extra gooeyness)
Instructions
- Prep Your Oven and Pans: Preheat your oven to 375°F (190°C). Line two large baking sheets with parchment paper or silicone baking mats.
- Cream Butter and Sugars: In a large bowl or the bowl of a stand mixer fitted with the paddle attachment, cream together the softened butter, granulated sugar, and brown sugar on medium speed until light, fluffy, and pale, about 2-3 minutes. Scrape down the sides of the bowl as needed.
- Add Eggs and Vanilla: Beat in the eggs one at a time, mixing well after each addition. Stir in the vanilla extract until just combined.
- Combine Dry Ingredients: In a separate medium bowl, whisk together the all-purpose flour, baking soda, and salt.
- Gradually Add Dry to Wet: With the mixer on low speed, gradually add the dry ingredients to the wet ingredients, mixing until just combined. Be careful not to overmix! Overmixing can lead to tough cookies.
- Fold in Chocolate Chips: Remove the bowl from the mixer and use a rubber spatula to fold in the chocolate chips until evenly distributed.
- Scoop the Dough: Drop rounded tablespoons (about 1.5-2 tablespoons each) of cookie dough onto the prepared baking sheets, leaving about 2 inches between each cookie. For extra bakery appeal, press a few extra chocolate chips onto the tops of the scooped dough balls before baking.
- Bake: Bake for 9-12 minutes, or until the edges are golden brown and the centers are still slightly soft and puffy. The cookies may look slightly underbaked in the center, but they will continue to set as they cool.
- Cool: Let the cookies cool on the baking sheets for 5 minutes before transferring them to a wire rack to cool completely. This helps them firm up without breaking.
- Enjoy: Serve warm or at room temperature and savor every soft, chewy bite!
Notes
- Chill Time (Optional but Recommended): For even chewier cookies and a deeper flavor, cover the dough and refrigerate for at least 30 minutes, or up to 24 hours. Chilled dough spreads less and results in a thicker cookie.
- Room Temperature Ingredients: Ensure butter and eggs are at room temperature for best results in creaming and emulsification.
- Don’t Overbake: This is the golden rule for soft cookies! Pull them out when the edges are set and golden, but the centers still look slightly underdone.
Tips & Variations
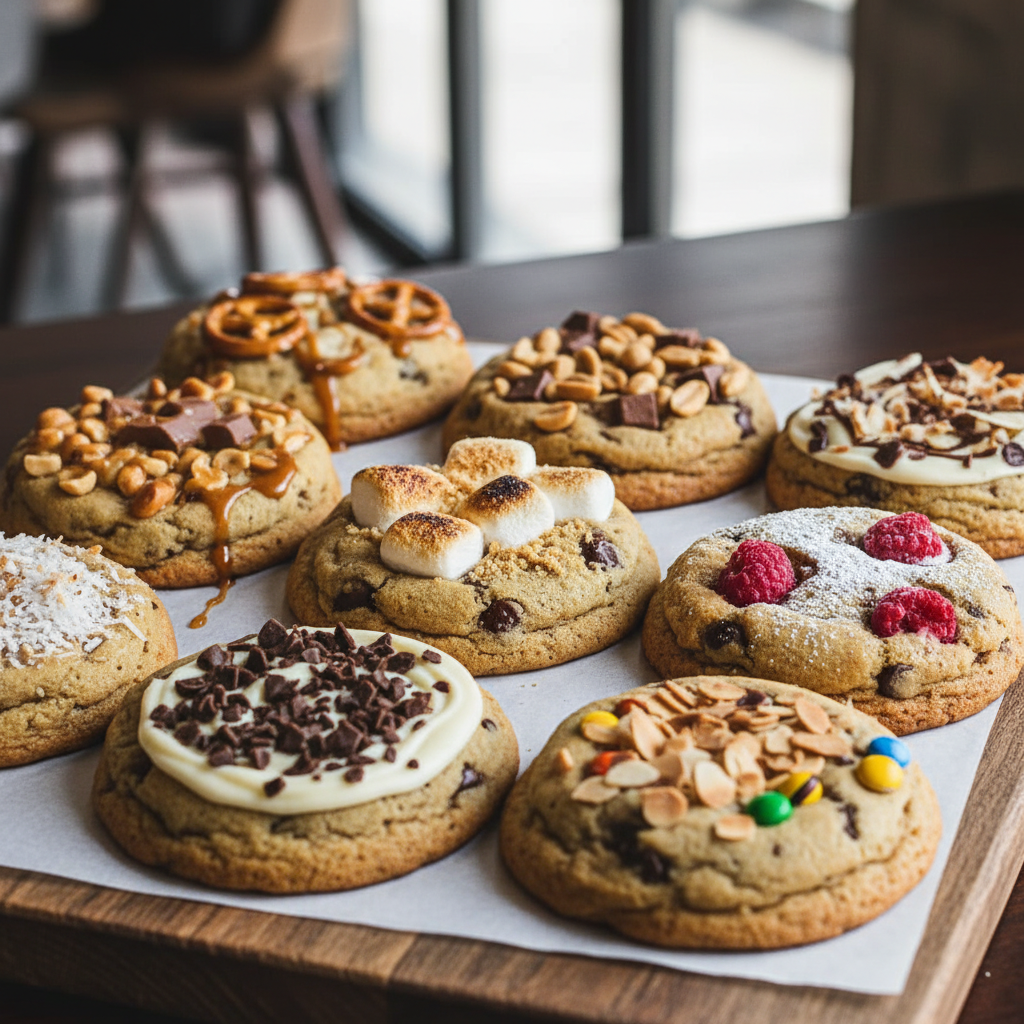
- Sea Salt Finish: Sprinkle a tiny bit of flaky sea salt on top of the warm cookies right after they come out of the oven. It enhances the chocolate flavor beautifully.
- Nutty Additions: Fold in 1/2 cup of chopped walnuts or pecans with the chocolate chips for extra crunch and flavor.
- Chocolate Chunks: For bigger pockets of melted chocolate, use chopped chocolate bars instead of or in addition to chocolate chips.
- Espresso Powder: Add 1 teaspoon of instant espresso powder to the dry ingredients. It won’t make your cookies taste like coffee, but it will deepen and intensify the chocolate flavor.
- Different Chocolates: Experiment with white chocolate chips, dark chocolate chunks, or even butterscotch chips.
Pro Chef Tips
- Measure Flour Accurately: The most common baking mistake is using too much flour. Spoon flour into your measuring cup and level it off with a straight edge, rather than scooping directly from the bag.
- Don’t Overmix the Dough: Once the flour is added, mix only until just combined. Overmixing develops gluten, leading to tough cookies.
- Chill Your Dough: While optional, chilling the dough for at least 30 minutes (or even overnight) allows the flavors to meld and the butter to firm up, resulting in a thicker, chewier cookie with a richer taste.
- Use a Cookie Scoop: This ensures all your cookies are the same size, which means they’ll bake evenly.
- Tap the Pan: For crinkly edges and a flatter cookie, gently tap the baking sheet on the counter a few times halfway through baking and again immediately after removing from the oven.
Common Mistakes to Avoid
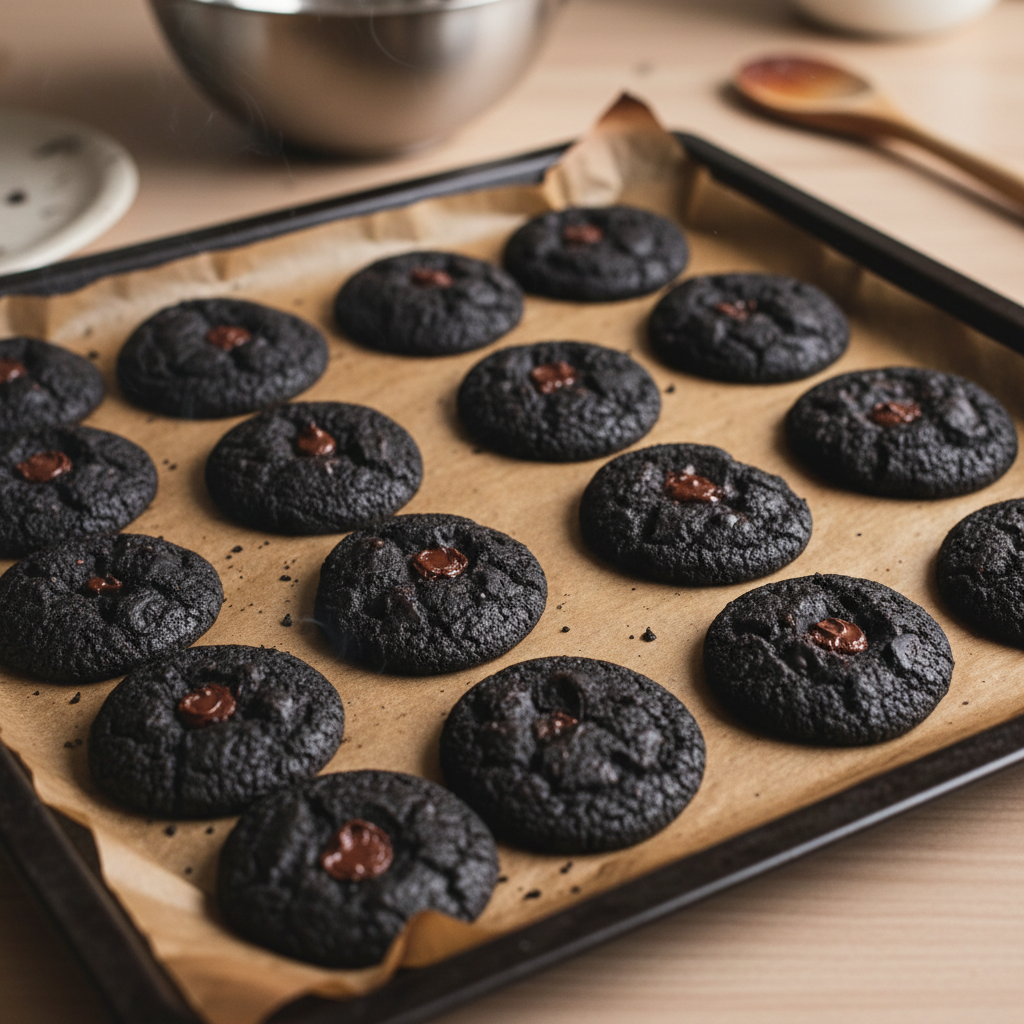
- Overbaking: This is the number one enemy of soft cookies. Always err on the side of underbaking slightly.
- Using Cold Butter or Eggs: Room temperature ingredients cream together much better, creating a smoother, more uniform dough.
- Not Measuring Accurately: Especially with flour, incorrect measurements can drastically alter the cookie’s texture.
- Overmixing the Flour: As mentioned, this leads to tough cookies. Mix until just combined.
- Baking on an Unlined Sheet: Cookies stick and can burn easily without parchment paper or a silicone mat.
Storage & Meal Prep
To keep your bakery-style cookies fresh and soft:
- Room Temperature: Store cooled cookies in an airtight container at room temperature for up to 3-4 days. Adding a slice of bread to the container can help keep them soft by providing extra moisture.
- Refrigeration: Not recommended for baked cookies, as it can dry them out.
- Meal Prep Dough: You can prepare the cookie dough in advance and store it in the refrigerator for up to 3 days. Simply scoop and bake when ready.
Make-Ahead & Freezer Notes
- Freezing Baked Cookies: Once completely cooled, place cookies in a single layer on a baking sheet and freeze until solid. Then transfer them to a freezer-safe bag or airtight container for up to 2-3 months. Thaw at room temperature.
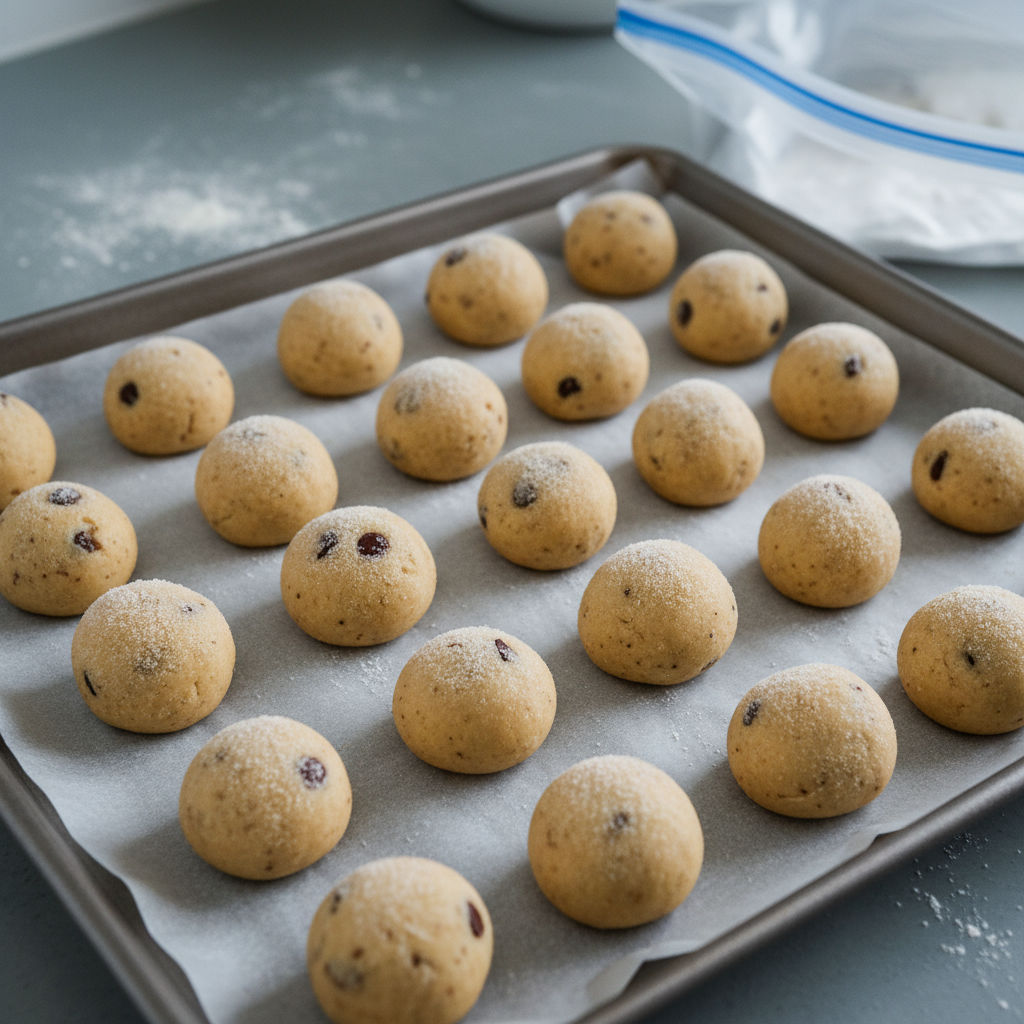
- Freezing Cookie Dough: Scoop the cookie dough into balls and place them on a parchment-lined baking sheet. Freeze until solid, then transfer the frozen dough balls to a freezer-safe bag. They can be stored for up to 3 months. When ready to bake, place frozen dough balls on a prepared baking sheet and bake for a few extra minutes (12-15 minutes) until golden. No need to thaw!
Serving Suggestions
These soft chocolate chip cookies are delicious on their own, but here are some ways to elevate the experience:
- Classic Milk Pairing: A tall, cold glass of milk is the quintessential companion.
- Ice Cream Sandwiches: Sandwich a scoop of your favorite vanilla or coffee ice cream between two cookies.
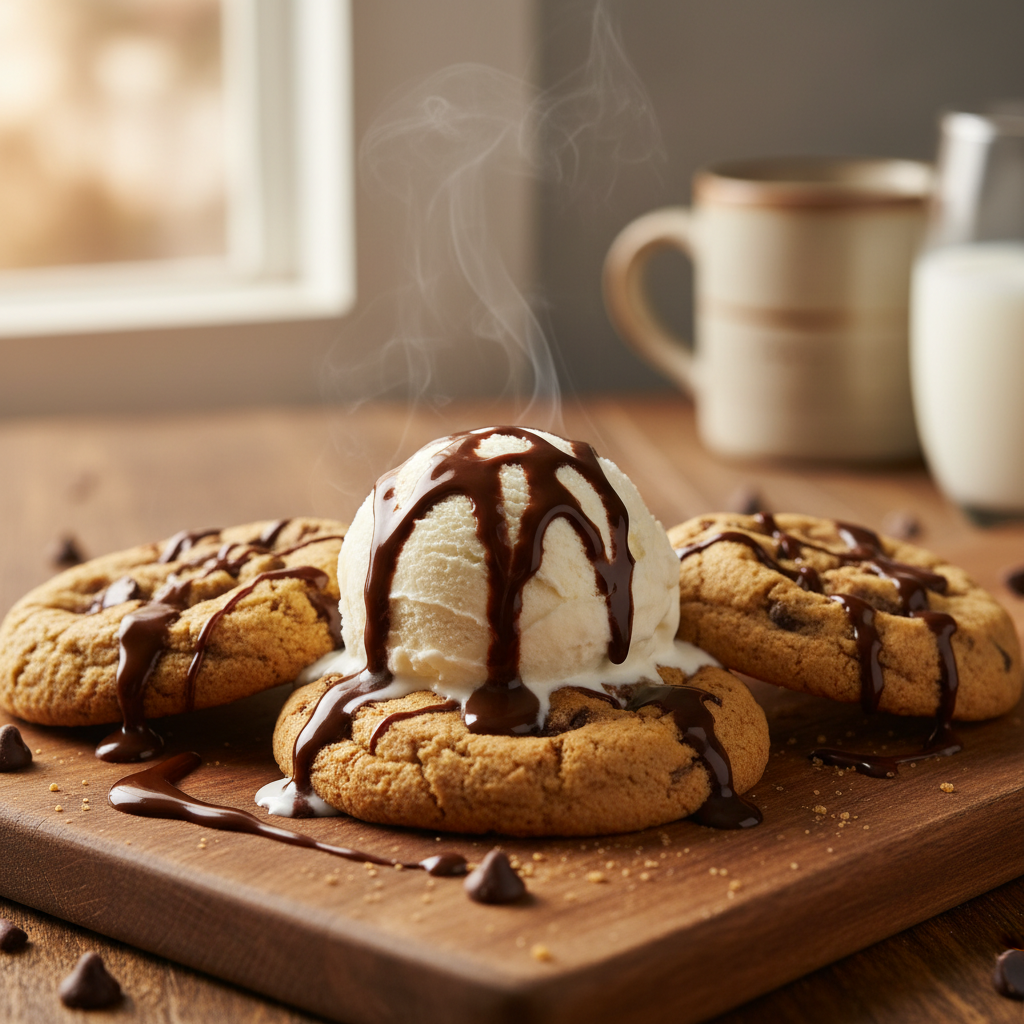
- Warm with a Scoop of Ice Cream: Serve a warm cookie with a scoop of vanilla bean ice cream and a drizzle of chocolate sauce.
- Coffee or Tea: Perfect for dipping into your morning coffee or afternoon tea.
- Dessert Platter: Arrange them alongside other treats for a delightful dessert spread.