Introduction
Imagine cutting into a beautiful white cloud of dessert. The outside is perfectly crisp and delicate, like a thin meringue shell. But when your fork goes deeper, you reach a soft, fluffy, marshmallow-like center that almost melts in your mouth. On top, there’s a generous pillow of whipped cream and a crown of fresh fruit.
That, right there, is a perfect classic pavlova.
Pavlova looks fancy and elegant, but the ingredients are actually very simple: egg whites, sugar, a little vinegar and cornstarch, plus cream and fruit for topping. The magic is all in how you mix and bake it. Once you understand a few key tips, this impressive dessert becomes very easy and very reliable.
This recipe will show you how to make:
- A crispy outer shell
- A soft, marshmallowy center
- A pavlova that is stable, sliceable, and not too sweet
We’ll walk through every step slowly, in clear, simple language that even a beginner baker can follow. By the end, you’ll know exactly how to create this showstopping dessert for birthdays, holidays, dinner parties, or a special weekend treat.
Let’s make your perfect classic pavlova!
History / Background
Pavlova is one of those desserts that people actually argue about. Not because it isn’t delicious (everyone agrees on that part), but because two countries claim it as their own: Australia and New Zealand.
What both sides agree on is the inspiration behind the dessert:
It was named after Anna Pavlova, a famous Russian ballerina from the early 1900s. She was known for her grace, lightness, and flowing movements. The dessert was created in her honor, and the light, cloud-like meringue is said to represent her delicate dancing.
Here’s what we know:
- In the 1920s, Anna Pavlova toured Australia and New Zealand.
- Around that time, desserts named “Pavlova” began to appear in both countries.
- Old cookbooks from both sides have recipes, and food historians still debate who truly invented it first.
But whoever made it first, pavlova has become a beloved dessert across Australia, New Zealand, and the rest of the world.
What makes pavlova special compared to regular meringue?
- Pavlova: crisp shell on the outside, soft and marshmallowy inside.
- Standard meringue cookies: crisp all the way through, dry and snappy.
The secret to that marshmallow center is:
- Slightly higher baking temperature
- Shorter bake time
- Adding a little cornstarch (cornflour) and acid (vinegar or lemon juice) to the meringue
Classic pavlova is usually served with lightly sweetened whipped cream and fresh fruit, especially berries, kiwifruit, and passionfruit. It’s a popular dessert for Christmas (which is summertime in Australia and New Zealand), Easter, and special family gatherings.
Now it’s your turn to bring this beautiful piece of dessert history into your own kitchen.
Why You’ll Love This Recipe
• True classic texture – Crispy outside, soft and marshmallowy inside, just like an authentic pavlova should be.
• Beginner-friendly method – Clear, step-by-step instructions in easy English, perfect if this is your first pavlova.
• Simple ingredients – Egg whites, sugar, vinegar, cornstarch, cream, and fruit. That’s it. No fancy ingredients needed.
• Make-ahead friendly – The meringue base can be baked ahead and kept crisp until you’re ready to serve.
• Showstopper dessert – Looks elegant and impressive on any dessert table, with beautiful toppings and height.
• Customizable toppings – Use whatever fruit you love: berries, kiwi, mango, passionfruit, stone fruits, or even chocolate shavings.
• Naturally gluten-free – Great option for guests who don’t eat gluten (just check any extra toppings).
• Light and airy feel – Sweet but not heavy, perfect after a big meal.
• Budget-friendly – Mostly uses pantry staples, but looks like it came from a fancy bakery.
• Perfect for celebrations – Birthdays, holidays, dinner parties, and special family lunches.
Ingredient Notes
Let’s break down the ingredients for a perfect classic pavlova with a crispy meringue and soft marshmallow center. Knowing why each ingredient is there will help you get the best results.
Egg Whites
Egg whites are the heart of pavlova.
- Use fresh eggs if possible; they whip more beautifully.
- It’s easier to separate eggs when they are cold, but egg whites whip best at room temperature.
- Make sure there is no yolk at all in the whites. Even a tiny bit of fat can stop them from whipping properly.
For this recipe, we’ll use 4 large egg whites (about 120 g / 4 oz).
Sugar
Sugar stabilizes the egg whites and makes them glossy and smooth.
- Use caster sugar (superfine sugar) if you can. The smaller crystals dissolve faster and give a smoother meringue.
- Regular granulated sugar can work, but it will take longer to dissolve.
We use a high sugar-to-egg-white ratio to get that crisp shell and soft inside. The sugar must be fully dissolved or the pavlova can weep (leak syrup) or feel grainy.
Tip: Rub a bit of meringue between your fingers. It should feel smooth, not gritty.
Cornstarch (Cornflour)
Cornstarch is one of the secret ingredients for a classic pavlova texture.
- It helps create the marshmallowy, soft center.
- It also adds a little stability so the pavlova holds its shape.
We use just a small amount, usually 1–2 teaspoons.
Vinegar (or Lemon Juice)
A little acid helps the meringue stay stable and gives it a tender texture.
- Use white vinegar, apple cider vinegar, or lemon juice.
- The acid strengthens the structure of the egg whites and helps prevent cracking.
You only need about 1 teaspoon. You won’t taste it in the final dessert.
Salt
A tiny pinch of salt balances the sweetness and rounds out the flavor. It’s optional but recommended.
Vanilla Extract
Vanilla adds a beautiful flavor to the meringue.
Use pure vanilla extract if you can. It gives the pavlova a gentle sweetness and wonderful aroma.
For the Topping: Whipped Cream
Classic pavlova is topped with lightly sweetened whipped cream.
- Use heavy cream / whipping cream (at least 30–35% fat).
- Lightly sweeten it with a little sugar and vanilla.
The cream balances the sweet meringue and gives richness.
For the Topping: Fruit
Here is where you can be creative! Some classic choices:
- Fresh berries: strawberries, raspberries, blueberries, blackberries
- Kiwifruit
- Passionfruit pulp
- Mango slices
- Peaches, nectarines, or plums (in season)
- Pomegranate seeds
Use fresh, not frozen fruit for the best texture and look. Try to combine a mix of colors and flavors: sweet, tart, juicy.
Equipment Needed
You don’t need professional tools to make pavlova, but a few key pieces of equipment will make it much easier.
Essential Equipment
- Electric mixer
A stand mixer or hand mixer is almost necessary. Whipping egg whites by hand is possible but very tiring. - Large mixing bowl
Use a clean, dry, glass or stainless steel bowl. Avoid plastic, which can hold onto grease. - Measuring cups and spoons
For accurate measurements. - Kitchen scale (optional but helpful)
Pavlova is more precise with weight measurements, especially for egg whites and sugar. - Rubber spatula
For gently folding and shaping the meringue. - Baking tray (sheet pan)
To bake the pavlova. - Parchment paper
To line the tray and prevent sticking. Do not use wax paper. - Oven thermometer (optional)
Pavlova is sensitive to temperature. Many ovens run hotter or cooler than the dial, so a thermometer is very helpful. - Spoon or offset spatula
To shape the pavlova and create a little “bowl” in the center for cream and fruit.
Nice-to-Have Equipment
- Fine mesh sieve – For dusting cocoa powder or powdered sugar on top.
- Metal spatula or cake lifter – To transfer the pavlova more easily once it’s baked.
- Piping bag (optional) – If you want to pipe the meringue into a fancy shape or make mini pavlovas.
Full Recipe Card (Perfect Classic Pavlova)
Perfect Classic Pavlova with Crispy Meringue and Soft Marshmallow Center
Servings: 6–8
Prep Time: 20–25 minutes
Baking Time: 1 hour to 1 hour 15 minutes
Cooling Time: 2–4 hours (in the oven)
Total Time: About 4 hours (mostly hands-off)
Ingredients
For the pavlova meringue:
- 4 large egg whites (about 120 g), at room temperature
- 1 cup (200 g) caster sugar (superfine sugar)
- 1½ teaspoons cornstarch (cornflour)
- 1 teaspoon white vinegar or lemon juice
- 1 teaspoon vanilla extract
- Pinch of salt
For the topping:
- 1 cup (240 ml) heavy cream or whipping cream, cold
- 2–3 tablespoons powdered sugar or caster sugar (to taste)
- 1 teaspoon vanilla extract
Fruit topping suggestions (use a mix):
- 1–2 cups fresh berries (strawberries, raspberries, blueberries, etc.)
- 2 kiwifruit, peeled and sliced
- 2 passionfruit, pulp scooped out
- 1 mango, sliced
- Pomegranate seeds, for color (optional)
Instructions
1. Prepare your equipment and oven
- Make sure your mixing bowl and beaters are completely clean and dry. Any grease will stop the egg whites from whipping.
- Preheat your oven to 300°F (150°C).
- Line a baking tray with parchment paper.
- You can draw a circle (about 8–9 inches / 20–23 cm) on the back of the paper as a guide, then flip it over so the pencil doesn’t touch the meringue.
2. Whip the egg whites
- Place the room temperature egg whites in your clean mixing bowl.
- Add the pinch of salt.
- Beat the egg whites on medium speed until they form soft peaks.
- Soft peaks mean the whites look foamy and when you lift the beaters, the peaks just start to hold but then gently fold over.
3. Add the sugar slowly
- With the mixer still running on medium-high speed, start adding the sugar one tablespoon at a time.
- Wait about 10–15 seconds between each spoonful to let it dissolve.
- Keep beating and adding sugar gradually. This step takes some time, but it’s very important.
- Once all the sugar is added, continue beating for another 3–5 minutes, or until:
- The meringue is thick, glossy, and holds firm peaks.
- When you rub a little between your fingers, it should feel smooth, not gritty. If it feels grainy, keep beating a bit longer.
4. Add cornstarch, vinegar, and vanilla
- Sprinkle the cornstarch (cornflour) over the meringue.
- Add the vinegar (or lemon juice) and the vanilla extract.
- Use a rubber spatula to gently fold these in. Be careful not to knock all the air out; use light, sweeping motions.
5. Shape the pavlova
- Scoop the meringue onto the prepared parchment paper in the center of the baking tray.
- Using your spatula or the back of a spoon, shape it into a round disk or mound about 8–9 inches (20–23 cm) wide.
- Smooth the sides and top, or create decorative swirls and peaks.
- Gently create a shallow well in the center, leaving the edges slightly higher.
- This will hold the whipped cream and fruit later.
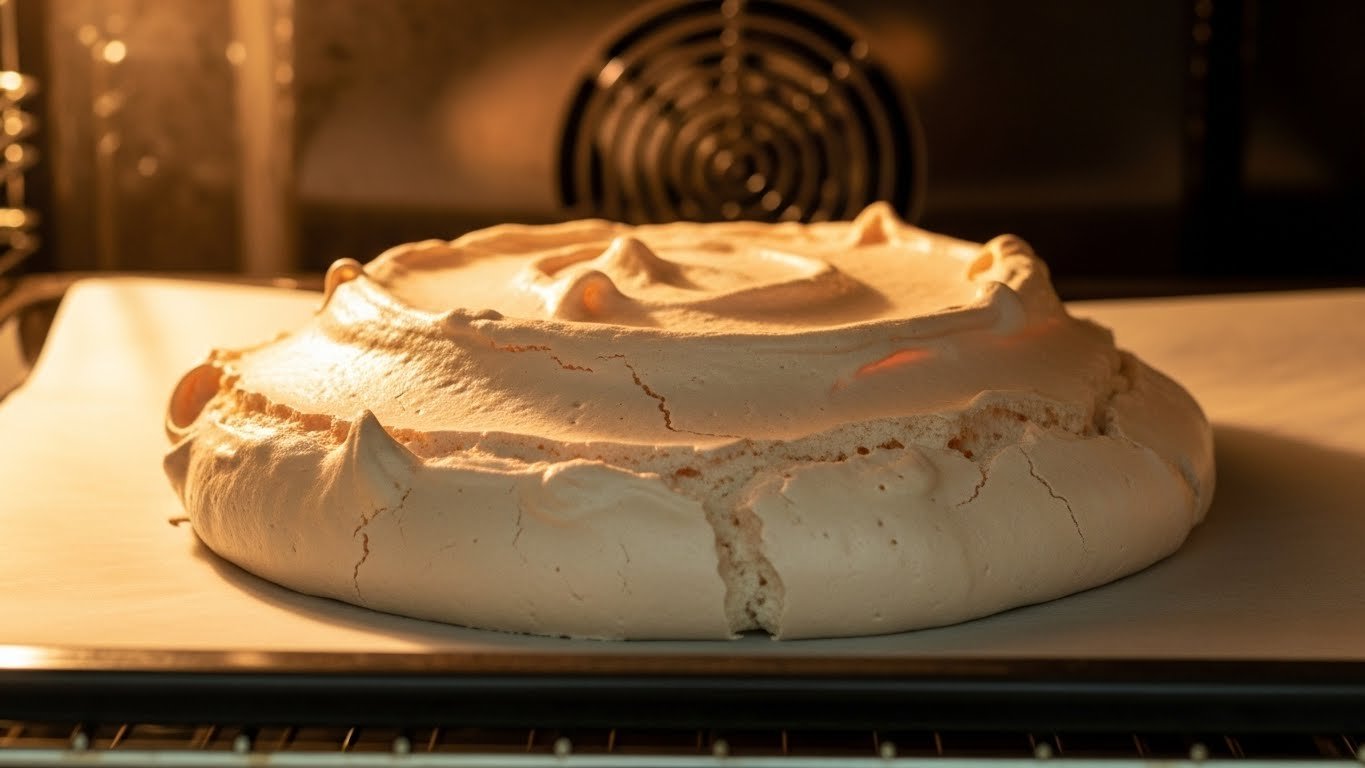
6. Bake
- Place the pavlova in the preheated 300°F (150°C) oven.
- Immediately turn the oven down to 250°F (120°C).
- Bake for 1 hour to 1 hour 15 minutes, or until:
- The outside looks dry and crisp.
- It feels firm when you gently touch the sides.
- It is still pale, maybe with just a hint of cream color, not brown.
- Try not to open the oven door while baking. Sudden temperature changes can cause cracks.
7. Cool in the oven
- After baking time is over, turn off the oven, but leave the pavlova inside.
- Prop the oven door open slightly (you can use a wooden spoon), and let the pavlova cool completely in the oven for at least 2 hours, or ideally until the oven is totally cold.
- This slow cooling helps prevent major cracking and collapsing.
- The outside will stay crisp, and the inside will stay soft and marshmallowy.
- Once completely cool, carefully remove the pavlova from the oven. Gently lift it from the parchment onto a serving plate (you can slide a large spatula or two underneath).
8. Make the whipped cream topping
- Just before serving, pour the cold cream into a mixing bowl.
- Add the sugar and vanilla extract.
- Whip on medium speed until soft to medium peaks form.
- It should be smooth and fluffy, not stiff or grainy. Don’t overwhip.
9. Assemble the pavlova
- Spoon the whipped cream onto the center of the pavlova, staying mostly inside the shallow well.
- Arrange your prepared fresh fruit on top of the cream. Be as simple or as fancy as you like. Mix colors and shapes for a beautiful look.
- If you like, drizzle with passionfruit pulp or a little berry sauce, and sprinkle with mint leaves or pomegranate seeds.
- Slice gently with a sharp knife and serve immediately.
Recipe Notes
- This recipe makes one medium pavlova (about 8–9 inches), serving 6–8 people.
- The outside shell should be crisp, and the inside should be soft and marshmallowy, not dry.
- If your pavlova browns too much, your oven may be running hot. Next time, lower the temperature slightly.
- Humidity can affect pavlova. On very humid days, the meringue may become sticky more quickly.
Tips & Variations
Once you master the classic pavlova, you can have all kinds of fun customizing it.
Shape Variations
- Mini Pavlovas:
Instead of one large pavlova, make 6–8 small circles of meringue. Bake at the same temperature but reduce baking time to about 40–50 minutes. These are great for individual servings. - Pavlova Wreath:
Pipe or spoon meringue in a ring shape, like a wreath. Perfect for Christmas. Decorate with red and green fruits. - Rectangle or Oval:
Shape it into a rough rectangle for easier slicing into squares.
Flavor Variations (in the meringue)
- Chocolate Swirl Pavlova:
Gently fold in 2–3 tablespoons of melted, cooled dark chocolate into the meringue just before shaping. Don’t mix too much; you want streaks. - Cocoa Pavlova:
Sift in 2 tablespoons of unsweetened cocoa powder with the cornstarch for a chocolate pavlova base. - Coffee Pavlova:
Dissolve 1 tablespoon of instant coffee or espresso powder in 1 teaspoon of hot water and fold into the meringue with the vanilla. - Citrus Pavlova:
Add finely grated lemon or orange zest to the meringue or cream for a fresh twist.
Topping Variations
- Berry Explosion:
Use mixed berries, a dusting of powdered sugar, and a drizzle of berry coulis. - Tropical Pavlova:
Top with mango, pineapple, kiwi, passionfruit, and toasted coconut. - Chocolate Lover’s Pavlova:
Add chocolate shavings, a drizzle of melted chocolate or Nutella, and maybe some chocolate curls on top. - Lemon Pavlova:
Spread a layer of lemon curd under or over the whipped cream and top with berries. - Nutty Pavlova:
Sprinkle toasted pistachios, almonds, or hazelnuts over the fruit for extra crunch.
Sweetness Adjustments
- If you prefer less sweet, you can slightly reduce the sugar in the whipped cream or use more tangy fruits like berries and passionfruit on top.
- Do not reduce the sugar in the meringue too much, as it affects structure and texture.
Pro Chef Tips
These little tips will help you go from “good pavlova” to “wow, this is perfect!”
- Use spotlessly clean equipment
Any trace of grease or egg yolk will stop egg whites from whipping. Wipe the bowl and beaters with a little vinegar and dry well before starting if you’re unsure. - Separate eggs one by one
Crack each egg into a small bowl first, then pour the white into the main mixing bowl. If a yolk breaks, you haven’t ruined the whole batch. - Use room temperature egg whites
They whip faster and hold more air. - Add sugar slowly
Rushing the sugar can cause a grainy, unstable meringue. Take your time with the one-spoonful-at-a-time method. - Check for sugar grains
Rub a bit of meringue between your fingers. If it feels gritty, keep beating. It should feel silky smooth. - Don’t overwhip
Stiff peaks are good, but if the meringue becomes dry, chunky, and dull, you’ve gone too far. Stop when it’s thick, glossy, and holds peaks. - Shape with thicker edges
Make the sides a little higher and thicker than the center. This gives better structure and keeps the marshmallow center inside. - Bake low and slow
Pavlova likes a gentle oven. A too-hot oven will brown or crack it badly. - Cool in the oven
This is one of the most important steps. Sudden cold air can cause big cracks and collapse. Let it cool slowly. - Accept some cracks
Tiny cracks are completely normal and even charming. You’ll cover most of them with cream and fruit anyway. - Use fresh fruit
Avoid very watery or frozen fruits that can leak lots of liquid and soften the meringue quickly. - Assemble close to serving time
Add the cream and fruit just before serving (or up to an hour before) so the shell stays crisp.
Common Mistakes to Avoid
Pavlova has a bit of a reputation for being tricky, but most problems come from the same few mistakes. Here’s how to avoid them.
1. Meringue doesn’t whip properly
Possible causes:
- A bit of egg yolk in the whites
- Greasy bowl or beaters
- Using cold egg whites
How to avoid:
- Separate eggs carefully, one at a time.
- Use a very clean, dry bowl (glass or metal, not plastic).
- Let egg whites come to room temperature before whipping.
2. Pavlova weeps or leaks syrup
Possible causes:
- Sugar not fully dissolved
- Too much sugar on the surface
- Very humid weather
How to avoid:
- Add sugar slowly and beat until the meringue feels smooth between your fingers.
- Don’t sprinkle extra sugar on top of the meringue before baking.
- Avoid making pavlova on extremely humid days, if possible.
3. Pavlova collapses or sinks badly
Possible causes:
- Undercooked center
- Oven door opened too early
- Too fast a temperature change
How to avoid:
- Bake long enough at low temperature until the shell is dry and firm.
- Don’t open the oven during baking.
- Let pavlova cool in the turned-off oven with the door slightly open.
4. Pavlova cracks a lot
Some cracks are normal, but very big ones can be from:
- Oven too hot
- Cooling too quickly
- Over-whipped meringue
How to avoid:
- Use an oven thermometer to check temperature.
- Always cool in the oven, slowly.
- Stop whipping when meringue is glossy and holds peaks, not dry.
5. Pavlova turns brown
Possible causes:
- Oven temperature too high
- Baking too close to top heating element
How to avoid:
- Reduce oven temperature by 10–15°C (about 25°F) next time.
- Bake on the middle rack.
6. Pavlova is dry all the way through (no marshmallow center)
Possible cause:
- Baked too long or at too high a temperature.
How to avoid:
- Shorten baking time slightly next time.
- Check your oven temperature.
7. Pavlova is too soft and doesn’t have a crisp shell
Possible causes:
- Underbaked
- Very humid environment
- Stored in the fridge
How to avoid:
- Bake a little longer until shell is fully dry.
- Store in a cool, dry place, not the refrigerator.
- Only add cream and fruit just before serving.
Storage & Meal Prep
Pavlova is best eaten fresh, but you can still plan ahead.
Storing the Plain Pavlova Shell
- Once completely cool, store the un-topped pavlova in an airtight container.
- Keep it in a cool, dry place, away from humidity. A pantry is better than the fridge.
- It should stay crisp for up to 2 days, depending on the weather.
Avoid storing in the refrigerator. Fridge humidity can make the shell sticky and soft.
Storing Assembled Pavlova
Once you add whipped cream and fruit, the pavlova will slowly start to soften as it absorbs moisture.
- Best enjoyed within 1–2 hours of assembling.
- You can refrigerate leftovers, but the meringue will turn soft and chewy rather than crisp. It will still taste nice, just with a different texture.
Meal Prep Strategy
For parties or special dinners:
- The day before:
- Bake the pavlova shell and let it cool fully in the oven.
- Store in an airtight container at room temperature.
- Just before serving:
- Whip the cream.
- Prepare and slice the fruit.
- Assemble and serve.
This way, you’re not stressed on the day, and your pavlova is still fresh and crisp.
Make-Ahead & Freezer Notes
Make-Ahead (Best Method)
- Bake the pavlova shell 1 day in advance.
- Let it cool completely in the oven.
- Store in an airtight container, in a dry, cool place (not in the fridge).
- On the day of serving, whip the cream, slice the fruit, assemble, and enjoy.
Freezing Pavlova
Freezing pavlova is possible, but not ideal. The texture can change slightly when it thaws, and it may become a bit more chewy.
If you do want to freeze it:
- Only freeze the plain, un-topped pavlova shell.
- Wrap it very carefully in plastic wrap, then in foil.
- Place it in a sturdy container to protect it.
- Freeze for up to 1 month.
To thaw:
- Remove from the freezer and unwrap.
- Let it come to room temperature in a dry place, still inside a container, to protect from moisture.
- Do not thaw in the fridge (too humid).
Once thawed, add cream and fruit just before serving.
Whipped cream does not freeze and thaw well when on the pavlova, so always freeze the meringue only, not the assembled dessert.
Serving Suggestions
Serving pavlova is so much fun because it looks as beautiful as it tastes.
Presentation Ideas
- Place the pavlova on a cake stand or large flat plate for a dramatic centerpiece.
- Top with a mountain of whipped cream, then pile fresh fruit high on top.
- Drizzle passionfruit pulp or berry coulis over the fruit for extra color and flavor.
- Add a few mint leaves or edible flowers for a final elegant touch.
Flavor Combos to Try
- Classic Berry Pavlova:
Whipped cream + mixed berries + powdered sugar dusting. - Kiwi & Strawberry Pavlova:
Sliced kiwifruit, strawberries, and maybe a little passionfruit. - Tropical Pavlova:
Mango, pineapple, kiwi, passionfruit, and toasted coconut flakes. - Chocolate & Cherry Pavlova:
Chocolate shavings, cherries or berries, and a drizzle of chocolate sauce. - Lemon Pavlova:
Layer of lemon curd, cream, and blueberries or raspberries.
What to Serve With It
- Hot drinks: coffee, espresso, cappuccino, tea.
- Cold drinks: sparkling water with lemon, light dessert wines, Moscato, or Prosecco.
Pavlova is sweet, so it pairs well with something light and refreshing.
FAQs
Q: Can I make pavlova on a humid or rainy day?
A: You can, but it’s a bit harder. High humidity can make the pavlova sticky or cause it to soften faster. If you must bake on a humid day, make sure the pavlova is stored in an airtight container once cool, and avoid leaving it out in the open air for long.
Q: What is the difference between pavlova and meringue?
A: Pavlova is a type of meringue dessert, but the texture is different. Pavlova has a crisp shell and a soft, marshmallowy center, while regular meringue cookies or shells are crisp and dry all the way through.
Q: Why did my pavlova crack?
A: Small cracks are normal. Big cracks usually mean the oven was too hot or the pavlova cooled too quickly. Next time, lower the temperature slightly and always cool it slowly in the oven with the door slightly open.
Q: My pavlova is chewy instead of crisp. What happened?
A: It may be underbaked or affected by humidity. Bake a bit longer at a low temperature until the shell is dry. Also, store in a dry place, not the fridge.
Q: Why is my pavlova sticky and weeping syrup?
A: The most common cause is sugar that wasn’t fully dissolved in the egg whites. Make sure you add sugar slowly and beat until the mixture feels smooth. Humidity can also contribute.
Q: Can I use brown sugar instead of white sugar?
A: It’s not recommended for a classic pavlova. Brown sugar contains more moisture and can cause stickiness and weeping. For best results, use caster or granulated white sugar.
Q: How far in advance can I assemble the pavlova with cream and fruit?
A: Ideally, assemble just before serving or up to 1 hour ahead. After that, the meringue will start to soften from the moisture.
Q: Can I double this recipe for a bigger pavlova?
A: It’s better to make two separate pavlovas or one and a few minis, rather than one huge one. Large pavlovas are more likely to crack or collapse. If you do double it, bake very gently and a bit longer.
Q: Can I use pasteurized egg whites from a carton?
A: Sometimes yes, sometimes no. Many carton egg whites do not whip as well because of how they’re processed. Fresh egg whites give the best and most reliable results.
Q: How do I move the pavlova without breaking it?
A: Use the parchment paper to lift it gently onto a serving platter, or slide a large spatula (or two) underneath. Work slowly and gently.
Conclusion (friendly and encouraging)
You’ve just learned how to make a perfect classic pavlova with a crispy meringue shell and a soft, marshmallow center—the kind that makes people say “wow” when they cut into it.
Yes, pavlova has a reputation for being a little bit fussy. But when you break it down, it’s really just:
- Whipping egg whites with sugar
- Folding in a few simple ingredients
- Shaping it
- Baking low and slow
- Letting it cool gently
With the tips in this guide, you now understand the “why” behind each step. That means you can avoid the most common problems and fix things if they go slightly off.
Don’t worry if your first pavlova has a few cracks or isn’t perfectly shaped. Pavlova is one of those desserts that is beautiful even when imperfect. Once you cover it with billows of cream and bright, juicy fruit, it always looks stunning—and more importantly, it tastes amazing.
So choose a day, separate some eggs, and give it a try. Each time you make it, you’ll feel more confident. And soon, pavlova will be your go-to special dessert for family celebrations, holidays, and those moments when you simply want to bring something truly gorgeous to the table.