Introduction
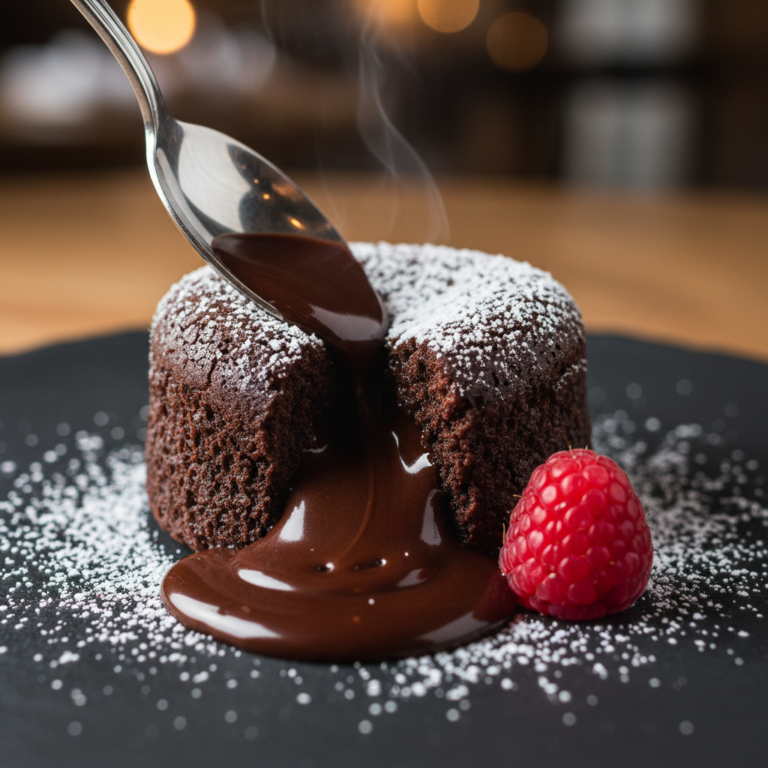
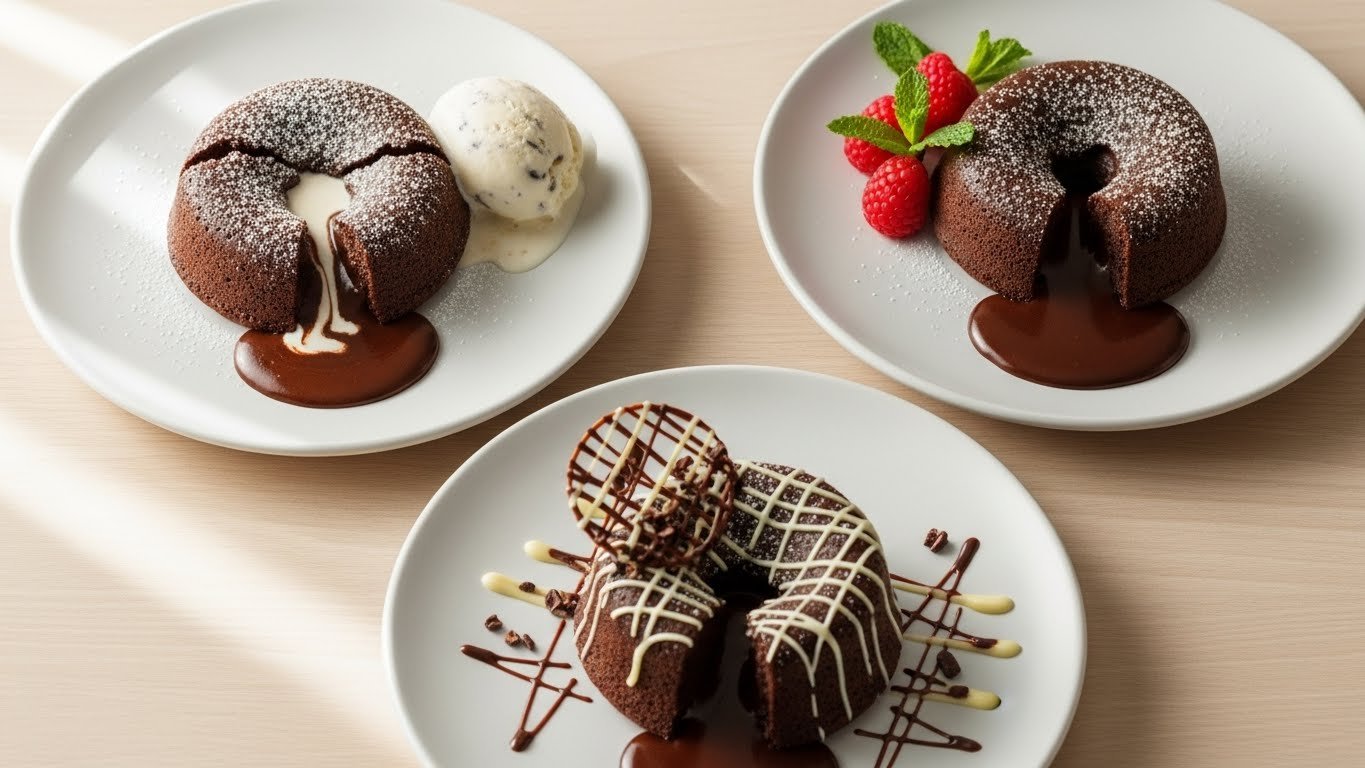
Imagine this: you take a spoon, gently crack through the top of a warm chocolate cake, and suddenly a river of hot, silky chocolate flows out onto the plate. The outside is soft and cakey, the inside is rich and molten, and every bite tastes like pure chocolate heaven.
That is exactly what you get with this restaurant style molten chocolate cake with a decadent oozy center.
The best part? You do not need to be a pastry chef to make it. This dessert looks very fancy and expensive, but it is surprisingly simple. You only need a handful of basic ingredients, a few small baking dishes (ramekins), and about 30 minutes from start to finish.
This molten chocolate cake recipe is perfect for:
- Date nights at home
- Dinner parties
- Valentine’s Day
- Birthdays
- Or simply when the chocolate craving hits and you want something special
In this guide, I’ll walk you through every step in an easy, friendly way. We’ll talk about the short history of chocolate lava cake, the best ingredients to use, pro tips, common mistakes, and how to make this recipe ahead for guests.
By the end, you’ll be able to pull a tray of perfect molten chocolate cakes out of your oven and serve them like a true restaurant dessert.
Let’s bake some chocolate magic!
History / Background
Molten chocolate cake, also called chocolate lava cake, feels like a modern classic you see on every restaurant dessert menu, but it actually has a fun story behind it.
Two famous chefs are often linked to this dreamy dessert.
Michel Bras – The French “coulant au chocolat”
In the early 1980s, French chef Michel Bras created a dessert he called “coulant au chocolat,” which means “flowing chocolate.” He made a frozen ball of chocolate ganache, then baked it inside a chocolate cake. When you cut into it, the center flowed out. It became a signature dish at his restaurant in France and started a new trend in chocolate desserts.
Jean-Georges Vongerichten – The New York lava cake
A few years later, in the late 1980s, chef Jean-Georges Vongerichten in New York served chocolate cakes that were slightly underbaked in the center. Instead of a solid cake, the inside stayed liquid and gooey. Diners loved it. He called it “chocolate lava cake,” and it quickly became famous in restaurants around the world.
Two methods, one result
So, we now have two main ways to make molten chocolate cake:
- Bake cake around a frozen chocolate center
- Bake a simple chocolate batter just until the edges are set and the center stays molten
For home baking, the second method is easier and faster, and that’s the method we’ll use in this recipe.
Why it became so popular
Molten chocolate cake became a star because:
- It looks dramatic when the center flows out
- It has that perfect contrast of textures: soft cake + liquid center
- It feels like a special restaurant dessert, but uses simple ingredients
Today, it’s a favorite dessert for special occasions, date nights, and anytime someone wants a warm, rich chocolate treat that feels a bit “fancy.”
Now it’s your turn to make this restaurant style molten chocolate cake in your own kitchen!
Why You’ll Love This Recipe
- True restaurant style – This molten chocolate cake looks and tastes like the ones you order at a high-end restaurant, complete with a perfectly oozy center.
- Simple ingredients – You only need chocolate, butter, eggs, sugar, flour, salt, and vanilla. That’s it.
- Ready in about 30 minutes – From mixing to eating, these chocolate lava cakes are surprisingly quick.
- Perfect portion size – Everyone gets their own little cake. So cute, and no slicing needed.
- Beginner-friendly – Clear, step-by-step instructions make this recipe great even if you’re new to baking.
- Make-ahead friendly – You can mix the batter and keep it in the fridge or freezer, then bake just before serving.
- Customizable – Add coffee, orange zest, peanut butter, caramel, or different chocolates to make your own version.
- Rich and indulgent – The flavor is deeply chocolatey, the texture is soft outside and molten inside. It’s pure decadence.
- Impresses every time – Friends and family will think you spent hours on this, but you’ll know it was actually easy.
- Great for special occasions – Valentine’s Day, anniversaries, birthdays, or just “I deserve chocolate today.”
Ingredient Notes
Let’s look at each ingredient in this restaurant style molten chocolate cake and why it matters. Understanding your ingredients helps you get the perfect gooey center and rich flavor.
Chocolate
This is the star of the recipe, so choose a chocolate you really like.
- Use semi-sweet or bittersweet chocolate (about 60–70% cacao).
- Look for baking bars or good quality chocolate bars, not chocolate chips if possible. Chips often have stabilizers and don’t melt as smoothly.
- Brands like Ghirardelli, Lindt, Guittard, Valrhona, or any high-quality dark chocolate will work well.
If you prefer a sweeter cake, choose a lower cacao percentage (around 55–60%). For a darker, more intense flavor, choose 70%.
Can you use milk chocolate? Yes, but the cake will be sweeter and less rich. If you do, reduce the sugar slightly.
Butter
Butter gives the cake richness and that lovely tender texture.
- Use unsalted butter so you can control the salt level.
- Cut it into pieces so it melts evenly with the chocolate.
If you only have salted butter, you can use it and just skip the added pinch of salt in the recipe.
Eggs and Egg Yolks
Eggs are very important in this recipe.
- You’ll use whole eggs plus extra yolks.
- Whole eggs give structure and help the cakes puff up.
- Extra yolks add richness and a silky texture to the batter and center.
Make sure your eggs are at room temperature. Cold eggs can cause the melted chocolate to thicken or seize.
Sugar
Plain granulated sugar (white sugar) sweetens the cakes and helps give the tops a slight crust.
Don’t use powdered sugar here; it has cornstarch and will change the texture.
Flour
We only use a small amount of all-purpose flour.
- The flour helps hold the cake together so it can be unmolded.
- Too much flour will make the cake dry and fully baked inside, not molten.
If you’re gluten-free, you can replace the flour with the same amount of gluten-free 1:1 blend or cornstarch.
Salt
A small pinch of fine salt might not sound important, but it is.
Salt brings out the chocolate flavor and balances the sweetness. Don’t skip it unless you’re using salted butter, in which case you can leave it out.
Vanilla Extract
Vanilla makes the chocolate taste rounder and deeper.
Use pure vanilla extract if you can. You only need a small amount, but it adds a lot of warmth and aroma.
Optional: Instant Espresso Powder
This is optional, but I highly recommend it.
- A little instant espresso powder deepens the chocolate flavor.
- It doesn’t make the cakes taste like coffee at this small amount. It just makes the chocolate taste more “chocolatey.”
If you don’t have espresso powder, you can skip it.
For the Ramekins
To help the cakes release nicely, you’ll need:
- Softened butter or cooking spray – to grease the ramekins
- Cocoa powder or flour – to dust the greased ramekins
Cocoa powder is my favorite because it keeps the outside of the cakes dark and chocolaty.
Equipment Needed
You don’t need fancy tools to make this restaurant style molten chocolate cake. Here’s what helps:
Essential Equipment
- 4 small ramekins (about 6 ounces each)
These are little ceramic dishes often used for custards or crème brûlée. If you don’t have ramekins, you can use oven-safe mugs or a muffin tin (with adjusted time). - Rimmed baking sheet
This makes it easy to move all the ramekins in and out of the oven at once. - Mixing bowls
One medium bowl for melting chocolate and butter, and another for mixing eggs and sugar. - Whisk
For beating the eggs and sugar and mixing the batter. - Rubber spatula
Useful for folding flour into the batter and scraping every last bit out of the bowl. - Microwave or double boiler setup
You’ll need one of these methods to gently melt the chocolate and butter. - Measuring cups and spoons
For accurate ingredients. - Small knife or offset spatula
To loosen the cakes from the ramekins before turning them out. - Kitchen timer
Timing is very important for that perfect oozy center.
Nice-to-Have Equipment
- Kitchen scale – For weighing chocolate and flour more precisely.
- Hand mixer or stand mixer – Makes it easier to whip eggs and sugar until pale and thick.
- Fine mesh sieve – For dusting powdered sugar over the finished cakes.
- Oven thermometer – To check if your oven runs hot or cold.
Full Recipe Card (Restaurant Style Molten Chocolate Cake)
Molten Chocolate Cake with Decadent Oozy Center
Servings: 4 individual cakes
Prep Time: 15 minutes
Cook Time: 12–14 minutes
Total Time: About 30 minutes
Difficulty: Easy to Intermediate
Ingredients
For the lava cakes:
- 4 oz (113 g) high-quality semi-sweet or bittersweet chocolate, chopped
- ½ cup (113 g / 1 stick) unsalted butter, cut into pieces
- 2 large eggs, at room temperature
- 2 large egg yolks, at room temperature
- ¼ cup (50 g) granulated sugar
- ½ teaspoon vanilla extract
- ⅛ teaspoon fine salt
- 2 tablespoons (about 15 g) all-purpose flour
- ½ teaspoon instant espresso powder (optional, for deeper chocolate flavor)
For preparing the ramekins:
- 1 tablespoon softened butter or cooking spray
- 1–2 tablespoons unsweetened cocoa powder (or flour)
For serving (optional but delicious):
- Vanilla ice cream or whipped cream
- Powdered sugar, for dusting
- Fresh berries (raspberries, strawberries, etc.)
Instructions
1. Prepare the ramekins
- Generously grease four 6-ounce ramekins with softened butter or cooking spray. Make sure to coat the bottom and the sides very well, especially where they meet.
- Add a small spoonful of cocoa powder to each greased ramekin. Tilt and rotate to coat the inside completely, then tap out any extra. Set the ramekins on a rimmed baking sheet.
- Preheat your oven to 425°F (220°C) with a rack in the middle.
2. Melt the chocolate and butter
- Place the chopped chocolate and butter pieces in a medium microwave-safe bowl.
- Microwave in 20–30 second bursts, stirring after each time, until the mixture is smooth and fully melted. This usually takes about 1–1½ minutes total. Do not overheat.Stovetop option: Place a heatproof bowl over a pot of gently simmering water (the bowl should not touch the water). Add the chocolate and butter and stir until melted and smooth.
- Remove from heat and let the mixture cool for about 5 minutes so it’s warm, not hot.
3. Mix the eggs and sugar
- In a separate mixing bowl, add the whole eggs, egg yolks, and granulated sugar.
- Whisk vigorously by hand for about 2–3 minutes, or use a hand mixer on medium-high speed for about 1–2 minutes, until the mixture becomes lighter in color, slightly thick, and a bit foamy.
- Whisk in the vanilla extract and salt until combined.
4. Combine chocolate and egg mixture
- If using espresso powder, stir it into the slightly cooled chocolate mixture now.
- Slowly pour the warm (not hot) chocolate mixture into the egg mixture while whisking gently until everything is smooth and fully combined.
5. Add the flour
- Sift or sprinkle the flour over the chocolate batter.
- Using a rubber spatula, gently fold the flour into the batter until just combined. Be careful not to overmix; stop as soon as you don’t see dry flour.
6. Fill the ramekins
- Evenly divide the batter between the prepared ramekins. They should be about ¾ full.
- Smooth the tops gently with the spatula or the back of a spoon.
At this point, you can bake them right away, or cover and refrigerate for later. See Make-Ahead section below.
7. Bake
- Place the baking sheet with the filled ramekins into the preheated 425°F (220°C) oven.
- Bake for 12–14 minutes. The exact time depends on your oven and your ramekins.
The cakes are done when:
- The edges look set and slightly pull away from the sides
- The tops look dry and may have a small crack or two
- The center still jiggles slightly when you gently shake the pan
- When they look ready, remove the baking sheet from the oven and let the cakes rest for 1 minute. No longer – they will keep cooking from the heat.
8. Unmold and serve
- Run a thin knife or offset spatula carefully around the edge of each cake to loosen it from the ramekin.
- Place a small dessert plate upside down on top of one ramekin. Holding the ramekin and plate together, quickly flip them over.
- Let the ramekin sit upside down on the plate for about 10 seconds, then gently lift it off. The cake should slide out beautifully.
- Repeat with the remaining cakes.
- Dust with powdered sugar, add a scoop of vanilla ice cream or whipped cream, and garnish with berries if desired.
- Serve immediately while the centers are still hot and molten.
Recipe Notes
- Every oven is a little different. The first time you make these, start checking at 11–12 minutes.
- Slight underbaking is better than overbaking. If the center is too runny, it’s still tasty. If it’s overbaked, you lose the molten center.
- If your batter was chilled in the fridge, it may need 1–2 extra minutes in the oven.
- Use room temperature eggs for the smoothest batter.
- These cakes are best eaten right away, as the centers firm up as they cool.
Tips & Variations
Once you master the basic restaurant style molten chocolate cake, you can have fun with flavors and textures.
Flavor Variations
- Mocha Lava Cake:
Add 1 teaspoon espresso powder and serve with coffee ice cream. - Orange Chocolate Lava Cake:
Stir 1 tablespoon finely grated orange zest into the batter. Garnish with orange slices or candied orange peel. - Mint Chocolate Lava Cake:
Add ½ teaspoon peppermint extract along with the vanilla. Top with crushed candy canes or mint leaves. - Spiced Lava Cake (Mexican hot chocolate style):
Add ¼ teaspoon cinnamon and a tiny pinch of cayenne pepper to the batter. - Salted Caramel Lava Cake:
Place a small spoonful of thick caramel in the center of each ramekin of batter before baking. Lightly sprinkle sea salt flakes on top before serving. - Raspberry Lava Cake:
Press a frozen raspberry into the center of each cake before baking. Serve with raspberry sauce.
Chocolate Variations
- Extra dark version:
Use 70–72% cacao chocolate and keep the sugar the same for a less sweet, more intense lava cake. - Milk chocolate version:
Use milk chocolate and reduce sugar to 2 tablespoons. The result is sweeter and creamier. - Half-and-half:
Use half milk chocolate and half dark chocolate for a balanced flavor.
Texture Variations
- Very runny center:
Bake 1 minute less than usual. - Slightly firmer center (more like fudge):
Bake 1–2 minutes longer. - Flourless style:
Skip the flour completely for a denser, almost truffle-like cake. Just know they will be more delicate to unmold.
Dietary Variations
- Gluten-free:
Replace the flour with 2 tablespoons cornstarch or gluten-free all-purpose blend. - Dairy-free:
Use dairy-free dark chocolate and replace butter with vegan butter or refined coconut oil. The flavor will change slightly but will still be rich and delicious.
Pro Chef Tips
Here are some simple but powerful tips that pastry chefs use to get perfect molten chocolate cakes every time:
- Know your oven
If your oven runs hot, your cakes may bake faster. If it runs cool, they may need extra time. An oven thermometer can help you learn your oven’s true temperature. - Use room temperature eggs
Cold eggs can cause the warm chocolate mixture to thicken too quickly and get grainy. Let your eggs sit at room temp for 20–30 minutes, or place them in a bowl of warm water for 5–10 minutes. - Cool your chocolate slightly before adding eggs
If the chocolate-butter mixture is too hot, it can cook the eggs and create a lumpy batter. Let it sit for about 5 minutes until just warm. - Whip eggs and sugar well
Whisk them until pale and slightly thick. This gives a lighter texture and helps the cakes rise nicely. - Fold, don’t beat, in the flour
Gently fold in the flour using a spatula. Overmixing knocks out air and can make the cakes dense. - Grease and dust thoroughly
Take your time greasing and dusting the ramekins. Any missed spots might cause the cake to stick. - The jiggle test
When you gently shake the baking sheet, the sides of the cake should stay mostly firm, but the very center should still jiggle a little. That’s when you know they’re ready. - 1-minute rest before turning out
Letting the cakes sit for just one minute helps them “set” slightly so they unmold neatly, but still stay molten inside. - Flip with confidence
Place the plate on top of the ramekin, hold both together, and flip quickly. A slow, nervous flip can cause accidents. - Serve right away
Have your plates, ice cream, and guests ready. These cakes are at their best within a few minutes after baking.
Common Mistakes to Avoid
Even though this recipe is simple, a few things can go wrong. Here’s how to avoid the most common problems:
- Overbaking the cakes
- Problem: The center is fully cooked and not molten.
- Fix: Reduce baking time by 1–2 minutes next time. Remember, ovens vary, so your perfect time might be a bit different from the recipe.
- Underbaking too much
- Problem: The cakes collapse or the batter in the center is completely liquid and doesn’t hold any shape.
- Fix: Add 1–2 minutes more. You want a gooey center, not raw batter.
- Cakes sticking to the ramekins
- Problem: You can’t unmold the cake in one piece.
- Fix: Grease and dust the ramekins very well. Make sure to get into the corners. Running a knife around the edge before flipping also helps.
- Grainy or lumpy batter
- Problem: The texture isn’t smooth.
- Fix: Let your chocolate cool slightly before adding to the eggs, and use room temperature eggs. If it still happens, you can strain the batter through a fine sieve.
- Too sweet or not chocolatey enough
- Problem: The flavor feels flat.
- Fix: Use a higher quality, darker chocolate. Add a pinch more salt or a bit of espresso powder to deepen the flavor.
- Tops cracking too much
- Problem: The cakes crack a lot and look dry.
- Fix: Your oven might be too hot. Try lowering the temperature by 10–15°F next time.
- Uneven baking (some done, some not)
- Problem: One cake is perfect, another is still raw.
- Fix: Make sure to divide the batter evenly between ramekins. You can rotate the baking sheet halfway through baking if your oven has hot spots.
- Batter too thick or pasty
- Problem: The mixture looks heavy and not pourable.
- Fix: This usually means the chocolate cooled too much before mixing. Try working a bit faster, and ensure eggs are room temperature.
Storage & Meal Prep
These molten chocolate cakes are at their very best when served fresh from the oven. The center is most molten when the cake is warm.
However, you can store leftovers and also prepare parts ahead of time.
Storing Baked Cakes
- Let leftover cakes cool to room temperature.
- Keep them in an airtight container in the fridge for up to 3–4 days.
The centers will no longer be molten, but the cakes will taste like rich, fudgy chocolate cakes.
Reheating Baked Cakes
- Microwave: Heat one cake at a time on medium power (50%) for 20–30 seconds. The center may soften a little again, though it won’t be as runny as when first baked.
- Oven: Warm at 325°F (160°C) for 8–10 minutes. This keeps the texture nicer than microwaving, but again, don’t expect a fully molten center.
Best Meal Prep Strategy
For the true molten effect, it’s better to store unbaked batter instead of baked cakes. See below.
Make-Ahead & Freezer Notes
This is where this recipe really shines for entertaining. You can prepare the batter in advance and bake the cakes at the last minute.
Make-Ahead in the Fridge (Up to 24 Hours)
- Prepare the batter and fill the greased, cocoa-dusted ramekins.
- Cover each ramekin tightly with plastic wrap.
- Refrigerate for up to 24 hours.
When ready to bake:
- Remove from the fridge and let sit at room temperature for about 15–20 minutes while the oven preheats.
- Bake as directed, adding 1–2 minutes if still quite cold in the center.
Freezing Unbaked Cakes (Up to 2 Months)
- Prepare the batter and fill the prepared ramekins.
- Let the batter cool to room temperature.
- Wrap each ramekin tightly in plastic wrap, then in foil.
- Freeze for up to 2 months.
To bake from frozen:
- Preheat oven to 425°F (220°C).
- Remove plastic and foil.
- Place frozen ramekins on a baking sheet.
- Bake for about 16–18 minutes, until edges are set and center jiggles.
- Rest 1 minute, then unmold and serve.
This is perfect when you want to always have a “restaurant dessert” hidden in your freezer, ready for surprise guests or sudden chocolate cravings.
Serving Suggestions
Serving is where you can really make your restaurant style molten chocolate cake feel special and beautiful.
Classic Pairings
- Vanilla ice cream – The cold ice cream against the warm molten chocolate is heavenly.
- Lightly sweetened whipped cream – Fluffy and simple; you can add a little vanilla or liqueur.
- Fresh berries – Raspberries, strawberries, or mixed berries add a bright, fresh contrast.
Plating Ideas
- Dust with powdered sugar over the top using a fine sieve.
- Add a drizzle of chocolate sauce, caramel sauce, or raspberry coulis on the plate.
- Sprinkle with cocoa powder or shaved chocolate for extra drama.
- Garnish with a mint sprig or a few fresh berries on the side.
Occasion Ideas
- Date night at home – Two molten cakes, candlelight, and coffee.
- Dinner parties – Prepare the batter ahead, bake while guests finish their main course, and serve warm.
- Birthdays – Add a candle right in the center and let the birthday person make a wish.
- Holiday meals – A rich chocolate lava cake makes a wonderful Christmas or New Year’s Eve dessert.
FAQs
Q: Can I make this molten chocolate cake without ramekins?
Yes. You can use oven-safe mugs, small heatproof bowls, or even a muffin tin. If you use a muffin tin, grease it very well and reduce the baking time to about 8–9 minutes since the cakes are smaller.
Q: How do I know when the cakes are done?
Look for set edges and a slightly jiggly center. The tops should look dry, not shiny. When you gently shake the pan, the center should wobble a little like soft jelly, not liquid like water.
Q: My cakes didn’t have a molten center. What went wrong?
They were probably baked a bit too long. Every oven is different, so try reducing the baking time by 1–2 minutes next time.
Q: Can I use chocolate chips instead of chocolate bars?
You can, but bars are better. Chips have stabilizers that can make the texture slightly less smooth. If you do use chips, choose a good-quality brand and still measure by weight if possible.
Q: Can I double the recipe?
Yes, you can double all the ingredients to make 8 cakes. Use two baking sheets if needed, and keep an eye on them, as baking time should be about the same.
Q: Do the eggs cook enough?
Yes. The cakes bake in a very hot oven, and the eggs reach a safe temperature during the baking and resting time.
Q: Can I make these lava cakes without flour?
Yes. If you leave out the flour entirely, the cakes will be denser and more like baked chocolate truffles. They may be more fragile when unmolding, so be extra gentle.
Q: Can I flavor the batter with alcohol (like rum or liqueur)?
Absolutely. You can add 1–2 teaspoons of a liqueur like Baileys, Kahlúa, Grand Marnier, or dark rum. Reduce the vanilla a bit if you do.
Q: Are these molten chocolate cakes very sweet?
They are sweet but balanced. Using dark chocolate (60–70% cacao) gives a deep chocolate flavor that isn’t overly sugary. If you like less sweet desserts, you can use darker chocolate or reduce the sugar slightly.
Q: Can I make them dairy-free?
Yes. Use dairy-free dark chocolate and replace butter with vegan butter or refined coconut oil. The flavor and texture will be a bit different but still lovely.
Conclusion (friendly and encouraging)
You did it—you now have a complete guide to making your own restaurant style molten chocolate cake with a decadent oozy center at home.
What seemed like “fancy restaurant magic” is actually a simple recipe with basic ingredients and a bit of careful timing. Once you’ve tried it once or twice, you’ll see how doable it really is.
Remember:
- The ingredients are simple.
- The method is clear and straightforward.
- The most important part is to keep an eye on the baking time.
Soon, you’ll know your oven’s perfect baking time by heart, and you’ll be able to turn out these impressive chocolate lava cakes whenever you like—date nights, holidays, or just because you deserve something amazing.
Don’t worry if your first batch isn’t perfect. Maybe one cake sticks a little, or one is more molten than the others. That’s okay. They will still taste wonderful, and every time you make them, you’ll get even better.
So go ahead: grab some good chocolate, preheat your oven, and treat yourself (and the people you love) to this warm, rich, gooey chocolate dessert. You absolutely can make this at home.