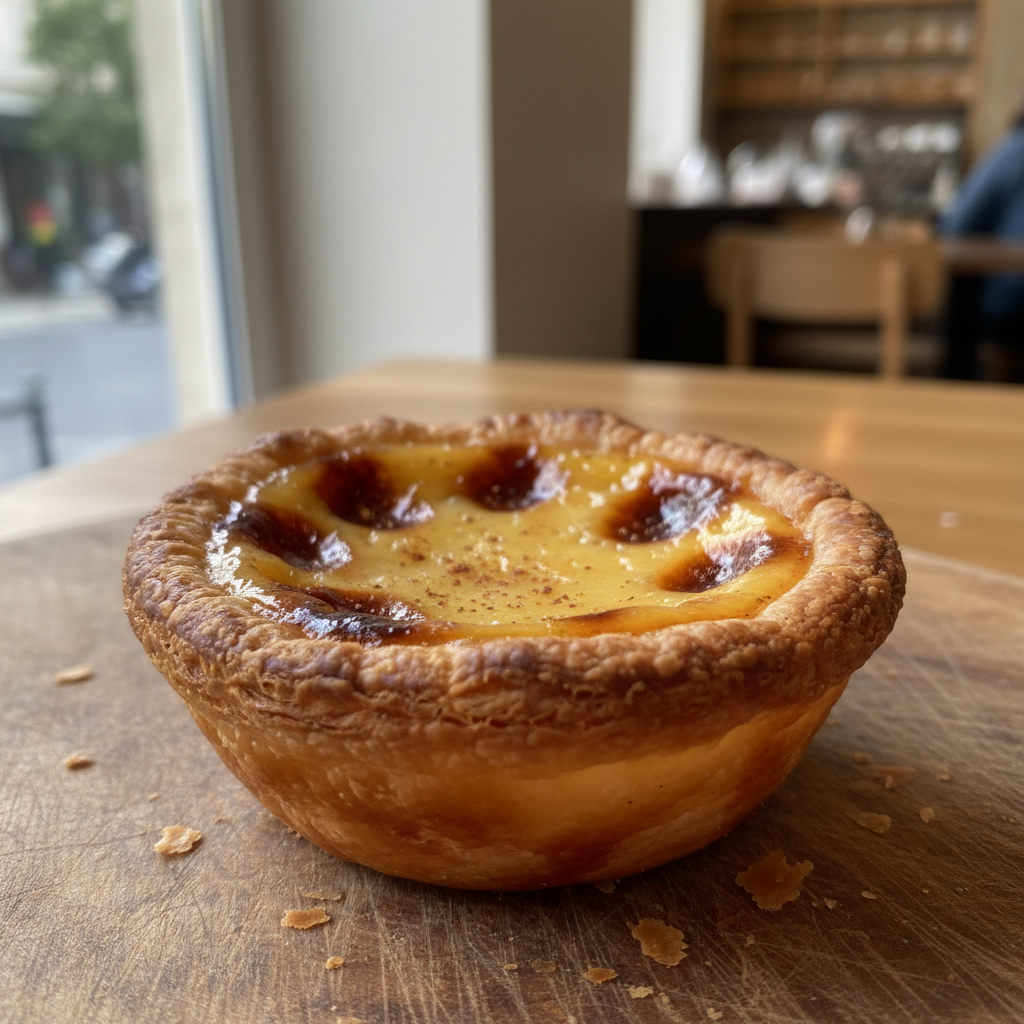
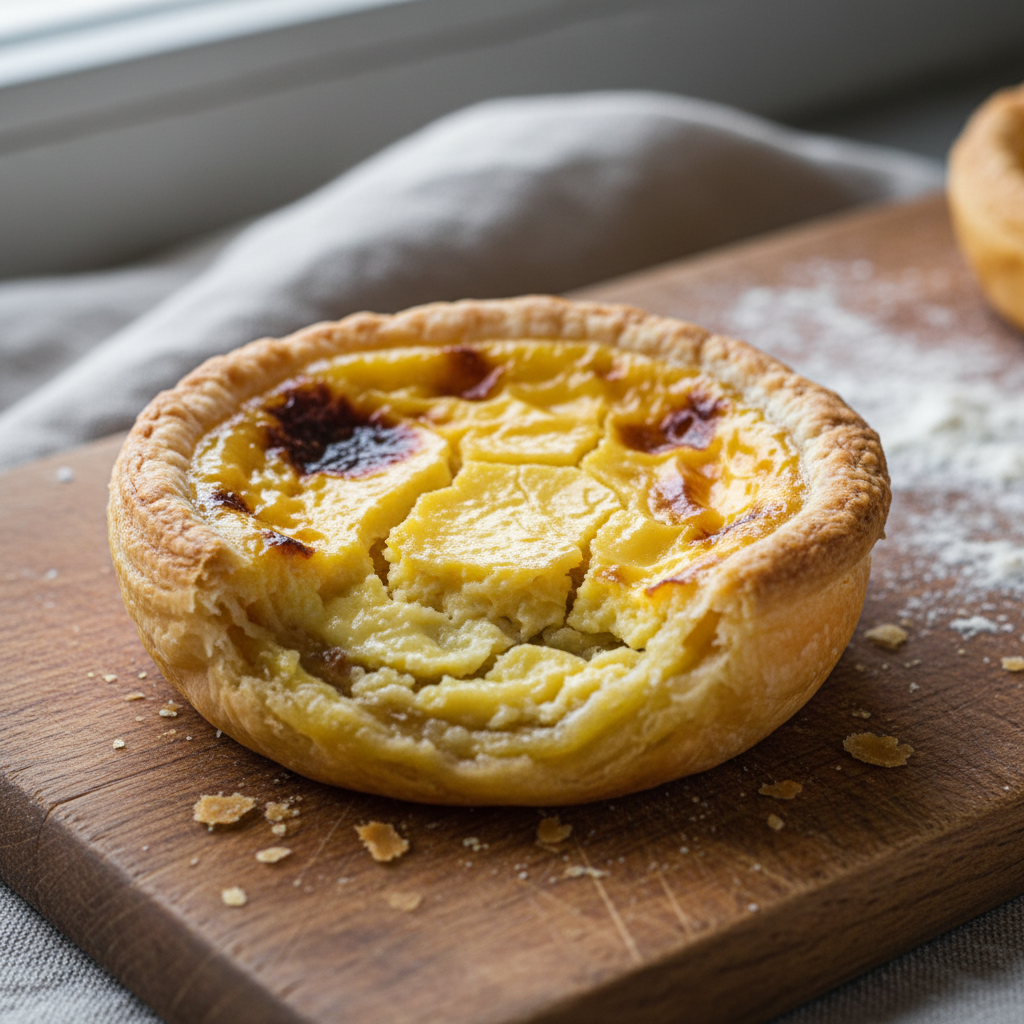
Hello, fellow food lovers! Are you ready to embark on a delicious journey to Portugal right from your kitchen? Today, we’re diving into the wonderful world of Portuguese egg tarts, or “Pastéis de Nata” as they’re known locally. These little golden wonders boast a perfectly crispy, flaky crust cradling a rich, creamy, and subtly sweet custard filling, often topped with a beautifully caramelized blistered top. They look incredibly impressive, but guess what? They’re surprisingly simple to make at home, even for beginner bakers! Forget those store-bought versions; once you taste your homemade Pastéis de Nata, there’s no turning back. Get ready to impress your friends and family with this truly irresistible treat.
History and Background of Pastéis de Nata

The story of Portuguese egg tarts is as rich and fascinating as the tarts themselves. These iconic pastries originated over 300 years ago in the Jerónimos Monastery in Santa Maria de Belém, Lisbon. During that era, convents and monasteries used large quantities of egg whites to starch clothes, leaving them with an abundance of egg yolks. Resourceful monks and nuns, not wanting to waste these precious yolks, began creating various pastries, with Pastéis de Nata being one of the most beloved. After the Liberal Revolution of 1820, many convents and monasteries were closed. To survive, the monks started selling their sweet treats, including the famous egg tarts, to the public. The original recipe was eventually sold to a sugar refinery, which later opened the Fábrica de Pastéis de Belém in 1837, the only place allowed to call their tarts “Pastéis de Belém.” All others are known as “Pastéis de Nata.” This rich history adds a layer of charm to every bite.
Why You Will Love This Recipe
- Effortlessly Crispy Crust Our recipe uses store-bought puff pastry, making the crispy, flaky shell achievable without hours of work.
- Velvety Smooth Custard The filling is incredibly rich, creamy, and perfectly sweet, with a hint of vanilla.
- Beautifully Caramelized Top Achieve that signature blistered, slightly charred top that adds depth of flavor and visual appeal.
- Beginner-Friendly Detailed instructions ensure success even if you’re new to baking.
- Impressive Dessert These tarts look sophisticated and taste divine, making them perfect for any occasion.
- Taste of Portugal Bring an authentic Portuguese bakery experience into your home.
Ingredient Notes for Perfect Tarts
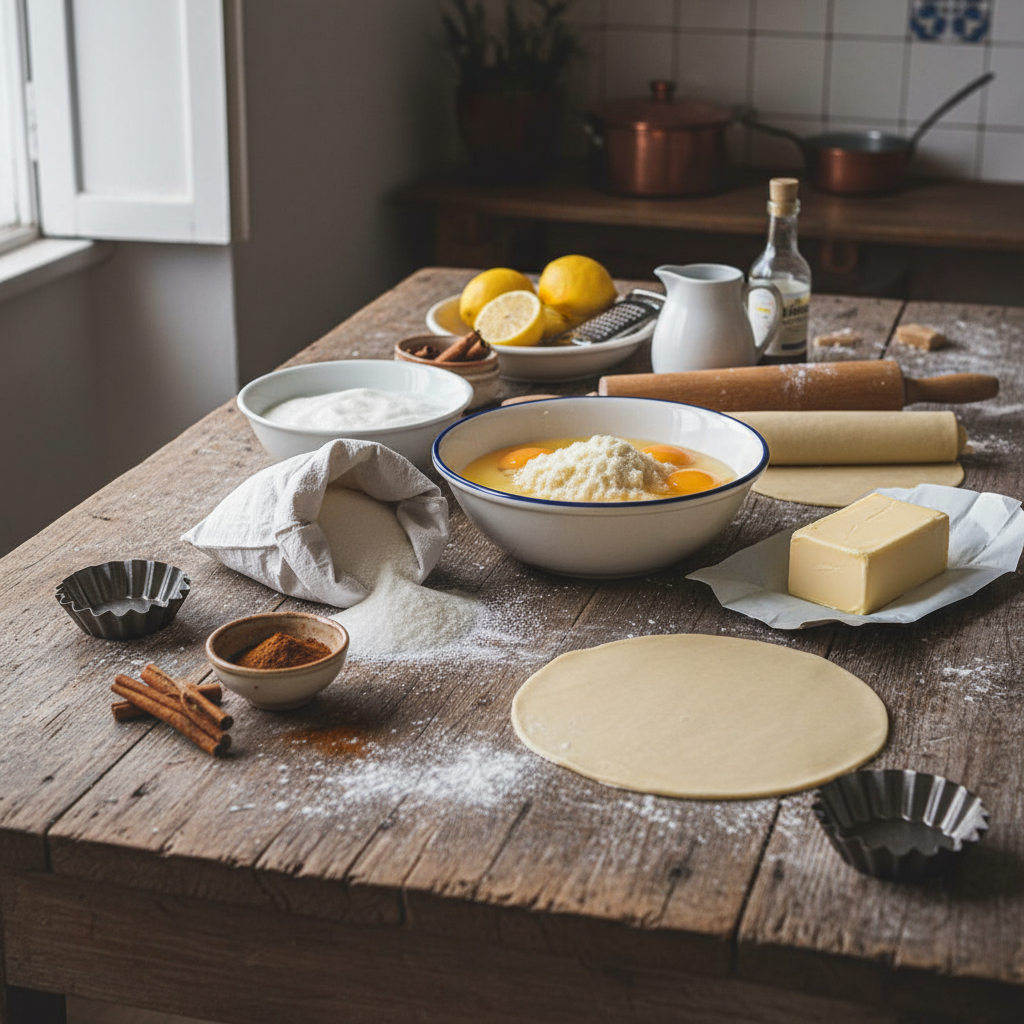
Making delicious Pastéis de Nata starts with understanding your ingredients. Here’s a quick rundown of what you’ll need and why each component is important:
- Puff Pastry The star of our crust! Opt for an all-butter puff pastry if you can find it for the best flavor and flakiness. Thaw it according to package directions.
- Granulated Sugar Sweetens the custard.
- All-Purpose Flour Helps thicken the custard slightly.
- Milk Whole milk is recommended for a richer, creamier custard.
- Egg Yolks These are what give the custard its signature richness, color, and smooth texture. Don’t worry about the whites; save them for meringues or omelets!
- Vanilla Extract Enhances the flavor of the custard. Pure vanilla extract is always best.
- Salt Just a pinch balances the sweetness and brings out other flavors.
- Cinnamon Stick (Optional) For simmering with the milk to infuse a subtle warmth.
- Lemon Peel (Optional) Similar to cinnamon, a strip of lemon peel can add a lovely aromatic note to the milk.
Equipment Needed
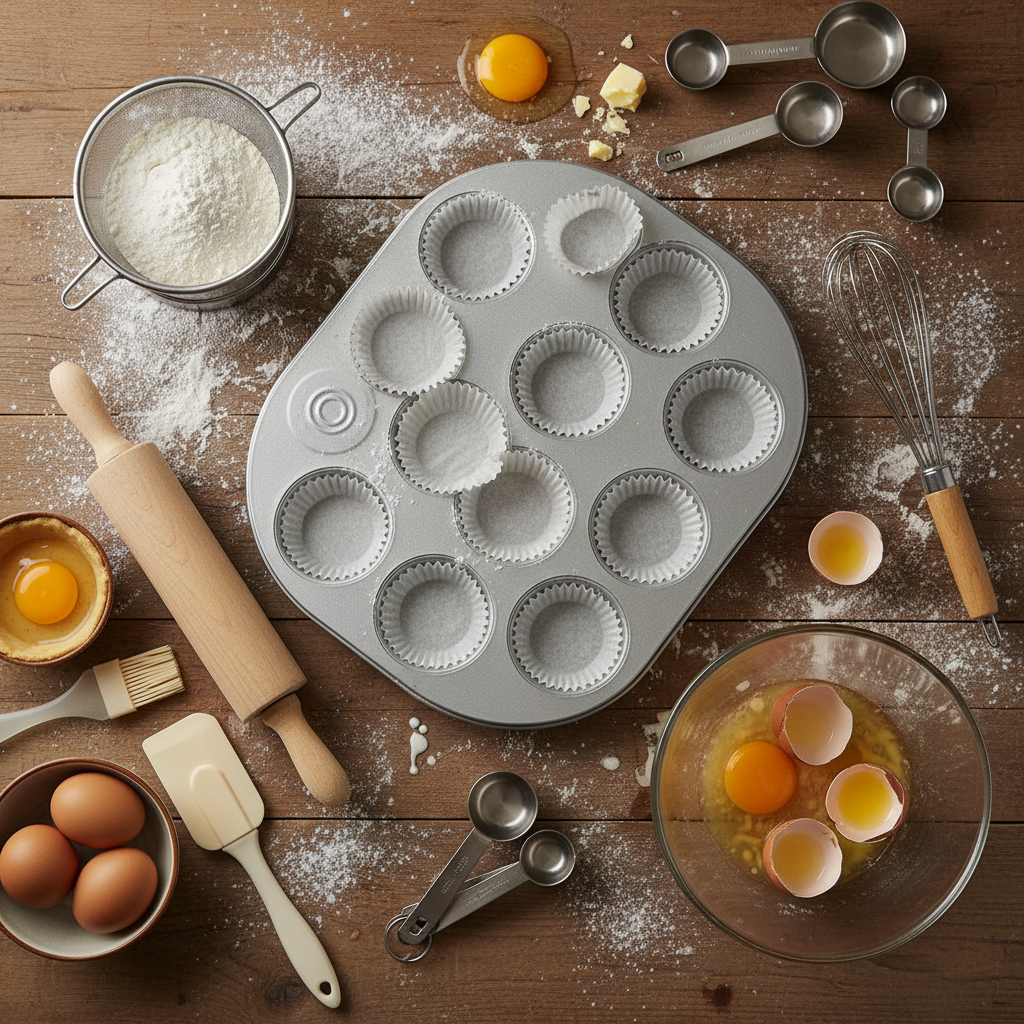
You don’t need a professional kitchen to make these tarts! Here’s the basic equipment that will help you along the way:
- Standard Muffin Tin (12-cup) This is crucial for shaping your tarts.
- Rolling Pin For rolling out the puff pastry.
- Small Saucepan For making the sugar syrup and heating the milk.
- Mixing Bowls A couple of medium-sized bowls for whisking yolks and combining ingredients.
- Whisk Essential for combining the custard ingredients smoothly.
- Fine-Mesh Sieve Recommended for straining the custard for an extra silky texture.
- Pastry Brush (Optional) For brushing the pastry with water if needed.
Full Recipe Card Portuguese Egg Tarts
Get ready to bake! Follow these steps carefully for the best homemade Pastéis de Nata.
Yield 12 tarts
Prep time 30 minutes
Cook time 20-25 minutes
Ingredients
- 1 sheet (about 14 oz / 400g) frozen puff pastry, thawed
- 1 cup (200g) granulated sugar
- 1/2 cup (120ml) water
- 1 cinnamon stick (optional)
- 1 strip lemon peel (optional)
- 1 1/2 cups (360ml) whole milk
- 1/4 cup (30g) all-purpose flour
- 6 large egg yolks
- 1 teaspoon vanilla extract
- Pinch of salt
Instructions
- Prepare the Puff Pastry On a lightly floured surface, roll out the thawed puff pastry sheet slightly to about 1/8-inch thickness. Roll it tightly into a log from one of the longer sides. Cut the log into 12 equal slices (about 1-inch thick each).
- Shape the Tart Shells Place each pastry slice cut-side down into the cups of a non-stick 12-cup muffin tin. Using your thumbs, press the pastry from the center outwards, covering the bottom and sides of each cup. Aim for a thin, even layer, making sure the pastry extends slightly above the rim. Chill the muffin tin in the refrigerator while you prepare the custard.
- Make the Sugar Syrup In a small saucepan, combine the sugar, water, cinnamon stick, and lemon peel (if using). Bring to a boil over medium-high heat, stirring until the sugar dissolves. Once boiling, stop stirring and let it boil for 3-4 minutes until it reaches 220°F (104°C) on a candy thermometer, or just until it slightly thickens. Remove from heat and discard the cinnamon stick and lemon peel.
- Prepare the Milk Mixture In another small saucepan, whisk together 1/4 cup of the milk with the all-purpose flour until smooth. Add the remaining 1 1/4 cups of milk and heat over medium heat, whisking constantly, until it thickens slightly, about 3-5 minutes. It should be thick enough to coat the back of a spoon. Do not boil vigorously. Remove from heat.
- Combine Custard Ingredients In a medium bowl, whisk the egg yolks with the vanilla extract and salt until well combined and slightly lighter in color.
- Temper the Yolks Slowly pour the hot milk mixture into the whisked egg yolks in a thin stream, whisking constantly to temper the yolks and prevent them from scrambling.
- Add Sugar Syrup Gradually pour the hot sugar syrup into the egg yolk and milk mixture, whisking continuously until everything is well combined. For an extra smooth custard, pass the mixture through a fine-mesh sieve.
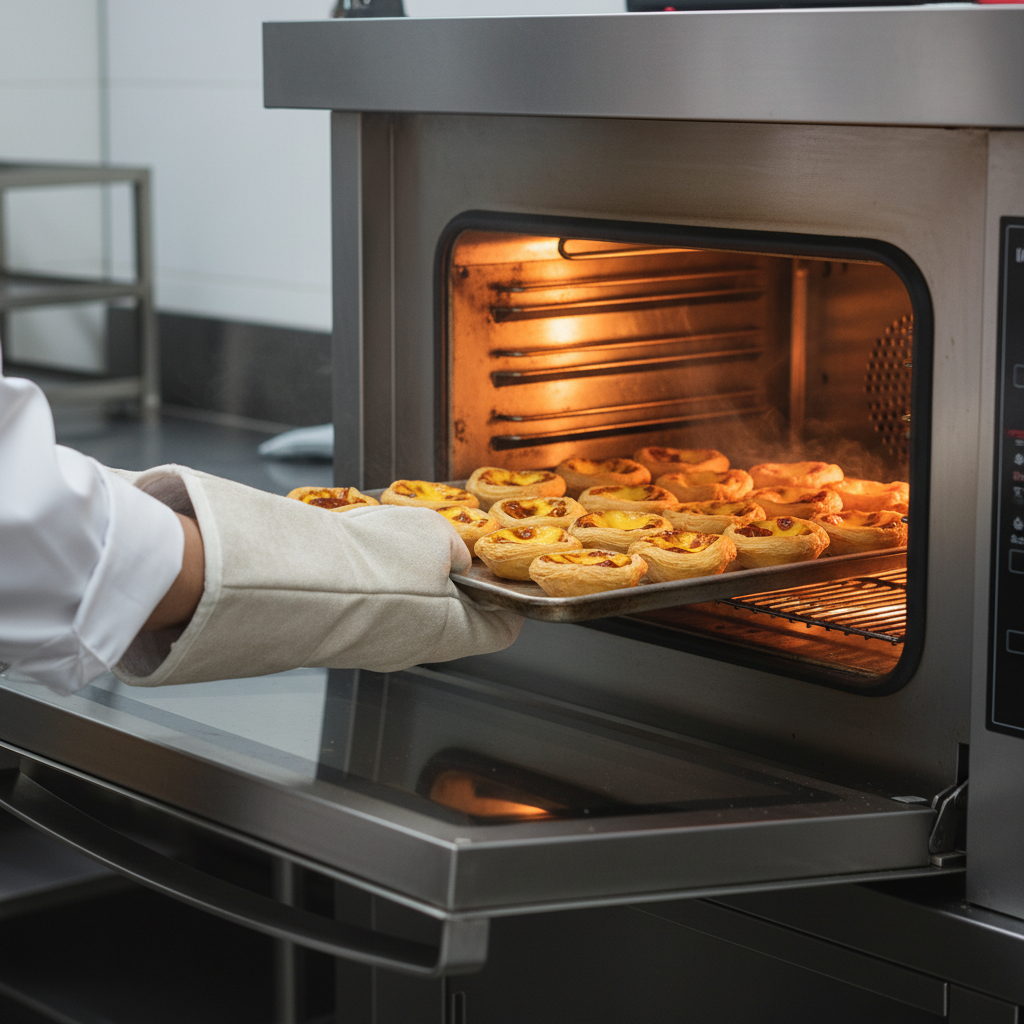
- Fill the Tart Shells Preheat your oven to 500°F (260°C) or as high as your oven goes. Remove the chilled muffin tin from the refrigerator. Fill each pastry-lined cup with the custard mixture, filling them about 3/4 full.
- Bake the Tarts Bake for 15-20 minutes, or until the pastry is golden brown and flaky, and the custard is set with characteristic dark brown, almost black, caramelized spots on top. Keep a close eye on them, as ovens vary.
- Cool and Serve Carefully remove the tarts from the muffin tin immediately after baking (a small offset spatula helps). Let them cool slightly on a wire rack. Pastéis de Nata are best served warm, but they are also delicious at room temperature.
Tips and Variations for Your Pastéis de Nata
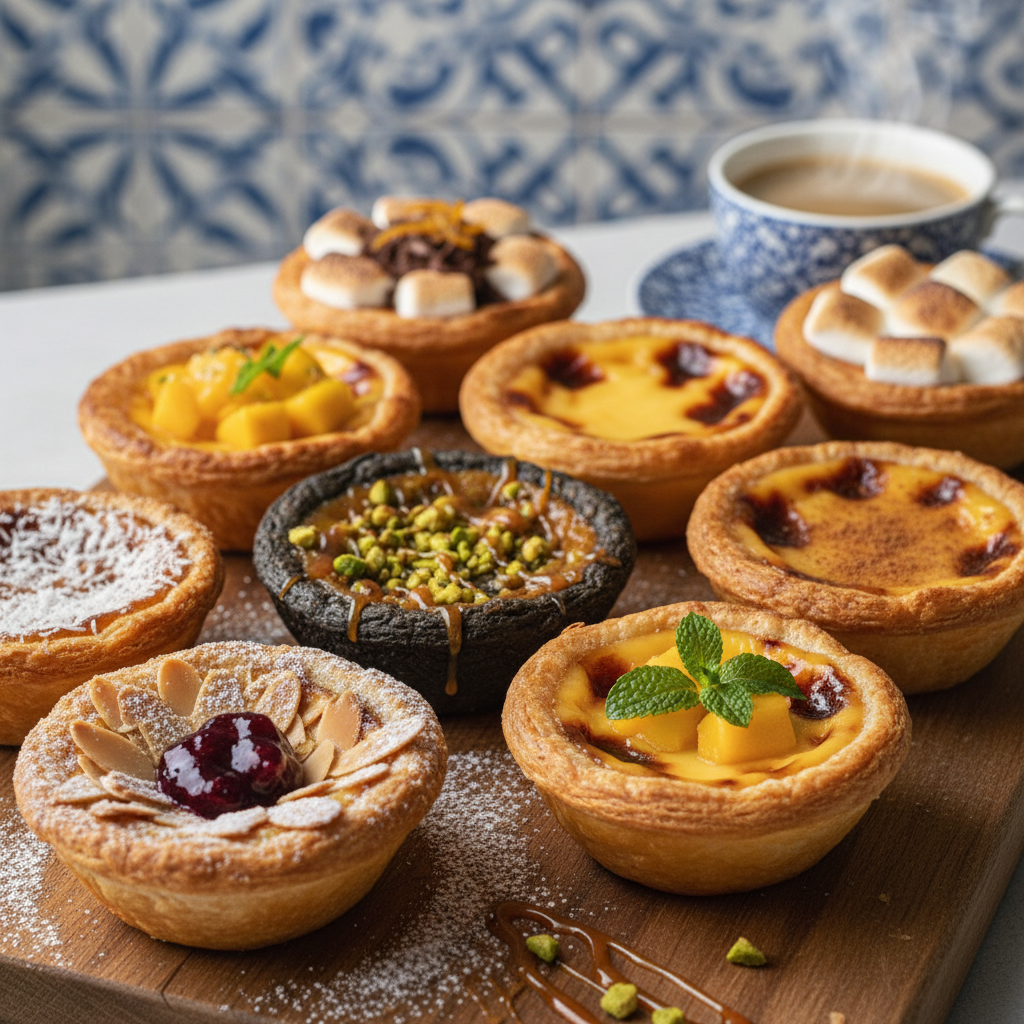
Once you’ve mastered the classic, don’t be afraid to experiment! Here are some ideas to make these tarts your own:
- Citrus Zest Add a pinch of orange or lemon zest to the custard mixture for a brighter flavor.
- Spice It Up A tiny pinch of nutmeg or a dash of ground cardamom can add an interesting twist to the custard.
- Chocolate Drizzle For a decadent treat, drizzle cooled tarts with melted dark chocolate.
- Flaky Shortcut While our recipe uses puff pastry, some traditional recipes use a lard-based dough. If you’re feeling adventurous, you can try making your own laminate dough.
- Individual Tart Molds If you have traditional Pastéis de Nata molds, they work beautifully, often leading to a slightly taller tart.
Pro Chef Tips for Success
Even though this recipe is beginner-friendly, a few professional insights can elevate your tarts:
- High Heat is Key The extremely high oven temperature is crucial for achieving that signature blistered, caramelized top and a super flaky crust. Don’t be afraid to crank up the heat!
- Don’t Overmix the Custard Whisk just enough to combine. Overmixing can incorporate too much air, leading to a less dense, smooth custard.
- Chill Your Pastry Keeping the pastry cold before baking helps maintain its flakiness and prevents it from shrinking too much.
- Temper Slowly When adding hot milk and syrup to the egg yolks, do it slowly and whisk constantly. This prevents the yolks from cooking prematurely.
- Use a Candy Thermometer For the sugar syrup, a candy thermometer ensures you reach the correct temperature, which is important for the custard’s texture.
Common Mistakes to Avoid
Even the best bakers make mistakes, but knowing what to watch out for can save your tarts!
- Soggy Bottom Crust This often happens if the pastry isn’t pressed thinly enough or if the oven isn’t hot enough. Make sure your oven is fully preheated to 500°F (260°C).
- Curdled Custard Overcooking the milk mixture or not tempering the yolks slowly can lead to a lumpy, curdled custard. Strain it if necessary!
- Uneven Baking Ensure your oven rack is in the middle position for even heat distribution. If your oven has hot spots, rotate the tin halfway through baking.
- Overfilling the Tarts Filling them too much can cause the custard to overflow and burn, sticking to the muffin tin.
- Not Cooling Immediately Leaving the tarts in the hot muffin tin can make the bottoms soggy. Remove them promptly.
Storage and Meal Prep

These tarts are best enjoyed fresh and warm, but you can certainly store them:
- Room Temperature They can be left at room temperature for a few hours, covered, but they are best refrigerated for longer storage.
- Refrigeration Store leftover Pastéis de Nata in an airtight container in the refrigerator for up to 2-3 days.
- Reheating To bring back their crispy crust and warm custard, reheat them in a preheated oven at 350°F (175°C) for 5-10 minutes, or until warmed through and the crust is crisp again. Avoid the microwave, as it will make the crust soggy.
Make-Ahead and Freezer Notes
Want to get a head start or save some for later? Here’s how:
- Make-Ahead Custard You can prepare the custard mixture a day in advance and store it in an airtight container in the refrigerator. Whisk it well before filling the tarts.
- Make-Ahead Tart Shells You can press the puff pastry into the muffin tin cups and chill them for a few hours or even overnight, covered.
- Freezing Baked Tarts While best fresh, you can freeze baked Pastéis de Nata. Once completely cooled, place them in a single layer on a baking sheet and freeze until solid. Then transfer them to an airtight freezer-safe container or bag. They can be frozen for up to 1 month.
- Reheating from Frozen Reheat frozen tarts directly from the freezer in a preheated oven at 350°F (175°C) for about 15-20 minutes, or until warmed through and crisp.
Serving Suggestions

Pastéis de Nata are incredibly versatile and delicious on their own, but here are some delightful ways to serve them:
- Classic with Coffee The most traditional way to enjoy them in Portugal is alongside a strong espresso or a milky “galão.”
- Dust with Cinnamon A light dusting of ground cinnamon on top just before serving adds an extra layer of warmth and flavor.
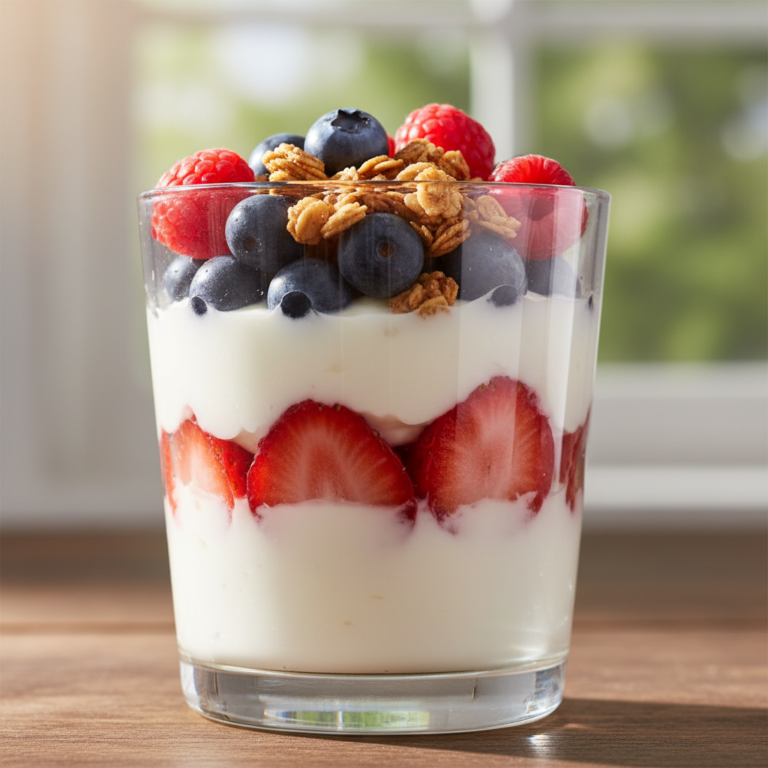
- Fresh Berries A side of fresh berries, like raspberries or blueberries, provides a lovely tart contrast to the sweet custard.
- Afternoon Tea They make an elegant addition to any afternoon tea spread.
- Dessert Delight Serve them as a light yet satisfying dessert after any meal.