Introduction
Let me tell you about one of my absolute favorite desserts – no bake cheesecake. If you’ve ever been intimidated by traditional baked cheesecake with its water baths, precise temperatures, and potential for cracks, this recipe is about to change your life! No bake cheesecake delivers all that creamy, dreamy cheesecake flavor and texture you crave, but without any of the stress or fuss.
I still remember the first time I made this recipe. I was hosting a dinner party and realized at noon that I’d completely forgotten about dessert. Panic mode! But then I remembered this no bake cheesecake that my aunt used to make. I whipped it together in about 20 minutes, popped it in the fridge, and by dinner time, I had the most elegant, restaurant-worthy dessert sitting on my table. My guests couldn’t believe I’d made it that same day!
The beauty of no bake cheesecake is that it’s incredibly forgiving. There’s no worry about overbaking, cracking, or sinking middles. You simply mix, chill, and serve. The texture is lighter and airier than traditional baked cheesecake, with a mousse-like quality that just melts in your mouth. Plus, you can make it days ahead, which makes it perfect for parties, holidays, or whenever you want an impressive dessert without spending hours in the kitchen.
Whether you’re a complete beginner or an experienced baker looking for an easier option, this no bake cheesecake is about to become your go-to recipe. Let’s dive in and create some magic!
History / Background
Cheesecake has an incredibly long history dating back to ancient Greece, where it was served to athletes during the first Olympic games in 776 BC. The Romans later spread cheesecake recipes throughout Europe. However, the cheesecake we know and love today really came into its own in America.
Traditional baked cheesecake became hugely popular in New York in the early 1900s, especially after cream cheese was invented in 1872. The iconic New York-style cheesecake – dense, rich, and baked – became the gold standard. But not everyone had the time, patience, or skills to master the perfect baked cheesecake.
No bake cheesecake emerged as a solution in the mid-20th century, gaining massive popularity in the 1960s and 1970s. Home cooks loved that they could create an elegant dessert without turning on their ovens, especially during hot summer months. The invention of stabilized whipped cream and cream cheese that could be easily whipped made no bake versions even more accessible.
Kraft Foods helped popularize no bake cheesecake through their Philadelphia cream cheese brand, printing recipes on packages and in magazines. The dessert became a staple at potlucks, family gatherings, and dinner parties throughout America.
Today, no bake cheesecake remains beloved because it delivers that signature tangy, creamy cheesecake flavor with a lighter, fluffier texture. It’s easier to make, more forgiving for beginners, and requires no special equipment or techniques. Plus, it’s perfect for hot weather when you don’t want to heat up your kitchen!
Why You’ll Love This Recipe
- No oven required – Perfect for summer or when your oven is occupied with other dishes
- Beginner-friendly – If you can use a mixer and fold ingredients, you can make this
- Quick prep – Just 20 minutes of hands-on time, then the fridge does all the work
- No cracking worries – Unlike baked cheesecake, there’s nothing to crack or sink
- Lighter texture – Airy and mousse-like, not as dense as traditional cheesecake
- Make-ahead perfection – Actually tastes better the next day, ideal for party planning
- Customizable – Easy to add your favorite flavors and toppings
- Impressive presentation – Looks like you spent hours making it
- Budget-friendly – Uses simple, affordable ingredients you might already have
- No water bath needed – Skip the complicated baking techniques entirely
- Feeds a crowd – One cheesecake serves 10-12 people easily
- Kid-approved – The creamy, sweet flavor appeals to everyone
- Foolproof results – Hard to mess up, even for first-timers
Ingredient Notes
Cream cheese (24 oz / 3 packages) – This is your base ingredient, so quality matters! Use full-fat cream cheese (not low-fat or fat-free) for the best texture and flavor. Make sure it’s softened to room temperature – this is crucial! Cold cream cheese won’t blend smoothly and will leave lumps in your cheesecake. Leave it out on the counter for about 1-2 hours before starting, or microwave in 10-second bursts if you’re in a hurry.
Heavy whipping cream (1 1/2 cups) – This creates that light, airy texture that makes no bake cheesecake special. Make sure it’s very cold straight from the fridge – cold cream whips better and holds its shape. Don’t substitute with half-and-half or milk; you need the fat content of heavy cream for proper whipping.
Powdered sugar (1 cup) – Also called confectioner’s sugar or icing sugar. It dissolves much more easily than granulated sugar, creating a smooth texture. Powdered sugar also contains a bit of cornstarch, which helps stabilize the whipped cream. Don’t substitute with regular sugar – it won’t dissolve properly and will feel grainy.
Vanilla extract (2 teaspoons) – Pure vanilla extract tastes significantly better than imitation vanilla. It enhances all the other flavors and adds depth. If you want to splurge, vanilla bean paste is even more amazing!
Sour cream (1/2 cup) – Adds that signature tangy flavor that makes cheesecake taste like cheesecake! It also contributes to the creamy texture. You can substitute with Greek yogurt if needed, though sour cream is traditional and tastes best.
Lemon juice (1 tablespoon) – Just a touch of acidity brightens all the flavors and balances the sweetness. Freshly squeezed is best, but bottled lemon juice works too.
Graham cracker crumbs (2 cups) – You can buy pre-crushed crumbs or crush whole graham crackers yourself in a food processor or zip-top bag with a rolling pin. Crushing your own often tastes fresher! You can also use digestive biscuits, vanilla wafers, or Oreos for a different twist.
Melted butter (6 tablespoons) – Holds the crust together. Use real butter, not margarine – the flavor is so much better. Make sure it’s fully melted and slightly cooled before mixing with the crumbs.
Sugar for crust (2 tablespoons) – Adds a touch of sweetness to the crust. Some people skip this, but I think it makes the crust taste more complete.
Salt (tiny pinch) – Just a pinch in both the crust and filling enhances all the other flavors. Don’t skip it!
Equipment Needed
9-inch springform pan – This is really important! A springform pan has removable sides, which makes it super easy to remove your cheesecake without damaging it. If you don’t have one, you can use a regular 9-inch pie pan, but you’ll need to serve slices directly from the pan rather than removing the whole cheesecake.
Electric mixer – A hand mixer or stand mixer makes whipping the cream and beating the cream cheese much easier. You can technically do it by hand with a whisk, but it’ll take a lot of arm power and time!
Large mixing bowls (2-3) – You’ll need separate bowls for whipping cream, mixing the filling, and preparing the crust. Having enough bowls prevents you from having to wash and reuse them.
Rubber spatula – Essential for folding the whipped cream into the cream cheese mixture gently. A spatula also helps you scrape down the sides of bowls to ensure everything is fully mixed.
Measuring cups and spoons – Accurate measurements are important for the right texture and sweetness.
Food processor or rolling pin – For crushing graham crackers if you’re making your own crumbs. A food processor is faster, but a rolling pin and zip-top bag works great too!
Mixing bowl for crust – A medium bowl for combining the crust ingredients.
Plastic wrap or aluminum foil – To cover the cheesecake while it chills. This prevents it from absorbing odors from the fridge.
Offset spatula or butter knife – For smoothing the top of your cheesecake to make it look professional.
Refrigerator space – Make sure you have enough room in your fridge for a 9-inch pan to sit flat for at least 4 hours (preferably overnight).
Full Recipe Card
Dreamiest No Bake Cheesecake
Prep Time: 20 minutes | Chill Time: 4-6 hours (or overnight) | Total Time: 4-6 hours | Servings: 10-12
Ingredients
For the crust:
- 2 cups graham cracker crumbs (about 14-16 full crackers)
- 6 tablespoons unsalted butter, melted
- 2 tablespoons granulated sugar
- Tiny pinch of salt
For the filling:
- 24 oz cream cheese (three 8-oz packages), softened to room temperature
- 1 cup powdered sugar
- 2 teaspoons pure vanilla extract
- 1 tablespoon fresh lemon juice
- 1/2 cup sour cream
- Tiny pinch of salt
- 1 1/2 cups cold heavy whipping cream
For topping (optional):
- Fresh berries (strawberries, blueberries, raspberries)
- Whipped cream
- Chocolate shavings
- Caramel or chocolate sauce
- Fruit compote
Instructions
Step 1: Prepare your springform pan
First, make sure your 9-inch springform pan is clean and dry. You can line the bottom with parchment paper if you want extra insurance for easy removal, but it’s not absolutely necessary. Set the pan aside while you make the crust.
Step 2: Make the crust
In a medium bowl, combine the graham cracker crumbs, melted butter, sugar, and pinch of salt. Stir with a fork until the mixture looks like wet sand and holds together when you squeeze it. Every crumb should be coated with butter.
Pour the mixture into your springform pan. Use the bottom of a measuring cup or glass to press the crumbs firmly and evenly into the bottom of the pan. Press hard – you want a compact crust that won’t crumble when you cut slices! You can also press the crumbs about 1 inch up the sides if you like a crust edge, though just a bottom crust works perfectly too.
Place the pan in the refrigerator while you make the filling. Chilling the crust for at least 10 minutes helps it firm up.
Step 3: Beat the cream cheese mixture
In a large bowl, beat the softened cream cheese with an electric mixer on medium speed for about 2-3 minutes until it’s completely smooth and fluffy. Make sure there are no lumps! Scrape down the sides of the bowl with a rubber spatula.
Add the powdered sugar, vanilla extract, lemon juice, sour cream, and pinch of salt. Beat again on medium speed for another 2-3 minutes until everything is fully combined and the mixture is light and creamy. Scrape down the sides again to make sure everything is incorporated. Set this bowl aside.
Step 4: Whip the cream
In a separate large, clean bowl, pour the cold heavy whipping cream. Using clean beaters (this is important!), beat the cream on medium-high speed. Start on low to prevent splattering, then increase the speed.
Watch it closely! The cream will go through several stages: foamy, soft peaks, then stiff peaks. You want stiff peaks, which means when you lift the beaters, the cream stands up straight and holds its shape. This usually takes about 3-4 minutes. Be careful not to overbeat, or you’ll end up with butter!
Step 5: Fold everything together
Here’s the important part: you want to fold, not stir! Add about one-third of the whipped cream to the cream cheese mixture. Use a rubber spatula and gently fold it in using a motion like you’re scooping from the bottom and bringing it over the top. This lightens the cream cheese mixture.
Add the remaining whipped cream and continue folding gently until no white streaks remain. The mixture should be light, fluffy, and uniform in color. Be patient and gentle here – aggressive stirring will deflate all that lovely air you just whipped in!
Step 6: Fill the pan
Remove your crust from the refrigerator. Pour the cheesecake filling over the crust. Use an offset spatula or the back of a spoon to smooth the top into an even layer. Give the pan a gentle tap on the counter to release any air bubbles.
Step 7: Chill thoroughly
Cover the cheesecake with plastic wrap or aluminum foil. Make sure the covering doesn’t touch the surface of the cheesecake, or it might stick. Place it in the refrigerator on a flat shelf.
Now comes the hard part – waiting! The cheesecake needs to chill for at least 4-6 hours, but overnight is even better. This allows the filling to set properly and the flavors to develop. Trust me, it’s worth the wait!
Step 8: Remove and serve
When you’re ready to serve, remove the cheesecake from the fridge. Run a thin knife around the edge of the pan to loosen any spots that might be sticking. Unclasp the springform pan and gently lift off the sides.
Add your toppings now if you’re using any. Slice with a sharp knife, wiping the blade clean between each slice for neat, pretty slices.
Serve chilled and watch everyone’s eyes light up!
Recipe Notes
- Room temperature cream cheese is key: This cannot be stressed enough! Cold cream cheese will create lumps that are nearly impossible to smooth out.
- Don’t skip the chilling time: The cheesecake needs at least 4 hours to set properly. Cutting into it too early will result in a runny mess.
- Whip the cream properly: Underwhipped cream won’t provide enough structure. Overwhipped cream will make your cheesecake grainy.
- Fold gently: Aggressive mixing deflates the whipped cream and makes your cheesecake dense instead of light.
- Use full-fat ingredients: Low-fat or fat-free products won’t set properly and won’t taste as good.
- Clean knife for neat slices: Wipe your knife with a damp cloth between each cut for the prettiest slices.
Tips & Variations
Flavor variations to try: Transform this basic recipe into something exciting! For chocolate cheesecake, add 1/2 cup melted and cooled chocolate to the cream cheese mixture. For lemon cheesecake, increase lemon juice to 3 tablespoons and add 2 teaspoons of lemon zest. Strawberry cheesecake is amazing – fold in 1 cup of pureed strawberries. Coffee cheesecake needs just 2 tablespoons of instant espresso powder dissolved in a tiny bit of hot water.
Different crust options: Swap graham crackers for Oreo cookies (remove the filling or leave it in – both work!), vanilla wafers, gingersnaps for a spicy kick, or even pretzels for a sweet-salty combo. You can also use chocolate graham crackers for a chocolate crust.
Layered cheesecake: Make half the filling plain and half chocolate, vanilla, or fruit-flavored. Layer them in the pan for a stunning two-toned effect.
Individual servings: Instead of one large cheesecake, make individual servings in small jars, cups, or a muffin tin lined with cupcake liners. Reduce chill time to 2-3 hours for smaller portions.
Swirl effect: Add fruit puree or melted chocolate to the filling, then use a knife to swirl it through for a marbled effect. Don’t overmix – you want distinct swirls!
Gelatin for extra stability: If you live in a warm climate or want a firmer cheesecake, add 1 teaspoon of unflavored gelatin dissolved in 2 tablespoons of hot water to the cream cheese mixture. This helps it hold its shape better.
Different sweetness levels: Prefer less sweet? Reduce powdered sugar to 3/4 cup. Want it sweeter? Increase to 1 1/4 cups.
Add-ins: Fold in mini chocolate chips, crushed candy bars, or chopped fruit just before pouring into the pan.
Pro Chef Tips
The room temperature trick: Forgot to take your cream cheese out early? Cut it into small cubes and let it sit for 20-30 minutes. Small pieces warm up faster! Or place unopened packages in a bowl of warm (not hot) water for 10 minutes.
Stabilizing whipped cream: For extra stability, add 2 tablespoons of powdered sugar or 1/2 teaspoon of unflavored gelatin to your whipping cream. This helps it hold its shape longer, especially important if you’re making the cheesecake a few days ahead.
Perfect smooth filling: Professional bakers beat cream cheese alone first before adding anything else. This ensures no lumps! Scrape the bowl frequently – ingredients love to hide on the sides and bottom.
Testing whipped cream: The perfect stage is when you lift the beaters and the peaks stand straight up but the very tips curl over just slightly. If peaks fall over completely, keep beating. If they’re super stiff and grainy-looking, you’ve gone too far.
Preventing crust crumbles: Press your crust firmly! Use the flat bottom of a measuring cup and really compress those crumbs. A loose crust will fall apart when you slice the cheesecake.
Freezing for easier slicing: For the neatest slices, freeze the cheesecake for 30 minutes before cutting. The firmer texture makes cleaner cuts. Then let slices sit at room temperature for 5 minutes before serving.
The water bath trick for crust: For an extra-firm crust, bake it empty at 350°F for 10 minutes before adding filling. Let it cool completely first. This is optional but makes the crust more cookie-like.
Professional smoothing: Use an offset spatula dipped in hot water to smooth the top. Wipe it clean, dip in hot water again, and sweep across the surface. This creates a perfectly smooth, professional finish.
Topping timing: Add fresh fruit and other toppings just before serving, not hours ahead. This prevents moisture from the toppings from making the cheesecake soggy.
Common Mistakes to Avoid
Using cold cream cheese: This is the number one mistake! Cold cream cheese creates lumps that are almost impossible to smooth out. Even if you blend forever, you’ll still have little bits of unmixed cream cheese. Always use room temperature cream cheese – it should be soft enough to press your finger into easily.
Overbeating after adding whipped cream: Once you add the whipped cream to the cream cheese mixture, you must fold gently. Aggressive mixing or using the electric mixer at this stage will deflate all the air and make your cheesecake dense and heavy instead of light and fluffy.
Not chilling long enough: I know it’s tempting to cut into your beautiful creation early, but patience is essential! If the cheesecake hasn’t chilled for at least 4 hours, it will be too soft and won’t slice cleanly. It might even ooze out when you release the springform pan. Give it the full time to set properly.
Loose crust: If you don’t press the crust firmly enough, it will crumble when you try to slice the cheesecake. Use real pressure with the bottom of a glass to compact those crumbs. The crust should feel solid when you touch it.
Wrong consistency whipped cream: Underwhipped cream won’t provide enough structure, and your cheesecake might not set properly. Overwhipped cream (which starts to look grainy and separated) will make your filling grainy and might even cause it to weep liquid. Stop right when you reach stiff peaks.
Using low-fat products: Low-fat cream cheese, light whipping cream, or fat-free sour cream won’t set properly and won’t taste nearly as good. The fat content is what makes cheesecake creamy and delicious. This is not the recipe for substitutions!
Cutting with a dirty knife: If you don’t wipe your knife between cuts, each slice will look messier than the last. Keep a tall glass of hot water and a towel nearby. Dip the knife in hot water, wipe it clean, then make your cut. Repeat for each slice.
Not greasing the pan: Even though you’re using a springform pan, a light coating of cooking spray or butter on the sides helps the cheesecake release cleanly.
Storing uncovered: Cheesecake absorbs odors from the refrigerator easily. Always keep it covered with plastic wrap or in an airtight container.
Storage & Meal Prep
Refrigerator storage: No bake cheesecake keeps beautifully in the refrigerator for up to 5 days. Keep it in the springform pan with the sides still attached, or transfer to an airtight container. Cover the surface with plastic wrap to prevent it from absorbing fridge odors and to keep it from drying out. The cheesecake actually tastes even better on day 2 and 3 as the flavors meld together!
Storing sliced cheesecake: If you’ve already cut slices, place them in an airtight container with parchment paper between layers so they don’t stick together. They’ll keep for 3-4 days this way.
Making ahead for parties: This is one of the best make-ahead desserts! You can make it up to 3 days before you need it. In fact, I recommend making it at least 1 day ahead. The texture improves as it chills, and you’ll have one less thing to worry about on party day. Just add toppings right before serving.
Crust preparation: You can make the crust up to 2 days ahead. Press it into the pan, cover tightly, and refrigerate. Fill it when you’re ready to make the filling.
Cream cheese preparation: You can make the cream cheese mixture (without the whipped cream) a day ahead. Cover it tightly and refrigerate. When ready to finish, let it sit at room temperature for 20 minutes to soften, then whip your cream and fold it in as directed.
Bringing to room temperature: While cheesecake should be served cold, letting it sit at room temperature for 10-15 minutes before serving enhances the flavor and makes it creamier. Don’t leave it out longer than 30 minutes, though.
Transporting tips: If you need to bring your cheesecake somewhere, keep it in the springform pan with sides attached for stability. Place it on a flat surface in your car, and keep it cool with ice packs if it’s warm outside. If possible, transport it in a cooler.
Make-Ahead & Freezer Notes
Freezing the whole cheesecake: Great news – no bake cheesecake freezes beautifully! After it’s fully set, cover it tightly with plastic wrap, then wrap again with aluminum foil. Freeze for up to 2 months. To thaw, transfer to the refrigerator and let it thaw slowly overnight (about 12 hours). Never thaw at room temperature, as this can cause condensation and affect the texture.
Freezing individual slices: Cut your cheesecake into slices and wrap each piece individually in plastic wrap, then place in a freezer bag. This is perfect for portion control! Thaw individual slices in the fridge for 3-4 hours, or at room temperature for 30-45 minutes.
Freezing before or after toppings: Freeze the plain cheesecake without toppings. Add fresh fruit, whipped cream, or sauces after thawing for the best appearance and texture.
Flash freezing technique: For the neatest slices, place the unwrapped cheesecake in the freezer for 30 minutes until firm. This is called flash freezing. Then slice it while frozen (it cuts like butter!), wrap pieces individually, and return to the freezer. This method gives you the cleanest, prettiest slices.
Making the crust ahead: The crust can be made up to 2 months ahead and frozen separately. Press it into your pan, wrap tightly, and freeze. When ready to use, fill it while frozen – no need to thaw.
Planning for holidays: During busy holiday seasons, make your cheesecakes weeks ahead and freeze them. Pull them out of the freezer the day before you need them and let them thaw in the fridge overnight. This is such a stress-saver!
Preventing freezer burn: Double wrap everything! Air is the enemy of frozen food. First wrap tightly with plastic wrap, making sure every surface is covered, then wrap again with foil. For extra protection, place in a freezer-safe zip-top bag with as much air pressed out as possible.
Quality after freezing: Honestly, the texture is almost identical to fresh once properly thawed. The biggest difference is that toppings like fresh fruit don’t freeze well, so always add those after thawing.
Serving Suggestions
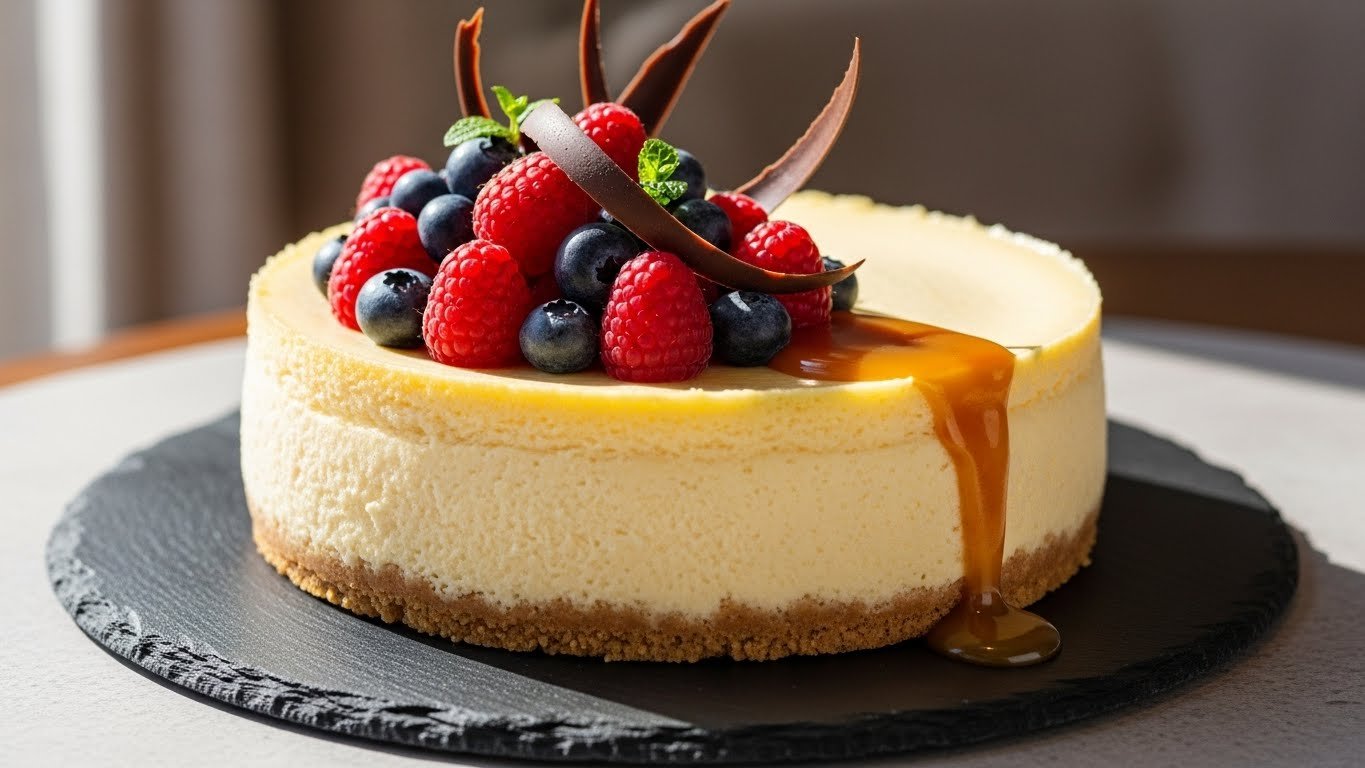
Classic berry topping: This is my go-to! Arrange fresh strawberries, blueberries, and raspberries on top in a beautiful pattern. For extra elegance, brush the berries with a simple glaze made from 2 tablespoons of warmed fruit jam mixed with 1 tablespoon of water.
Chocolate lovers: Drizzle with chocolate ganache (equal parts chocolate and heavy cream, melted together), top with chocolate shavings, or press mini chocolate chips into the sides. A sprinkle of cocoa powder over the top looks sophisticated too.
Caramel drizzle: Homemade or store-bought salted caramel sauce is incredible on cheesecake. Drizzle it over the top in a decorative pattern. Add a sprinkle of sea salt flakes for the ultimate sweet-salty combination.
Fruit compote: Make a quick berry compote by simmering frozen berries with sugar and lemon juice until thick. Cool completely, then spoon over slices. Cherry or blueberry pie filling works great too for a super easy option.
Cookie crumb sides: After removing the springform pan, press crushed cookies, graham cracker crumbs, or toasted nuts into the sides for a bakery-style finish. This also covers up any imperfections!
Whipped cream rosettes: Pipe whipped cream rosettes around the edge and place a fresh berry in each one. This looks incredibly elegant but takes just minutes.
Coffee pairing: Serve with freshly brewed coffee, cappuccino, or espresso. The slight bitterness of coffee complements the sweet, creamy cheesecake perfectly.
Wine pairing: Dessert wines like Moscato d’Asti, late-harvest Riesling, or Port pair beautifully. For non-alcoholic options, try sparkling white grape juice or berry iced tea.
Seasonal decorations: Top with candy canes and crushed peppermint for Christmas, candy corn for Halloween, or colored sprinkles for birthdays. Adapt it to any occasion!
Sauce on the side: Instead of topping the whole cheesecake, serve slices with small pitchers of raspberry sauce, chocolate sauce, or caramel on the side so guests can add their own.
Ice cream pairing: A small scoop of complementary ice cream alongside the cheesecake is decadent but delicious. Try vanilla bean, strawberry, or even coffee ice cream.
Savory-sweet combo: This might sound weird, but a tiny drizzle of good quality honey and a sprinkle of fresh thyme makes a sophisticated, unexpected topping that’s popular in upscale restaurants.
FAQs
Why is my no bake cheesecake not setting?
The most common reasons are: not chilling long enough (give it the full 4-6 hours or overnight), using low-fat ingredients (always use full-fat cream cheese and heavy cream), or underwhipped cream that didn’t have enough structure. Make sure your whipped cream reached stiff peaks before folding. If it’s been 6+ hours and still not set, you may need to freeze it for a couple hours to firm it up.
Can I make this without a springform pan?
Yes! You can use a regular 9-inch pie pan or even an 8×8 square pan. The challenge is removing and serving – you’ll need to serve slices directly from the pan rather than removing the whole cheesecake. For an easier alternative, line a regular pan with parchment paper with long overhangs so you can lift the whole thing out. Individual servings in jars or cups also work beautifully!
My cheesecake has a grainy texture. What happened?
Graininess usually comes from overwhipped cream that started to separate, or from not beating the cream cheese enough at the beginning. Make sure to beat the cream cheese until completely smooth before adding other ingredients. When whipping cream, stop as soon as you reach stiff peaks – going too far makes it grainy.
Can I use Cool Whip instead of whipping heavy cream?
You can, though the texture and flavor won’t be quite as good. If using Cool Whip, use 3 cups of thawed whipped topping in place of the whipped heavy cream. Fold it into the cream cheese mixture just as you would homemade whipped cream. The cheesecake might be slightly less stable.
How do I prevent the crust from being too hard?
Make sure you’re using the right ratio of butter to crumbs – too much butter makes it soggy, too little makes it hard. The mixture should look like wet sand. Also, don’t bake the crust unless you want it extra crispy. A no-bake crust stays softer and more tender.
Can I use Greek yogurt instead of sour cream?
Yes! Plain, full-fat Greek yogurt is a great substitute. It provides the same tangy flavor and creamy texture. Use the exact same amount as the sour cream.
My cheesecake is too sweet. What can I do?
For next time, reduce the powdered sugar to 3/4 cup. The tanginess from the cream cheese and sour cream will come through more. You can also increase the lemon juice to 2 tablespoons for more tang. If you’ve already made it too sweet, serve it with tart fresh berries or a sour fruit compote to balance the sweetness.
Why did my cheesecake crack?
Good news – no bake cheesecakes don’t usually crack! If you see cracks, it’s likely from being too cold (frozen spots expanding) or from rough handling. Unlike baked cheesecake, these minor surface cracks are easy to hide under toppings, so don’t worry about them.
How long can cheesecake sit out at room temperature?
No bake cheesecake should not sit at room temperature for more than 2 hours due to food safety concerns with dairy products. If you’re serving it at a party, keep it refrigerated until right before serving, or set it over a bowl of ice to keep it cold.
Can I make this dairy-free or vegan?
It’s challenging but possible! Use vegan cream cheese, coconut cream (the thick part from a can of coconut milk, whipped), and coconut yogurt. The texture won’t be exactly the same, but it can still be delicious. Make sure to use full-fat vegan products.
My springform pan leaked. How do I prevent this?
Springform pans sometimes leak, especially if the filling is thin. To prevent this, wrap the outside bottom of the pan with aluminum foil before adding the crust. This catches any drips. You can also place the springform pan on a baking sheet for extra protection.
Conclusion
Congratulations! You now have all the secrets to making the dreamiest, creamiest no bake cheesecake. I’m so excited for you to try this recipe and experience how incredibly easy it is to create such an impressive dessert.
The beauty of this recipe is that it looks and tastes like you spent hours in the kitchen, but we both know your secret – it only took 20 minutes of actual work! The refrigerator does all the heavy lifting while you relax or prepare other dishes. It’s the perfect dessert for busy people who still want to serve something special.
I love that this cheesecake is so forgiving and adaptable. Don’t be afraid to make it your own with different crusts, flavors, and toppings. Some of my favorite dessert memories come from experimenting with classic recipes and discovering new favorite combinations. Maybe you’ll create the next amazing flavor that becomes your signature dessert!
Remember, the keys to success are: room temperature cream cheese (seriously, don’t skip this!), properly whipped cream to stiff peaks, gentle folding to keep it light and airy, and patience during the chilling time. Follow these guidelines, and you’ll have perfect results every single time.
This recipe is wonderful for so many occasions – birthdays, holidays, dinner parties, potlucks, or simple Tuesday nights when you want something special. It’s fancy enough for celebrations but easy enough for regular days. And the make-ahead friendly nature means you can have impressive dessert ready anytime with minimal stress.
So grab that cream cheese, get out your mixer, and prepare to wow everyone (including yourself!) with your amazing no bake cheesecake. Your